If you want to Migrate WordPress Website Manually via cPanel then this article is for you. In this article, I have shared the full procedure of migration with the help of screenshots. So stick to the end of the page if you also want to migrate your WordPress site to another host with the same domain or different domain without loosing google ranking and traffic.
Benefits Of Migrating Website Via This Procedure
- Fast
- Easy
- No Traffic Lose
- No Plugin Required
- No Effect On Google Ranking (It depends on the speed of the host)
Things To Do Before Migration
- Get a Web Hosting (Namecheap/GreenGeeks/Bluehost)
- Disable/Delete Cache Plugins (Also Check If There Is Any Cache Rule In Cloudflare)
- Make Sure Your Site Is Live
- Clear Browser Cache
- PHP Version of Both Server Must Be Same
- You Must Be Having Access To cPanel, File Manager, and Database
- Follow These Steps Properly
1. Backup WordPress Website
Step1: Login to cPanel (In which your site is hosted) > Tap on File Manager

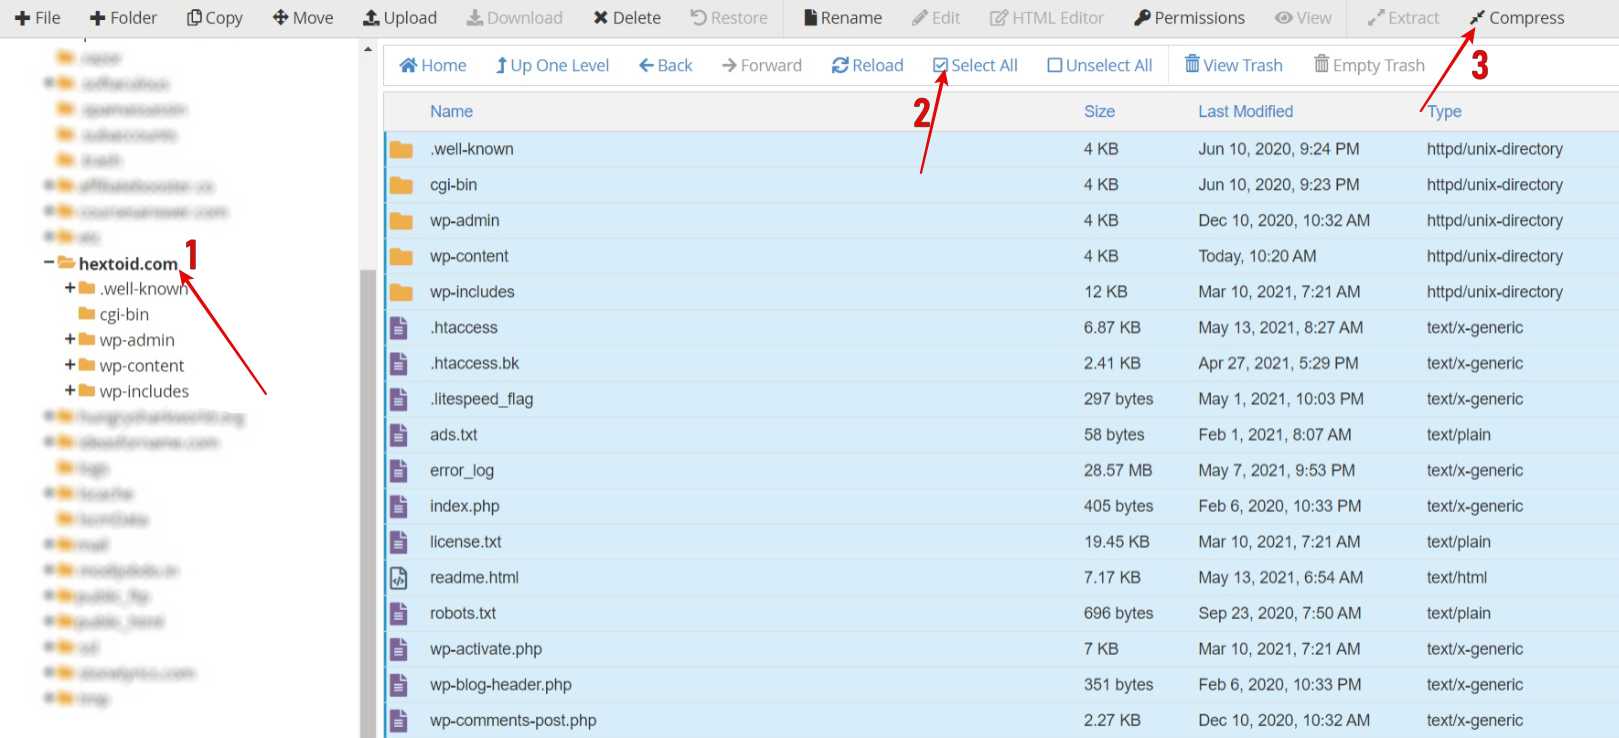
Step 2: Open the domain folder if multiple sites are hosted (main domain will be available in public_html) > Select All > Compress

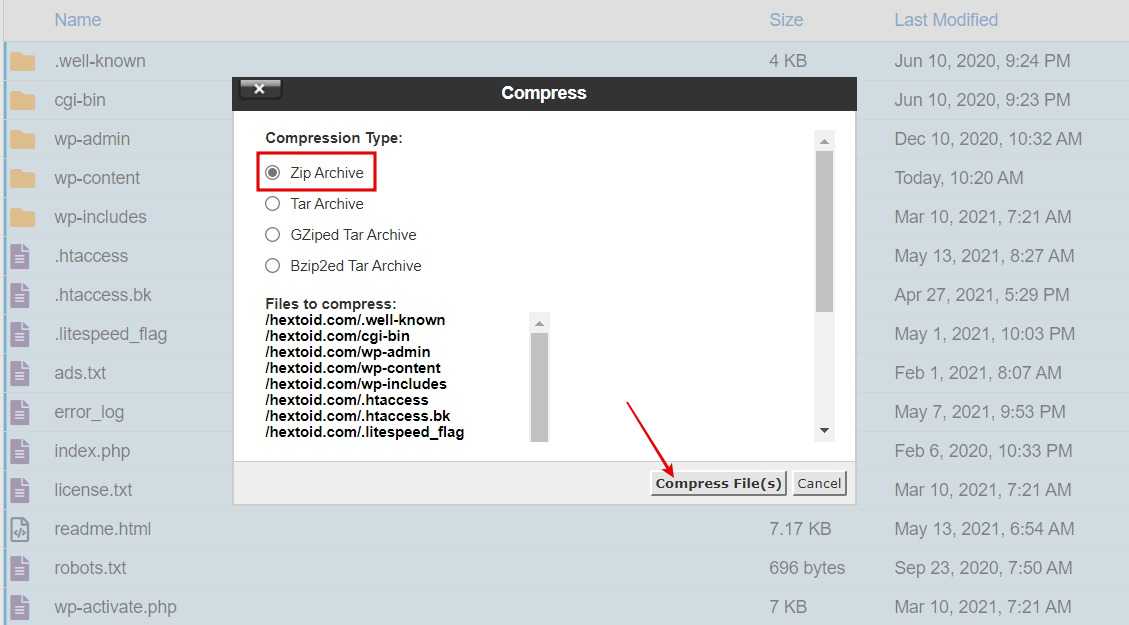
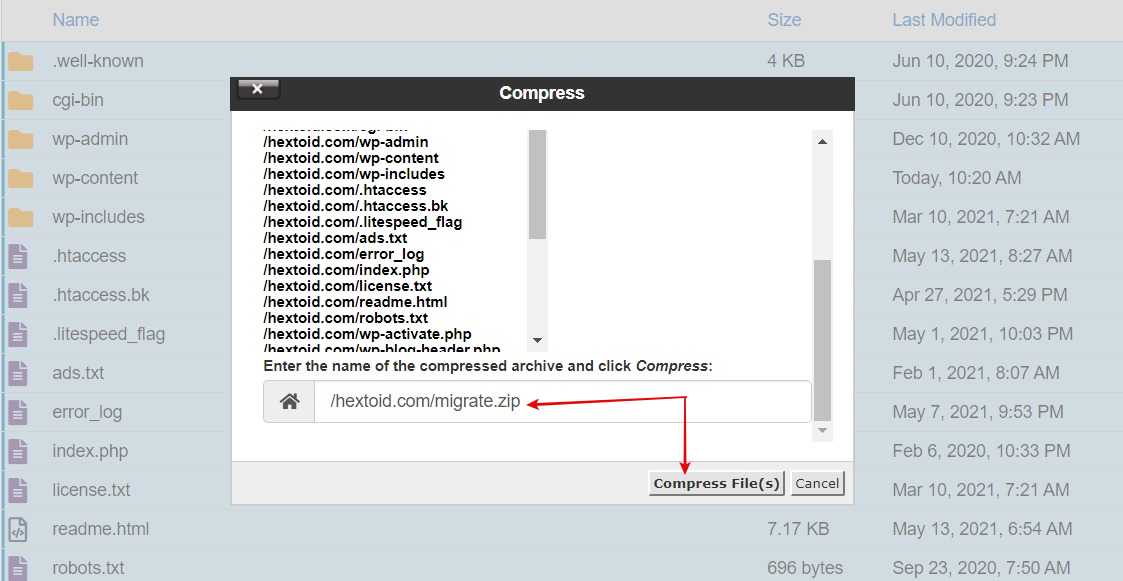
Step 3: Choose Zip Archieve > Rename with extension .zip > Compress File(s) > Close (On success page)


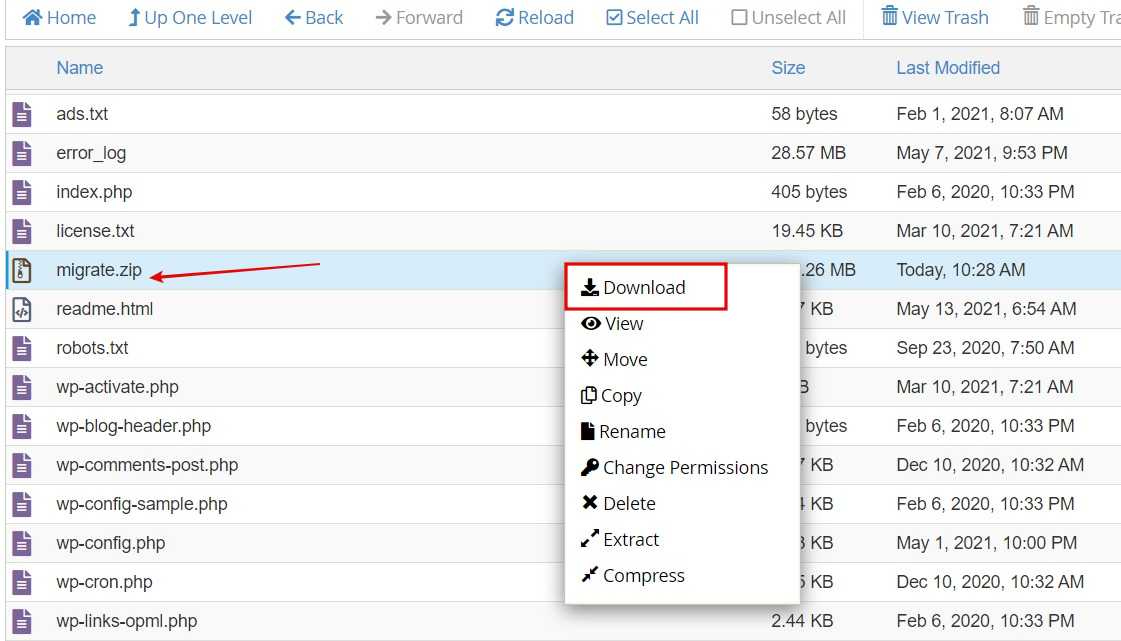
Step 4: Right-click & Download the .zip file

We have got the backup of files, now it’s time to take the backup of the database.
Note: For faster download type, https://domain.com/filename.zip in address bar (ex: https://hextoid.com/migrate.zip).
2. Backup Database
Step 5: Navigate to the domain folder in file manager > Find wp-config.php file > Right-click & edit


Step 6: Note down DB_NAME Which is selected in the below screenshot


Step 7: Go to phpMyAdmin


Step 8: Click on the DB_NAME that you copied > Export > Go


We have also got the backup of the database, now it’s time to point the domain to the new server (on which you want to migrate).
Close All the windows of old hosting.
3. Point Domain Name To New Server
Step 9: Log in to your new cPanel (On which you want to migrate) > Copy the Shared IP Address


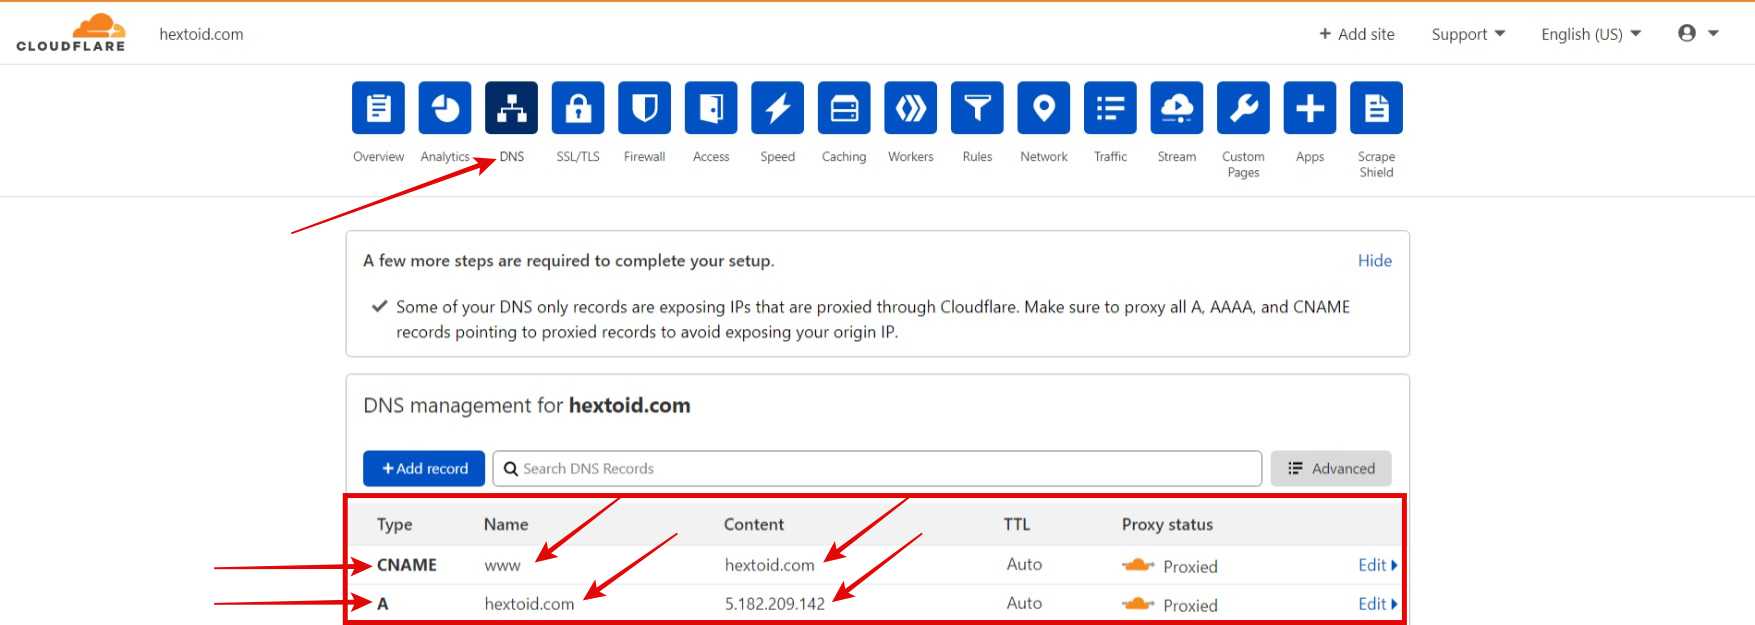
Step 10: Go to DNS section of the domain > Add CNAME & A Record (value and domain name will be different in your case)
| Type | Name | Content |
|---|---|---|
| CNAME | www | hextoid.com |
| A | hextoid.com | 5.182.209.142 |

4. Add Domain To New Hosting
Step 11: Go to cPanel > Addon Domains


Step 12: Enter domain name > Click Add Domain


5. Upload Backup .zip File To New Server
Step 13: Login to cPanel > Tap on File Manager


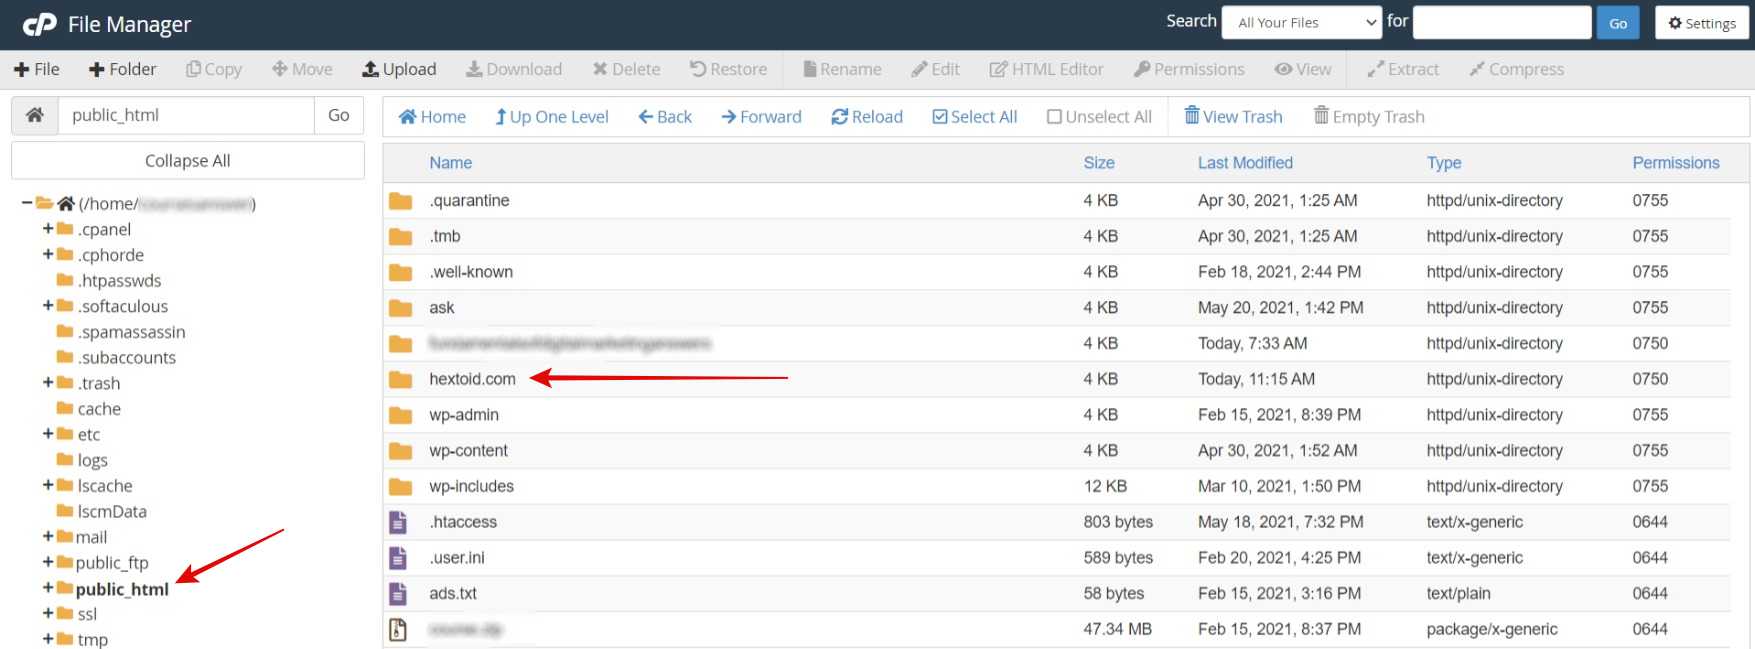
Step 14: Open the domain folder if multiple sites are hosted (main domain will be available in public_html) > Upload

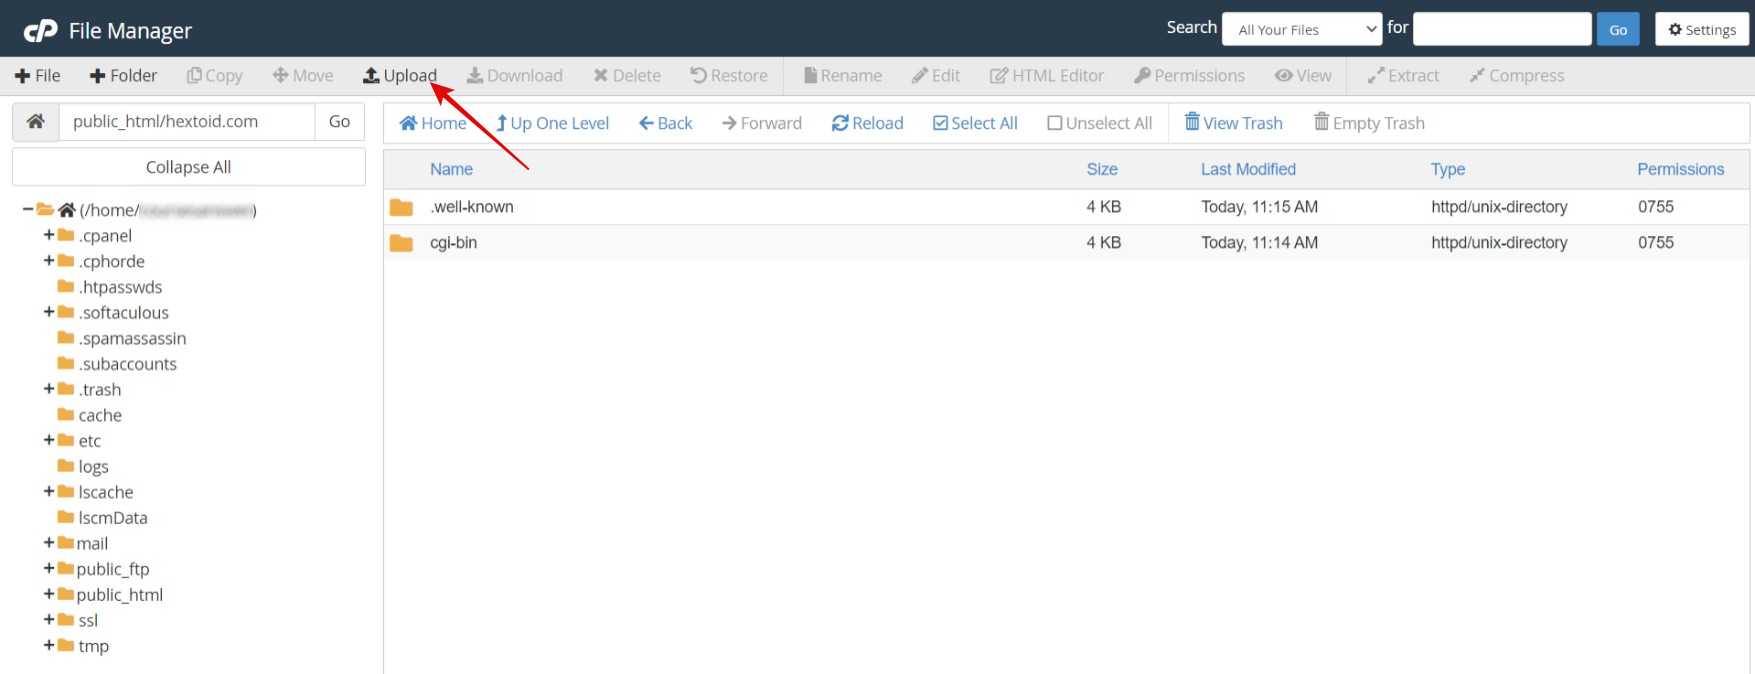

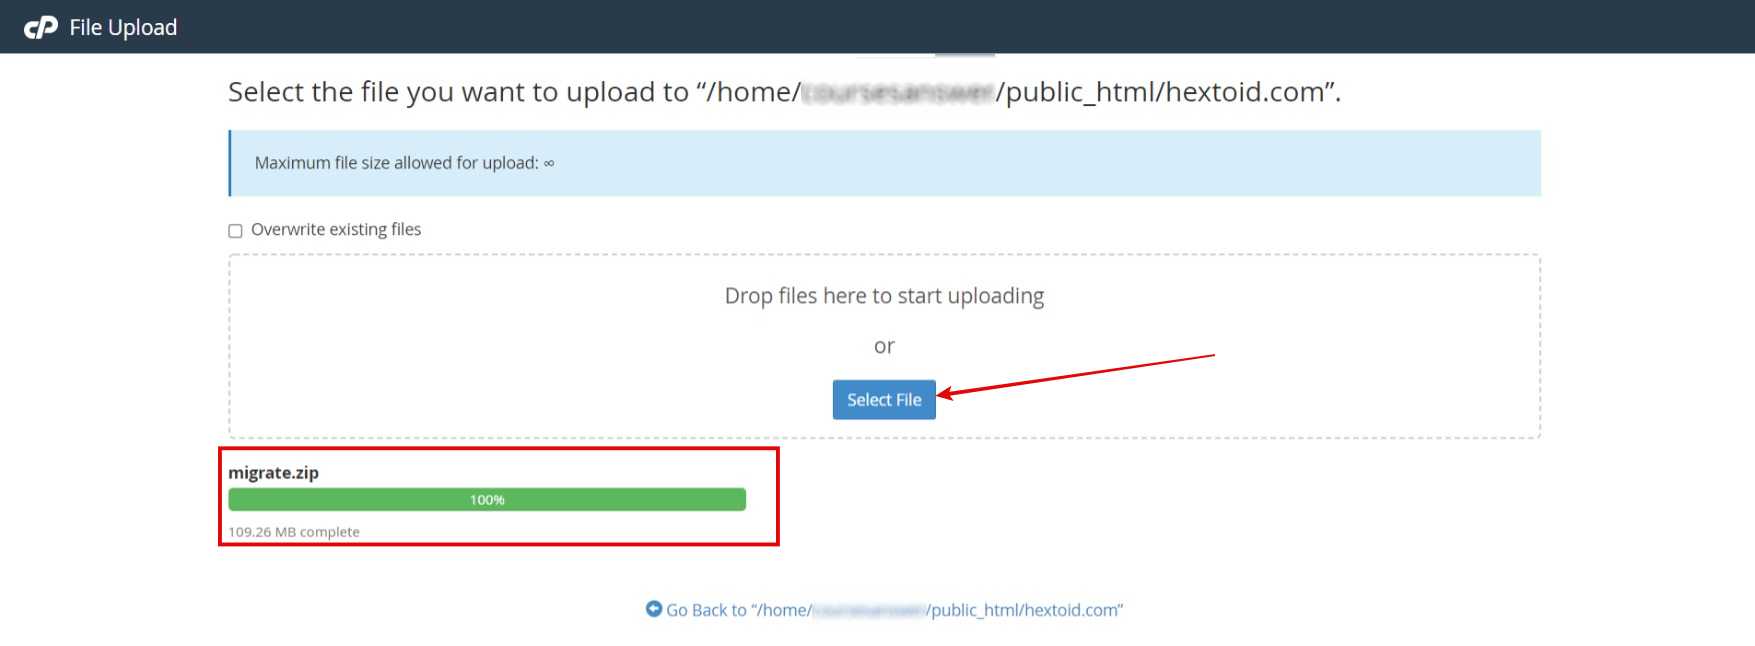
Step 15: Upload the .zip file downloaded in Step 4

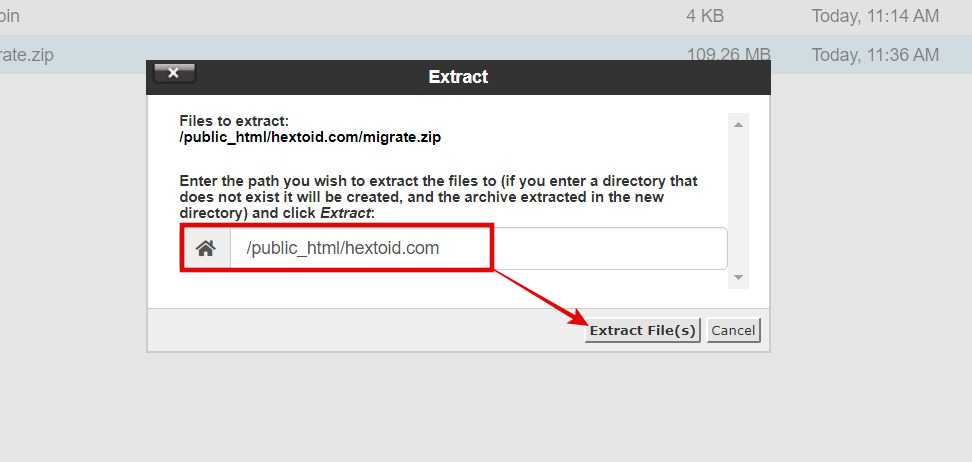
Step 16: Right-click > Extract


Step 17: Extract the zip file in the domain folder

6. Create & Upload Database To New Server
Step 18: Go to cPanel > MySQL Databases


Step 19: Enter a name > Create Database > Copy the database name (DB_NAME)


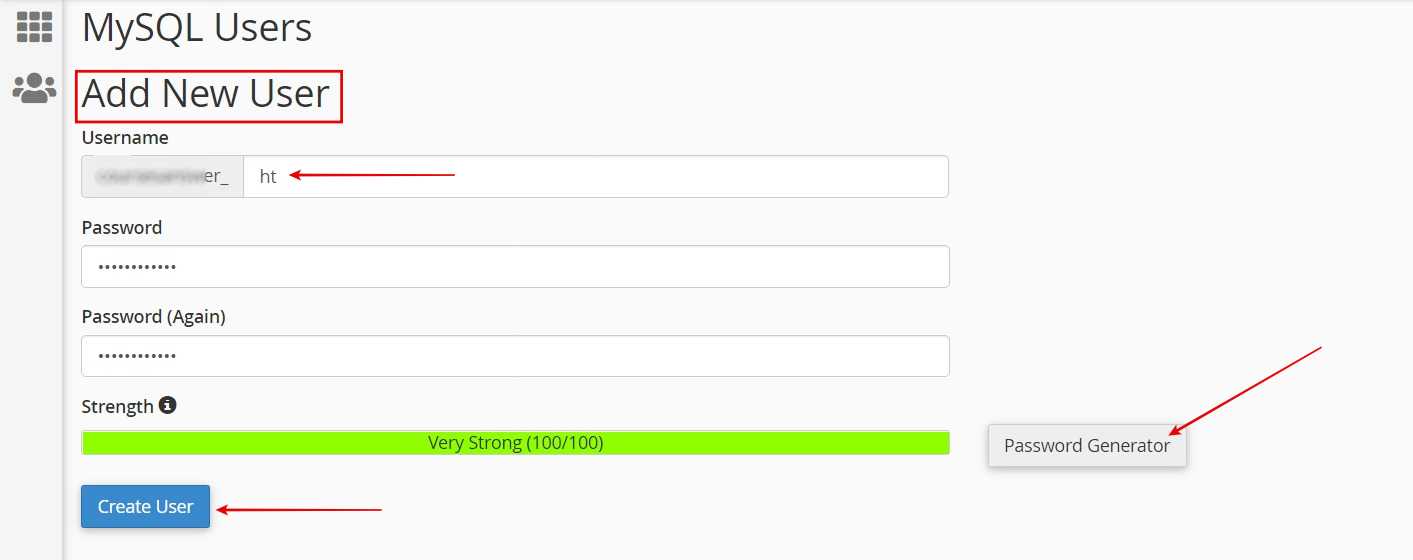
Step 20: Scroll down to Add New User section > Enter database username (DB_USER) (to avoid confusion keep it same as DB_NAME) > Password Generator (Copy the generated Password) > Create User

Step 21: Scroll down to Add User To Database section > Choose the DB_USER & DB_NAME from drop down menu > Add


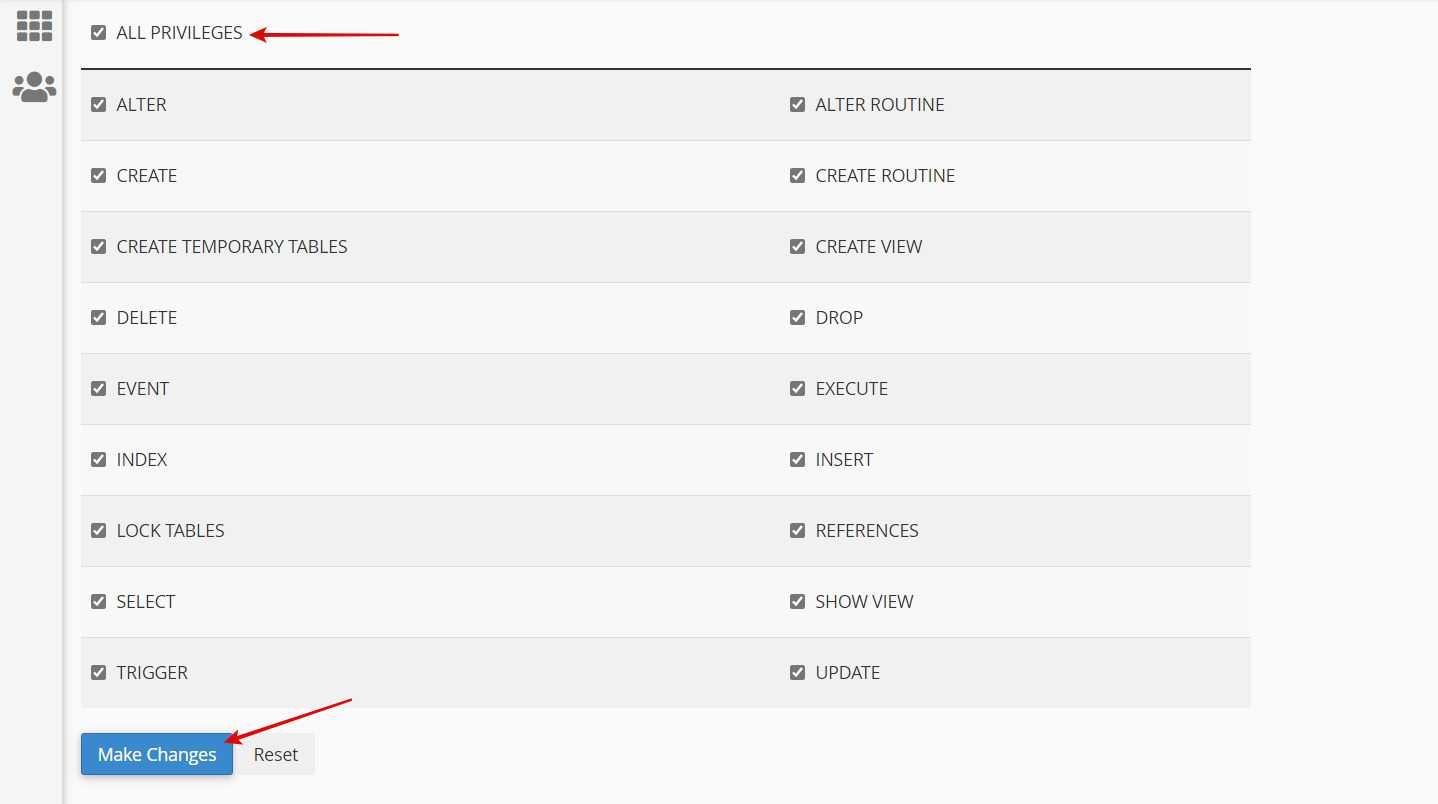
Section 22: Enable ALL PRIVILEGES > Make Changes

Step 23: Go to phpMyAdmin


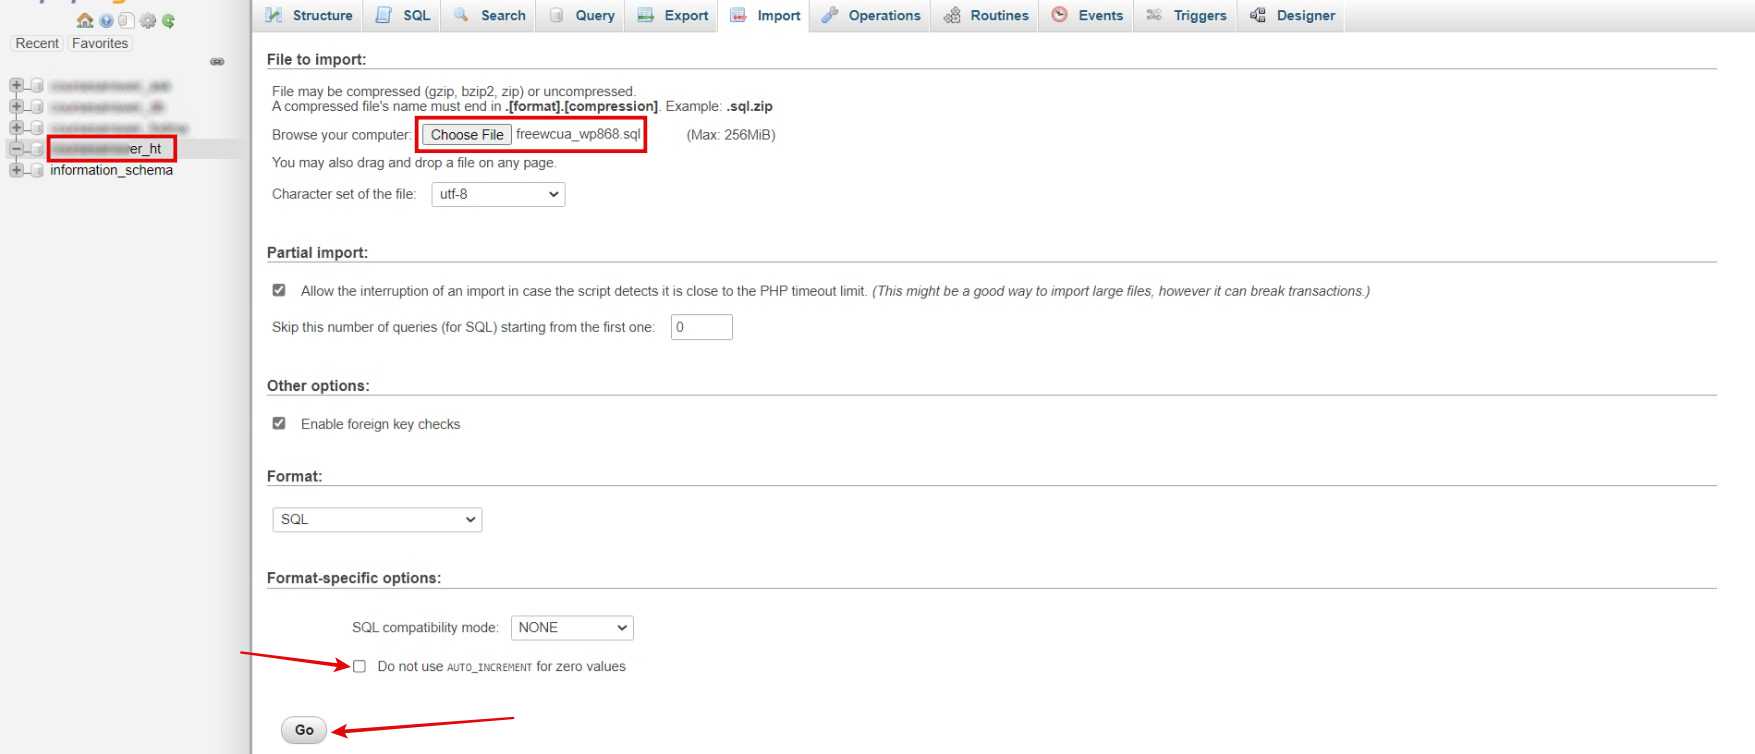
Step 24: Navigate to newly created database > Import > Choose file (upload the sql file downloaded in Step 8) > Remove Tick from Do not use AUTO_INCREMENT for Zero values > Go


7. Configure Database
Step 25: Navigate to the domain folder in file manager > Find wp-config.php file > Right-click & edit


Step 26: Change old DB_NAME, DB_USER, and DB_PASSWORD with Newly created
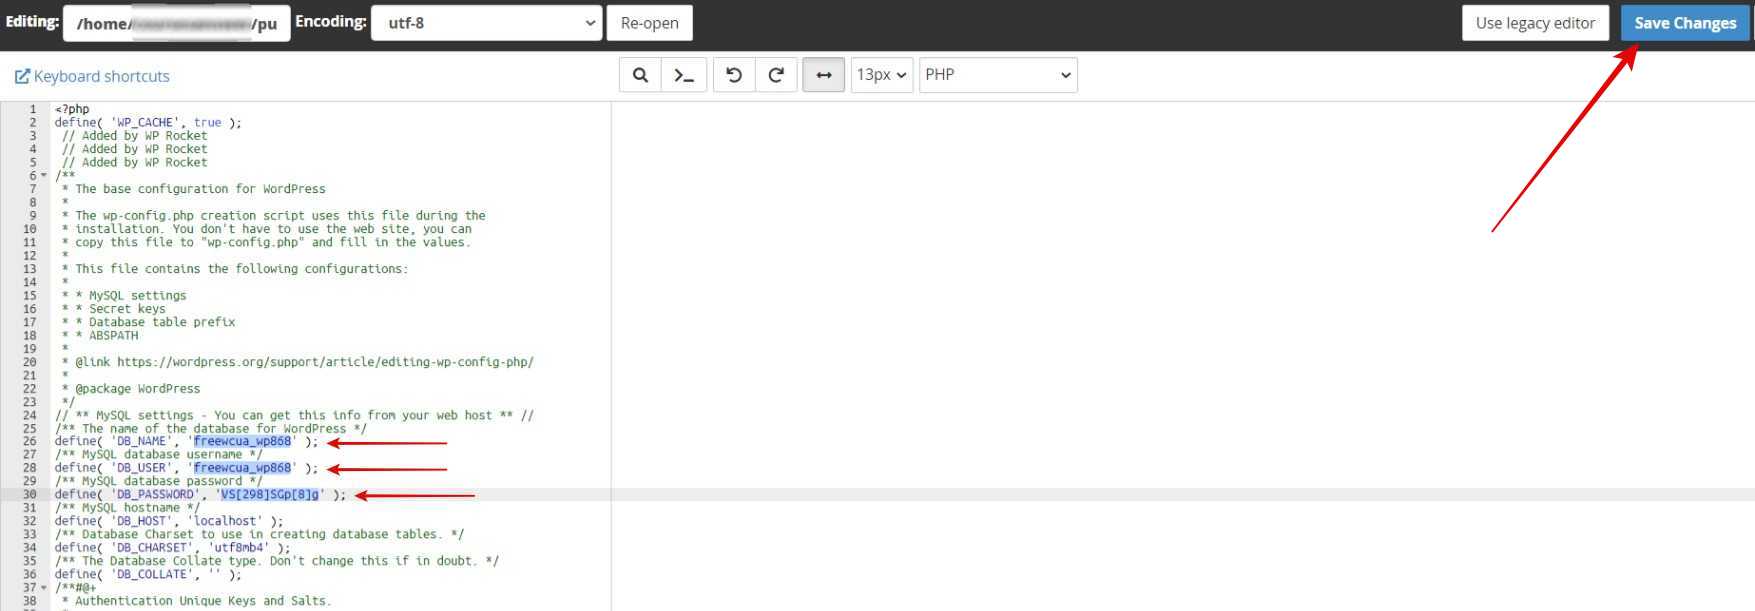

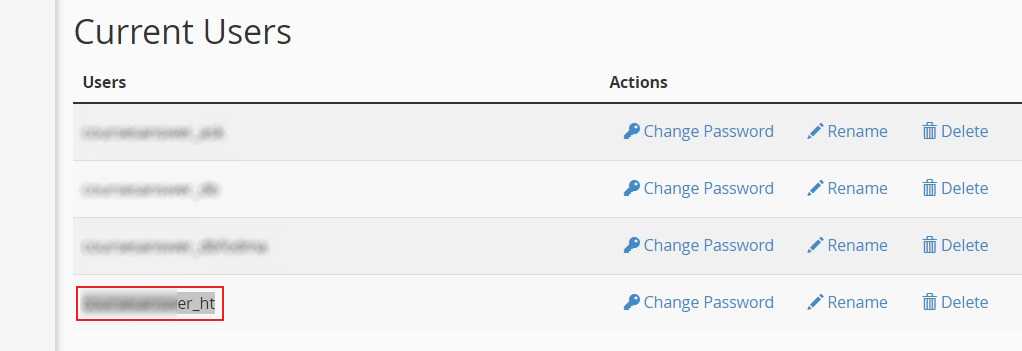
Step 27: Go to cPanel > MySQL Databases > Copy DB_NAME & DB_USER



What If Any Error Occurs
- Change Theme
- Disable All Plugins (Especially Cache Plugins)
- Clear Browser Cache
- Check If Domain Is Propagated or Not
- Settings > Permalinks > Click Save Changes (If 404 is occurring for posts/pages)
Wrap Up
I hope you have successfully migrated your WordPress Website from one to another host without any traffic loss in just a few minutes. If you have any query then drop them in the comments below or help me by sharing this article on social media.


![How To Use Download Timer in WordPress [Show Content/Download Button After Timer]](https://www.hextoid.com/wp-content/uploads/2022/10/how-to-use-download-timer-in-wordpress-768x432.webp)

