Disclosure: Some of the links to products in this article are affiliate links. It simply means, at no additional cost to you, we’ll earn a commission if you click through and buy any product.
Do you want to create a custom business email in the name of your company/business domain for free using cPanel and connect with Gmail as well as set a profile photo for it.
Not only this you can have a lot of benefits if you are following this ultimate guide of creating a business Email.
What Is a Business Email & Its Uses?
Business email is address that contains your website name instead of gmail, reddmail, hotmail and yahoo here is an example of business email [email protected].
Most person uses the free email services provided by google and yahoo which isn’t much professional and they looks very simple such as [email protected].
It doesn’t looks good when you approach a brand with these free emails as it looks less trustworthy, whereas it is not same with the professional emails.
There are a lots of benefits of using a business email.
- Looks professional
- Earn customer’s trust
- Short and easy to remember
- Promote your brand & business
To create a free Business Email you must have a
- Gmail
- Domain name
- Hosting with cPanel
- cPanel supports the email functionalities
Quick Guide To Create a Business Email
- cPanel > Email > Email accounts > Click Create
- Choose Domain > Enter Username > Set Password > Choose Storage > Click Create
- cPanel > Email Accounts > Click Connect Devices
- Note down the important data
- cPanel > Email > Forwarders
- Choose Domain > Add Forwarder > Enter Username > Choose Domain > Enter Gmail > Add Forwarder
- Gmail > Settings > See All Settings
- Accounts and Imports > Add Another Email Address
- Enter > Name > Custom Email > Next
- Type SMTP Server > Choose port > Username > Password > Add Account > Enter Verification code > Verify
How to Create a Free Business Email Address In cPanel?(Step by Step)
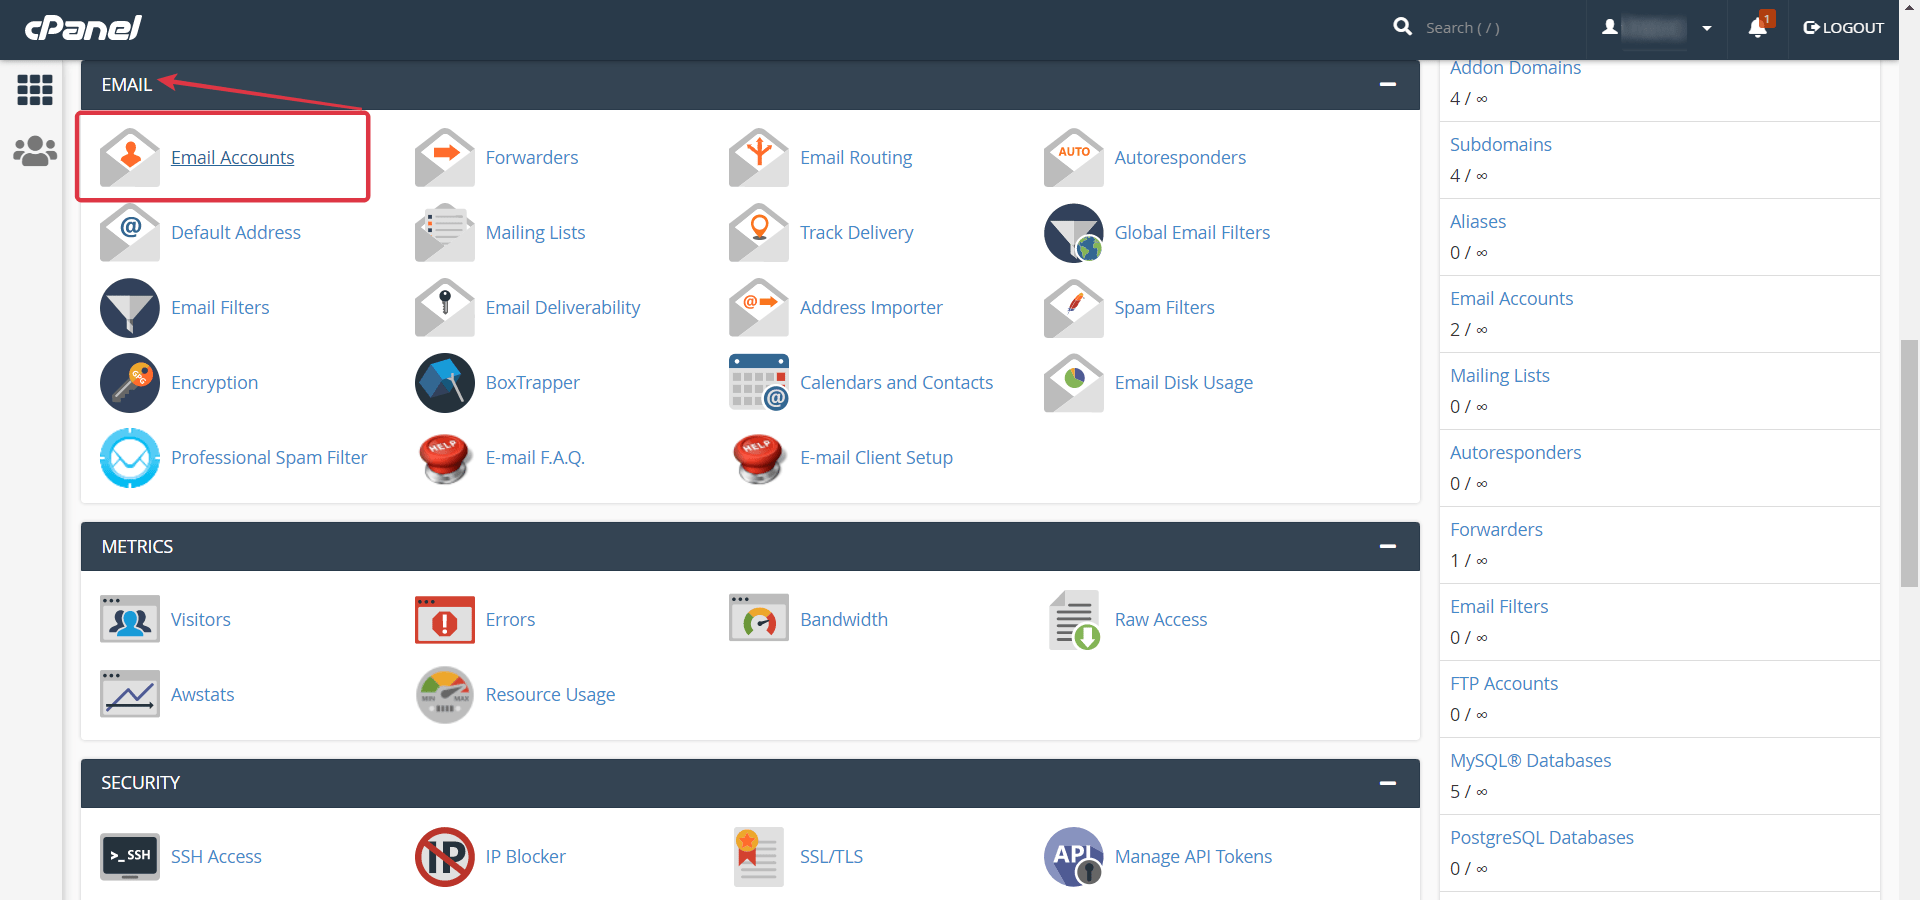
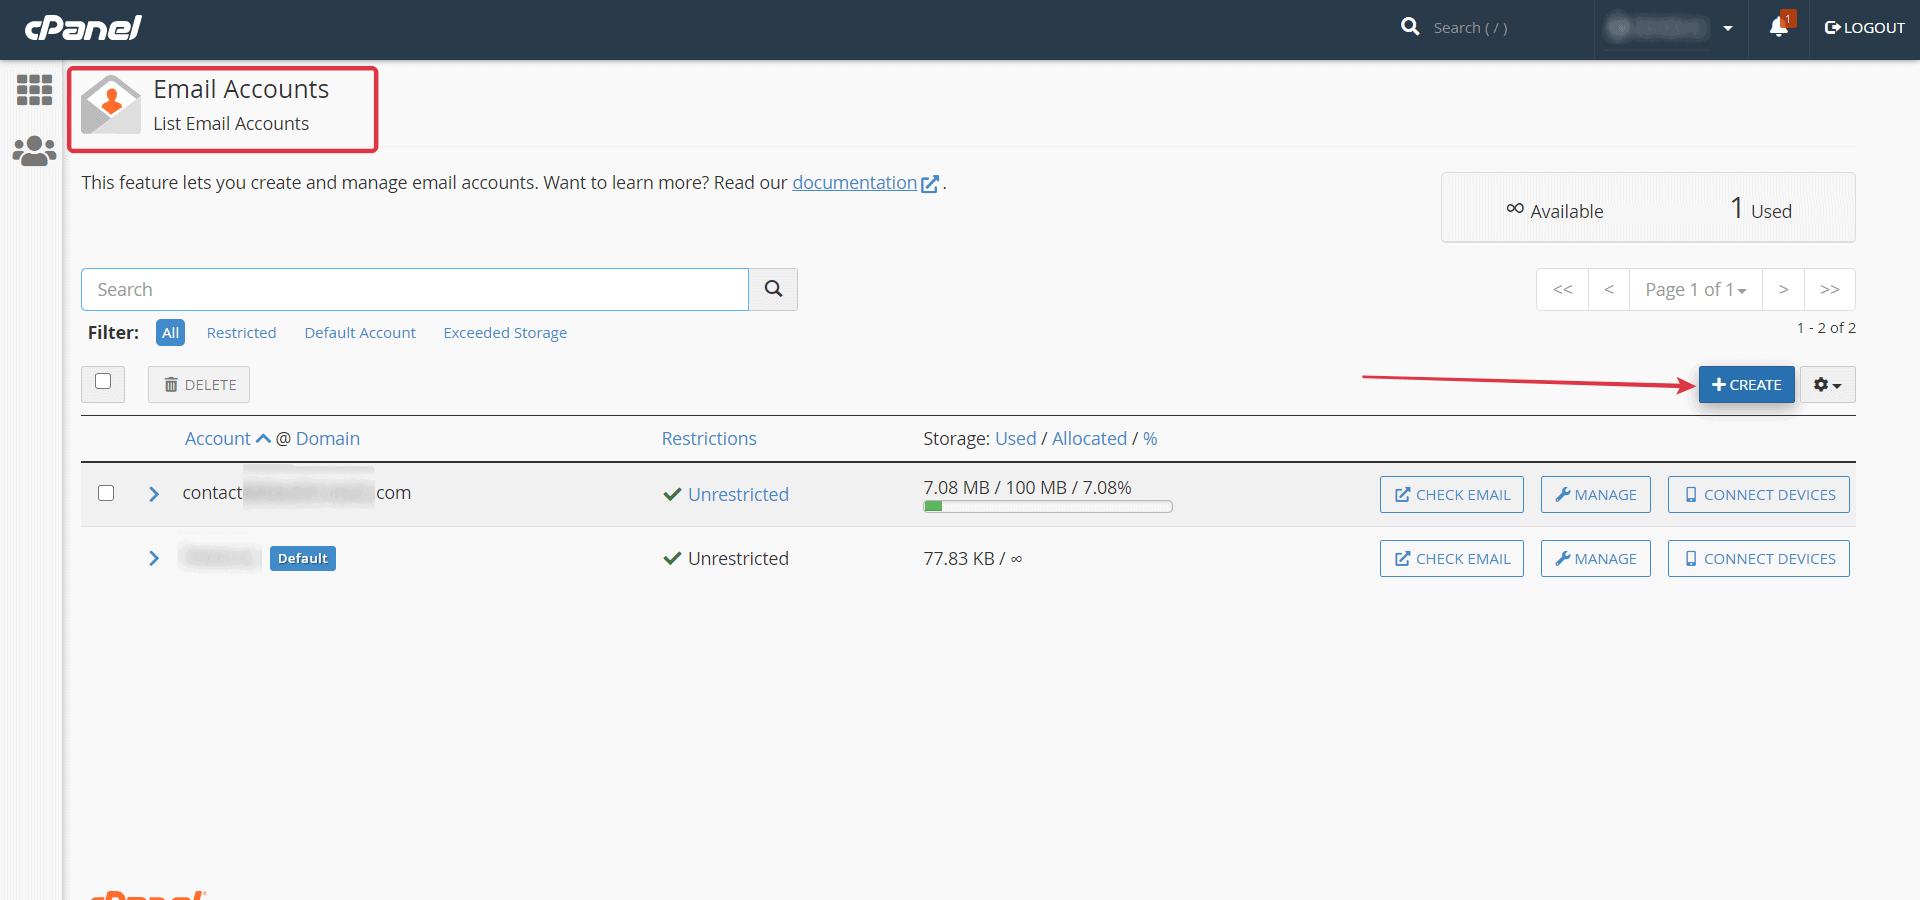
- Go to cPanel > Email > Click Email Accounts
- Click Create
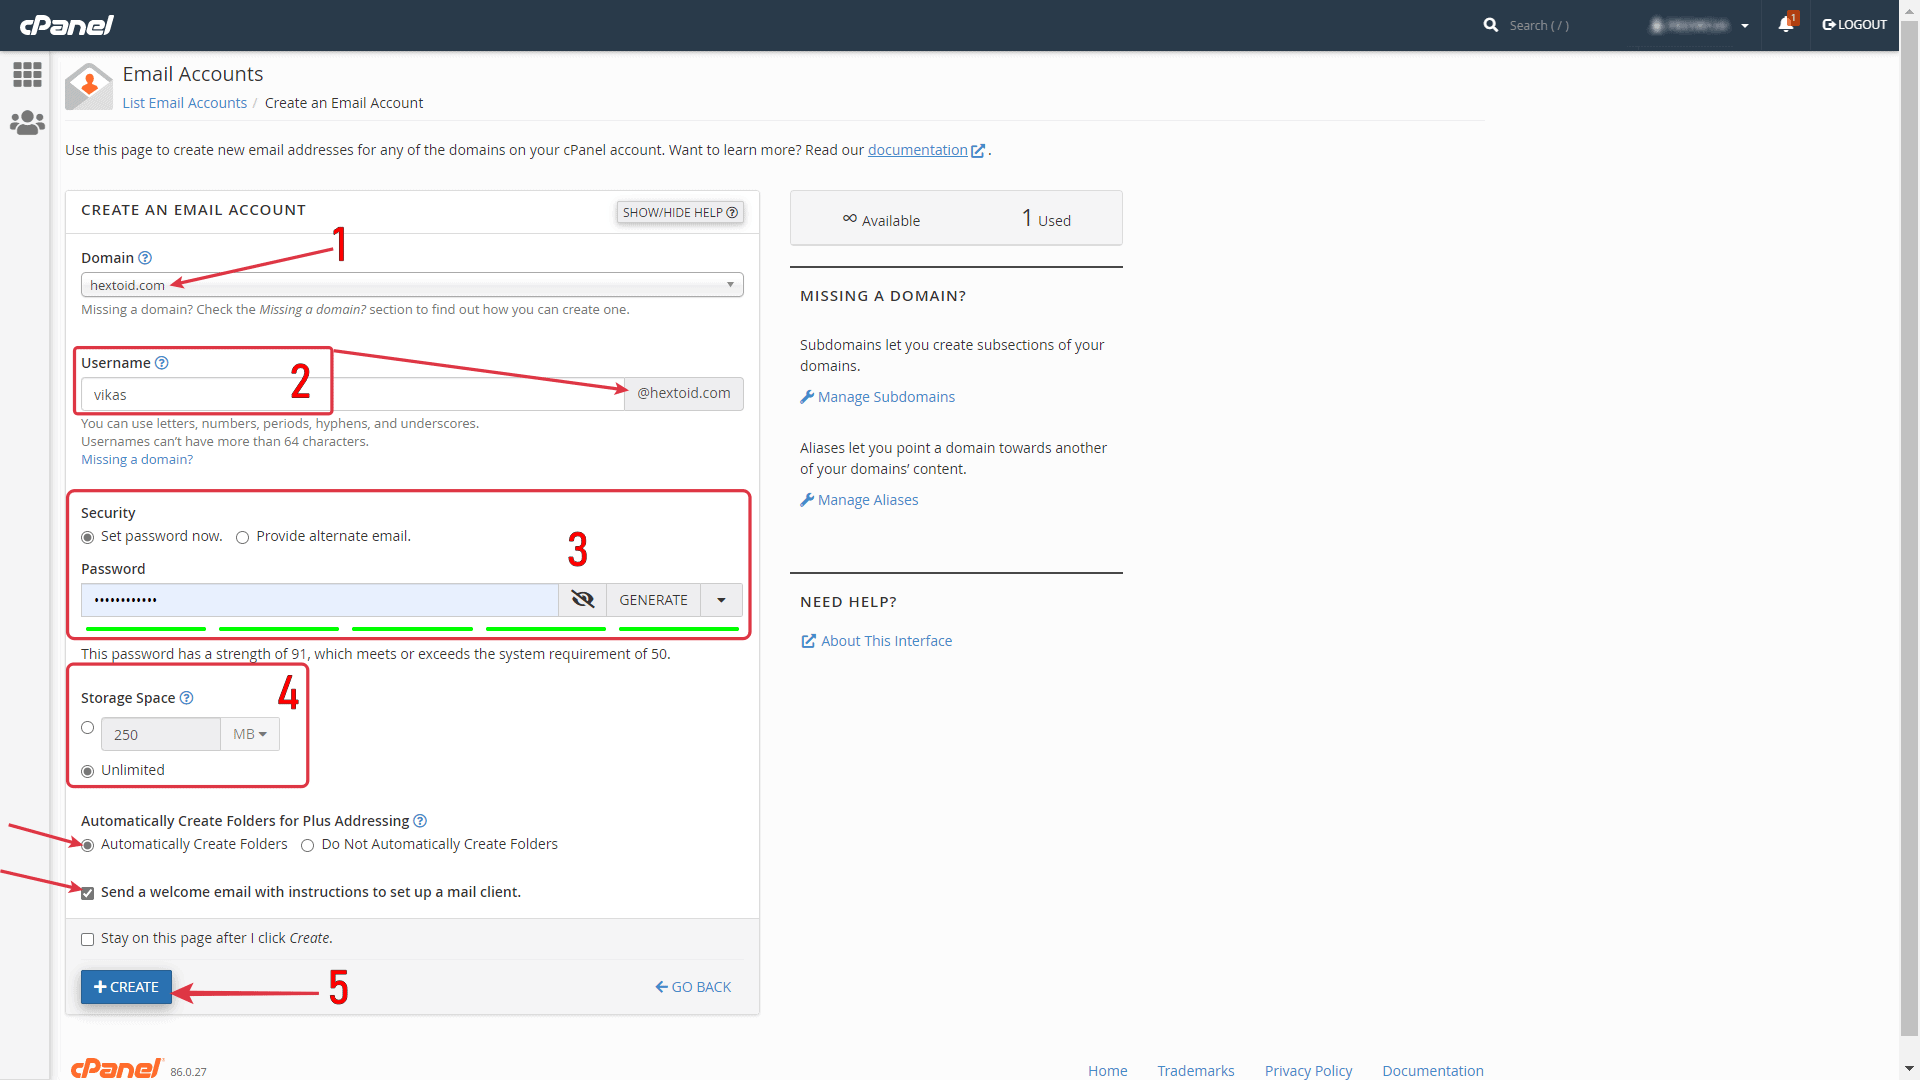
- Choose Domain > Enter Username > Enter Password (for custom email) > Select Storage > Click Create
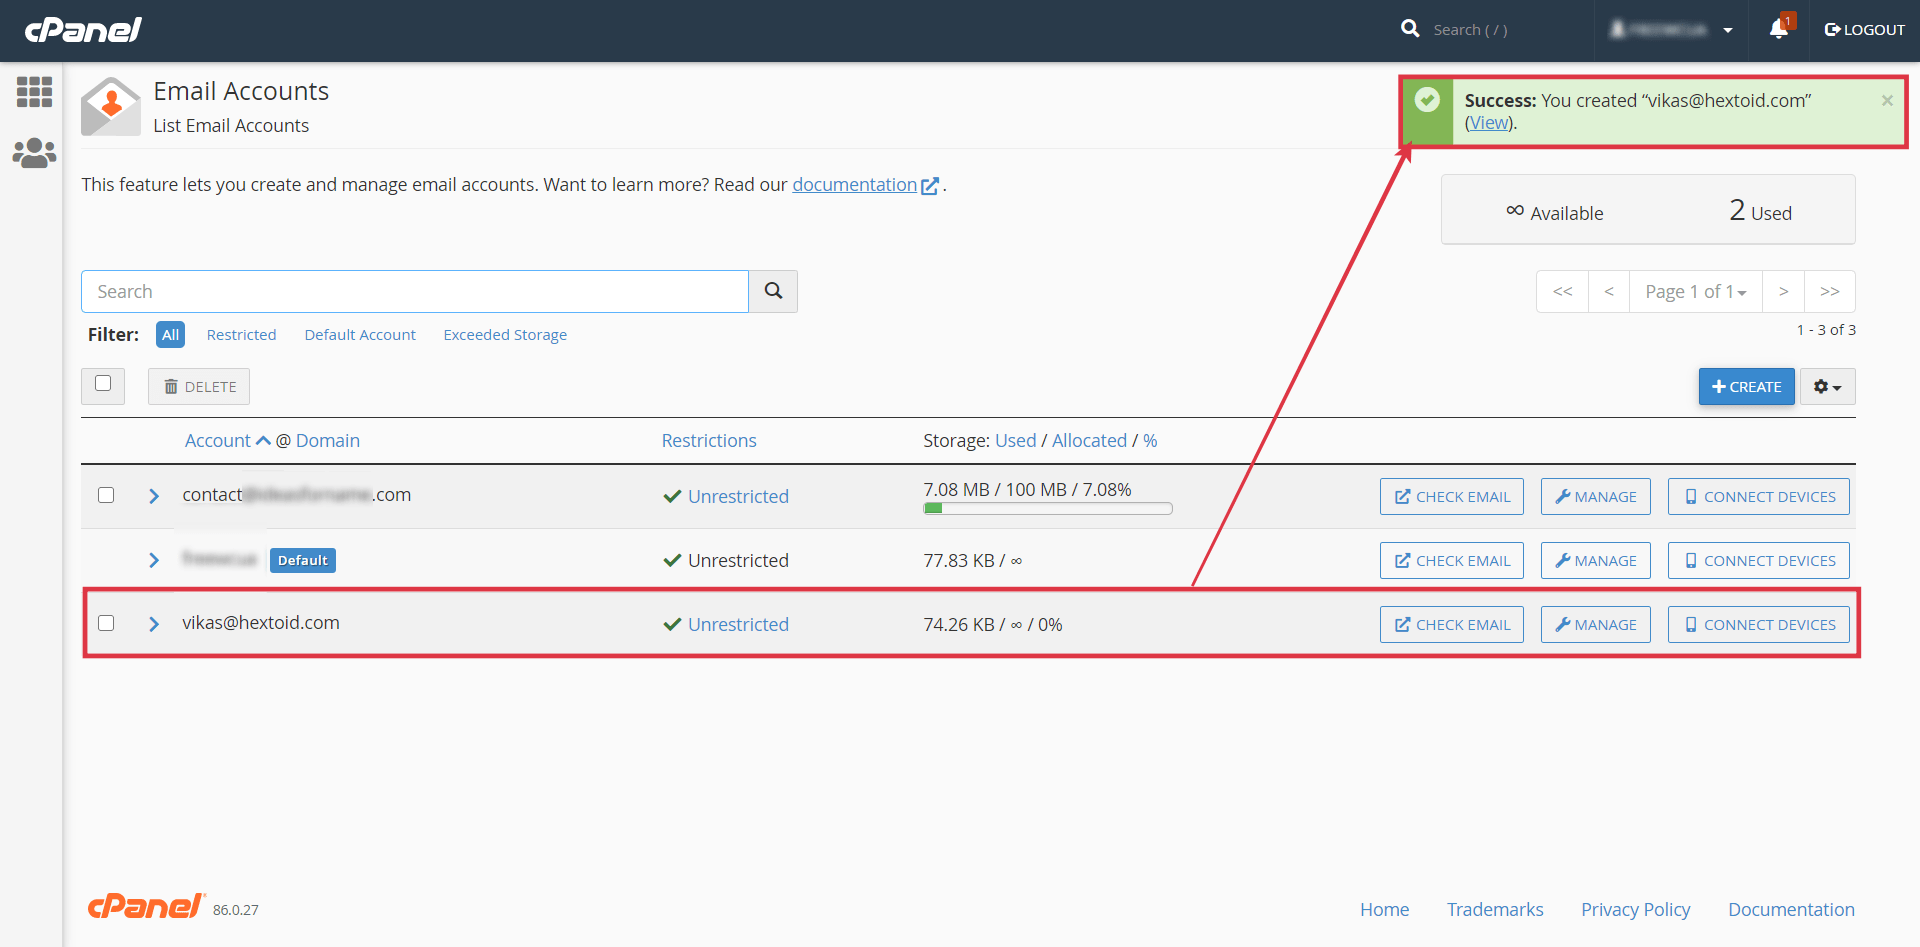
- Email Created Success Message
Our custom business email account is created using the cPanel, now it is time to forward all the emails to Gmail, so that we can directly send and reply to the emails using this custom email.
It is very uncomfortable to go to webmail or cpanel to access emails, whereas after integrating Gmail with custom email you will be able to do everything with the custom mail using Gmail.
How To Setup Email Forwarder In Custom Email To Gmail?
- Go to cPanel > Email > Email Accounts > Click Connect Devices (Available at the end of email address)
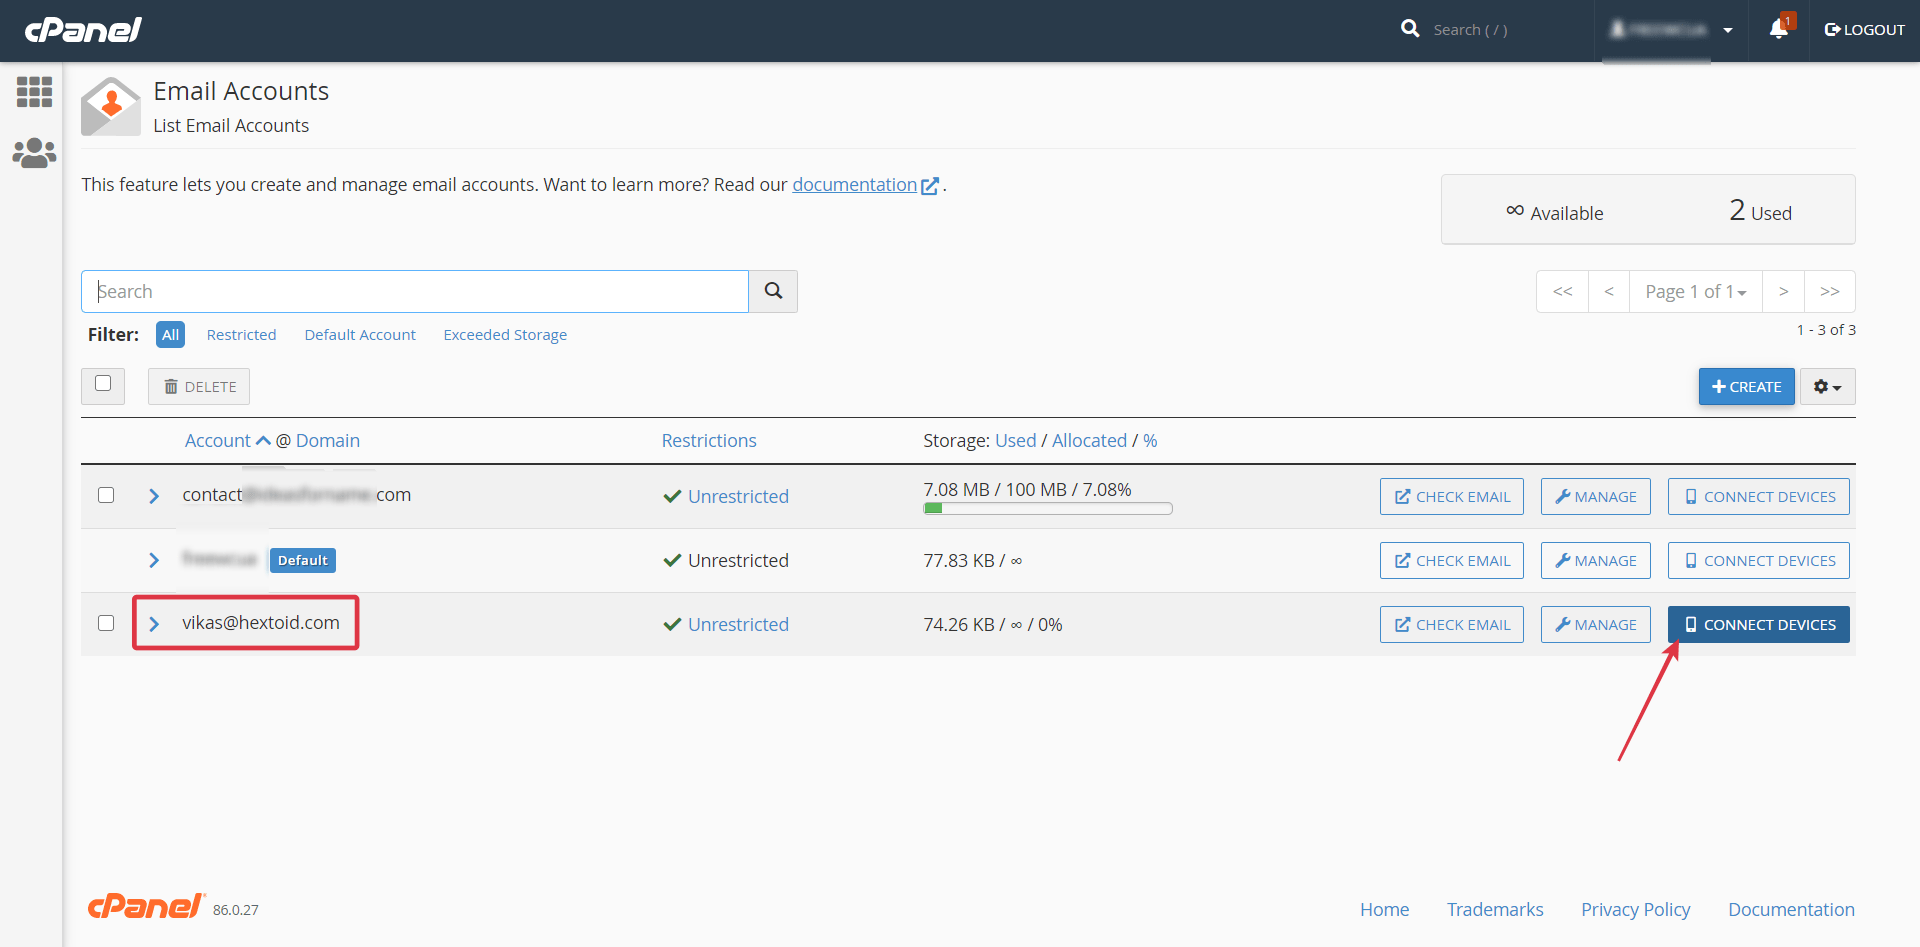
- Here you will find all the mail client details to complete the Gmail integration
- Note it down at safe place and don’t share with any unauthentic person
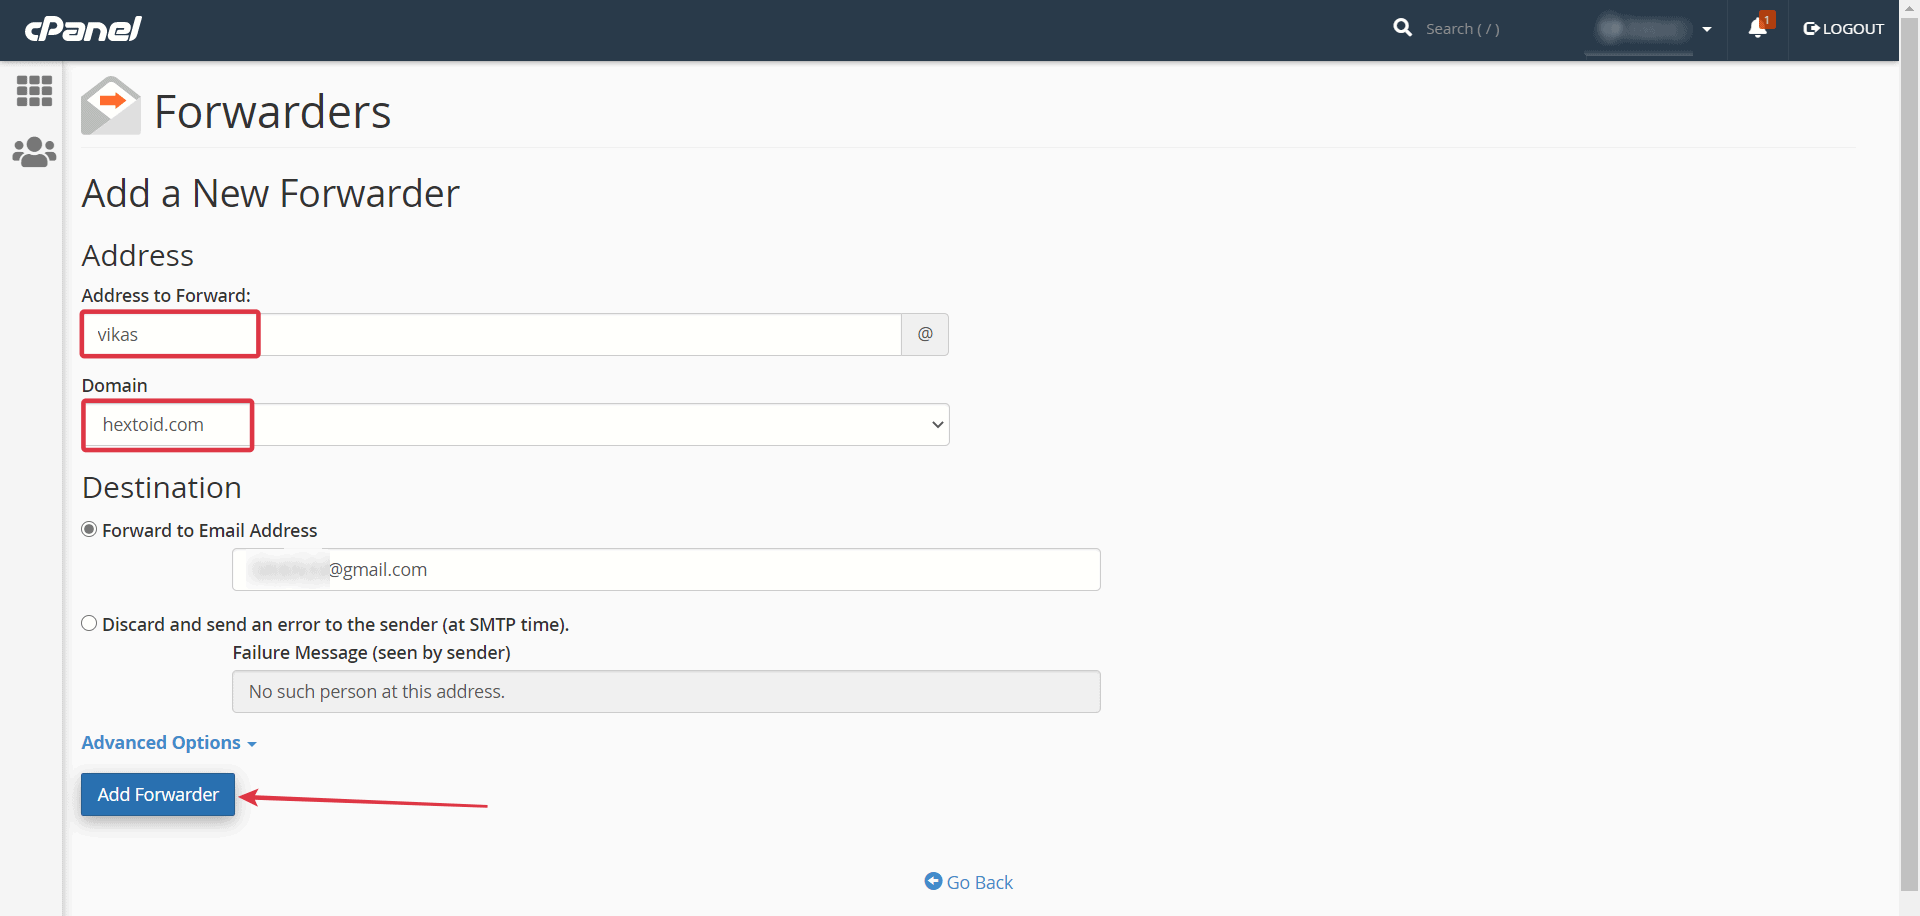
- Go to Email > Forwarders
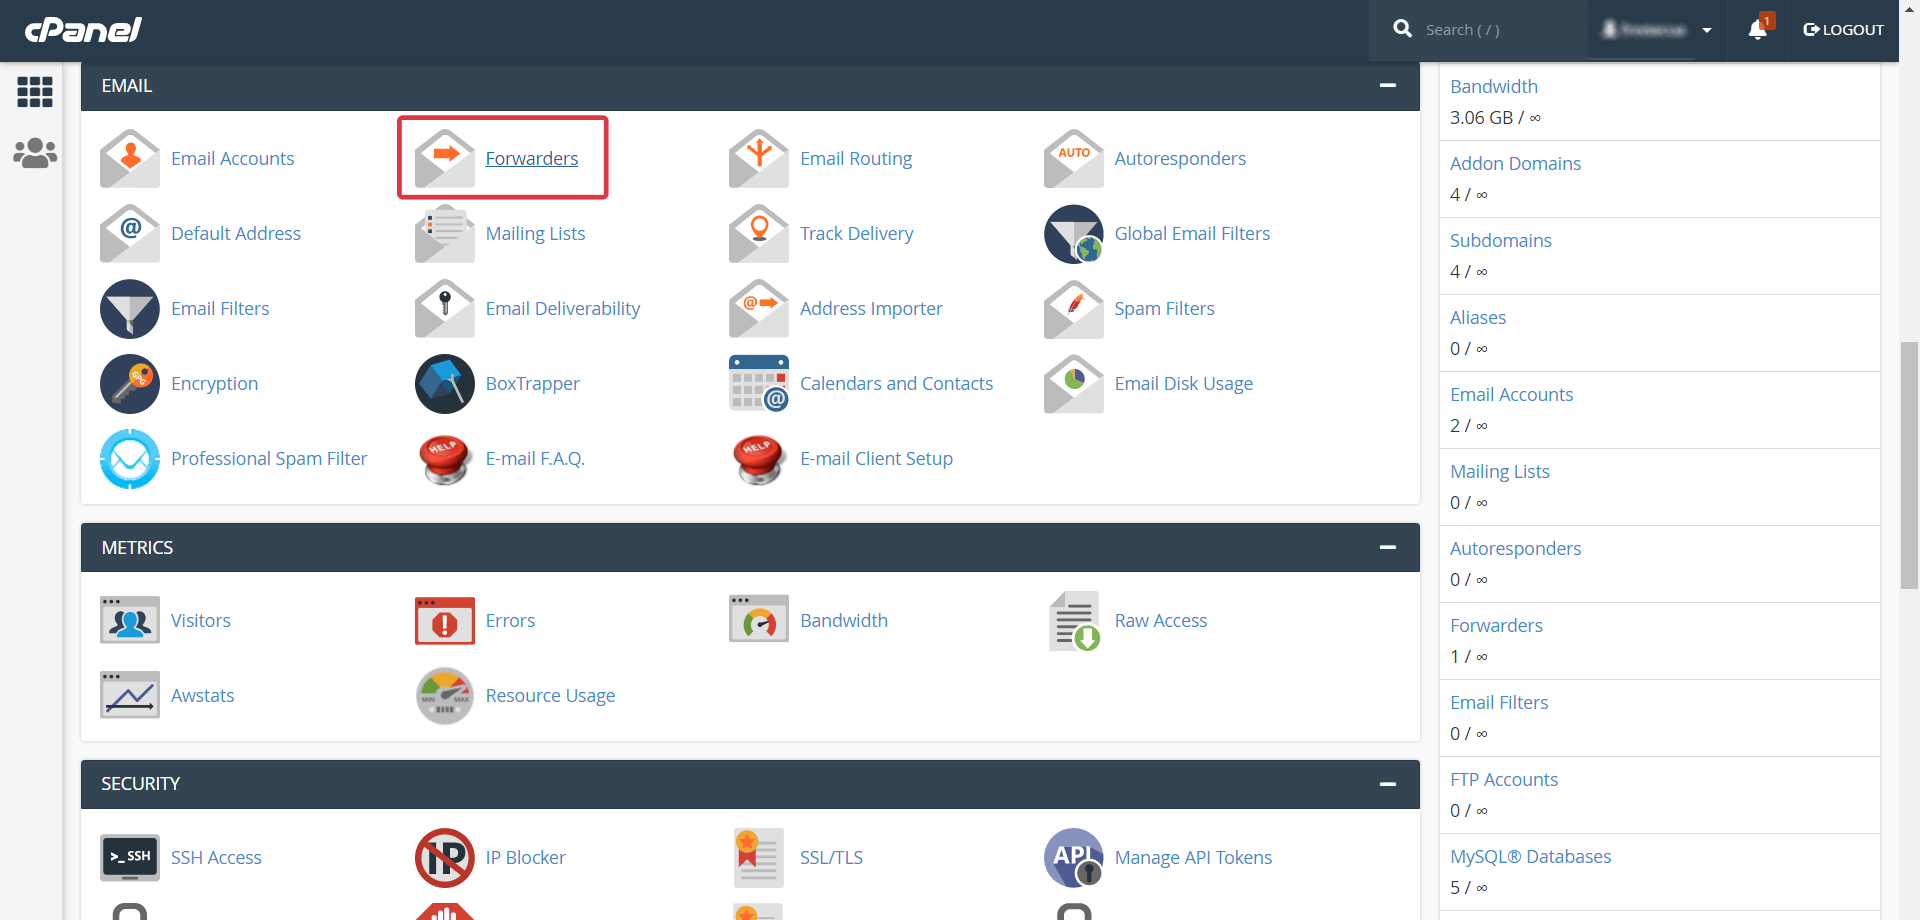
- Choose Domain (With which you created the email) > Click Add Forwarder
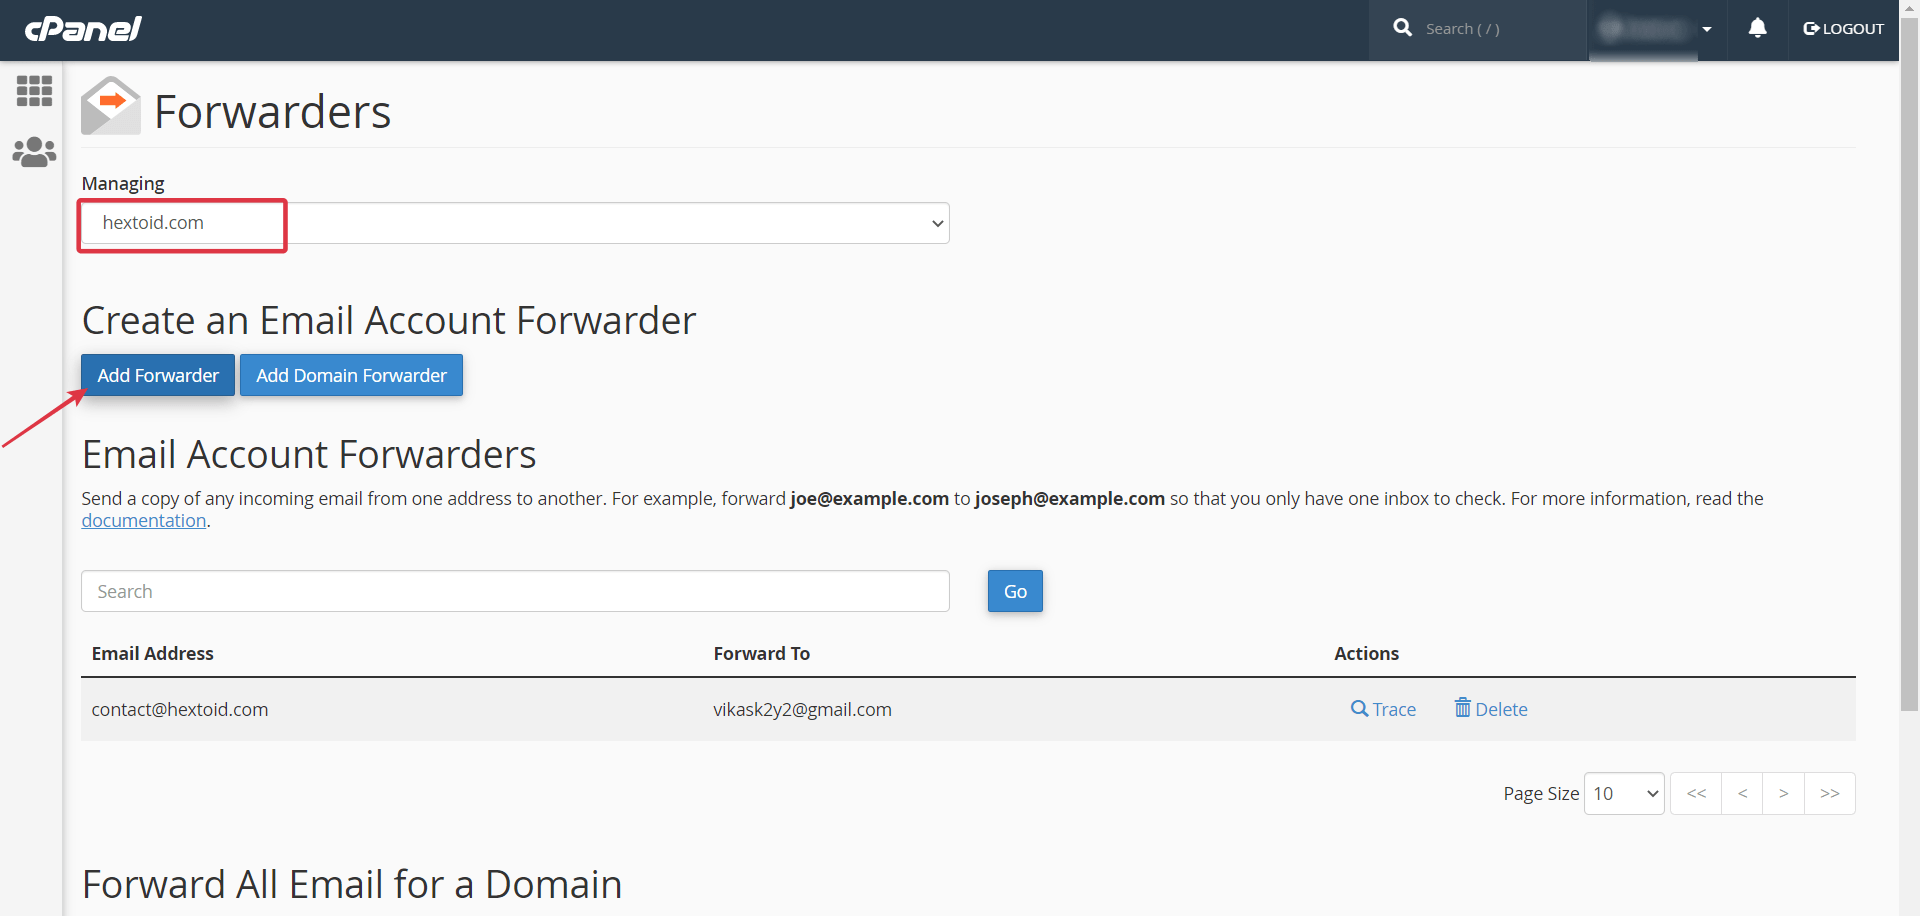
- Enter Username > Choose Domain > In the forward email enter the Gmail > Click Add Forwarder
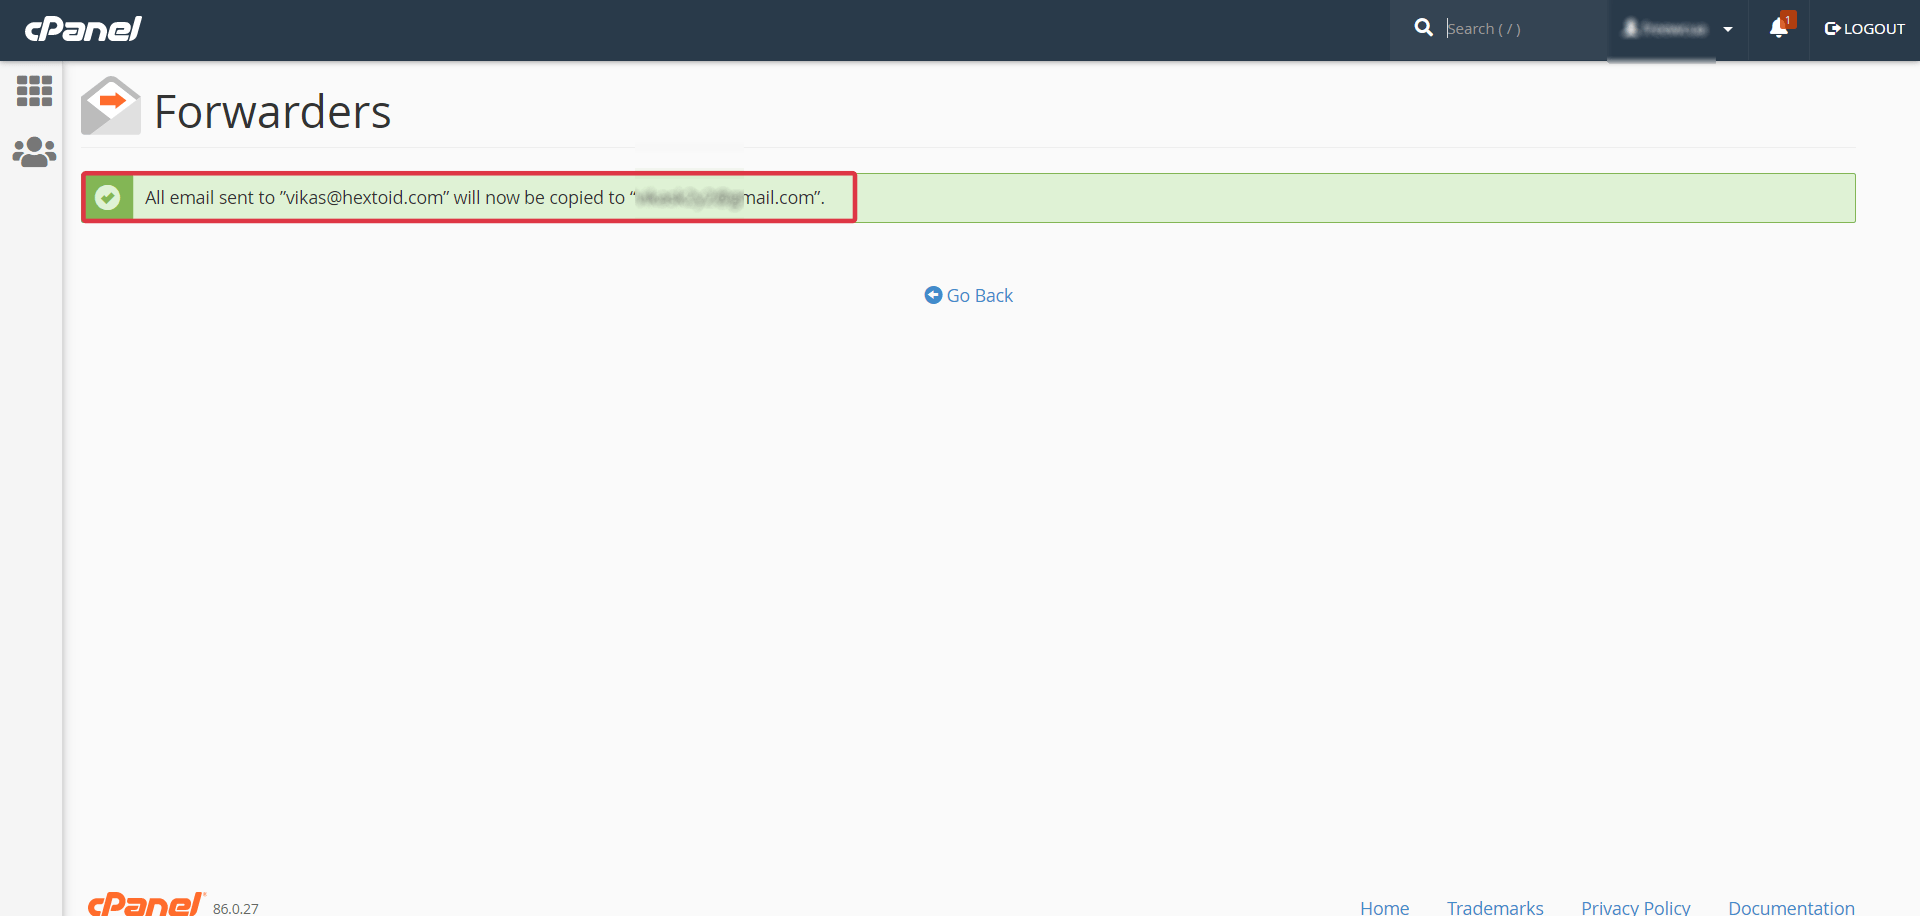
- Forwarders has been enabled and now all the email sent to the custom email will arrive at Gmail inbox
- But now if you will try to reply to this email you won’t be able to reply with this custom email, and to reply with this custom email you have to connect it with Gmail.
Connect Custom Email With Gmail To Send & Receive Emails Using Gmail
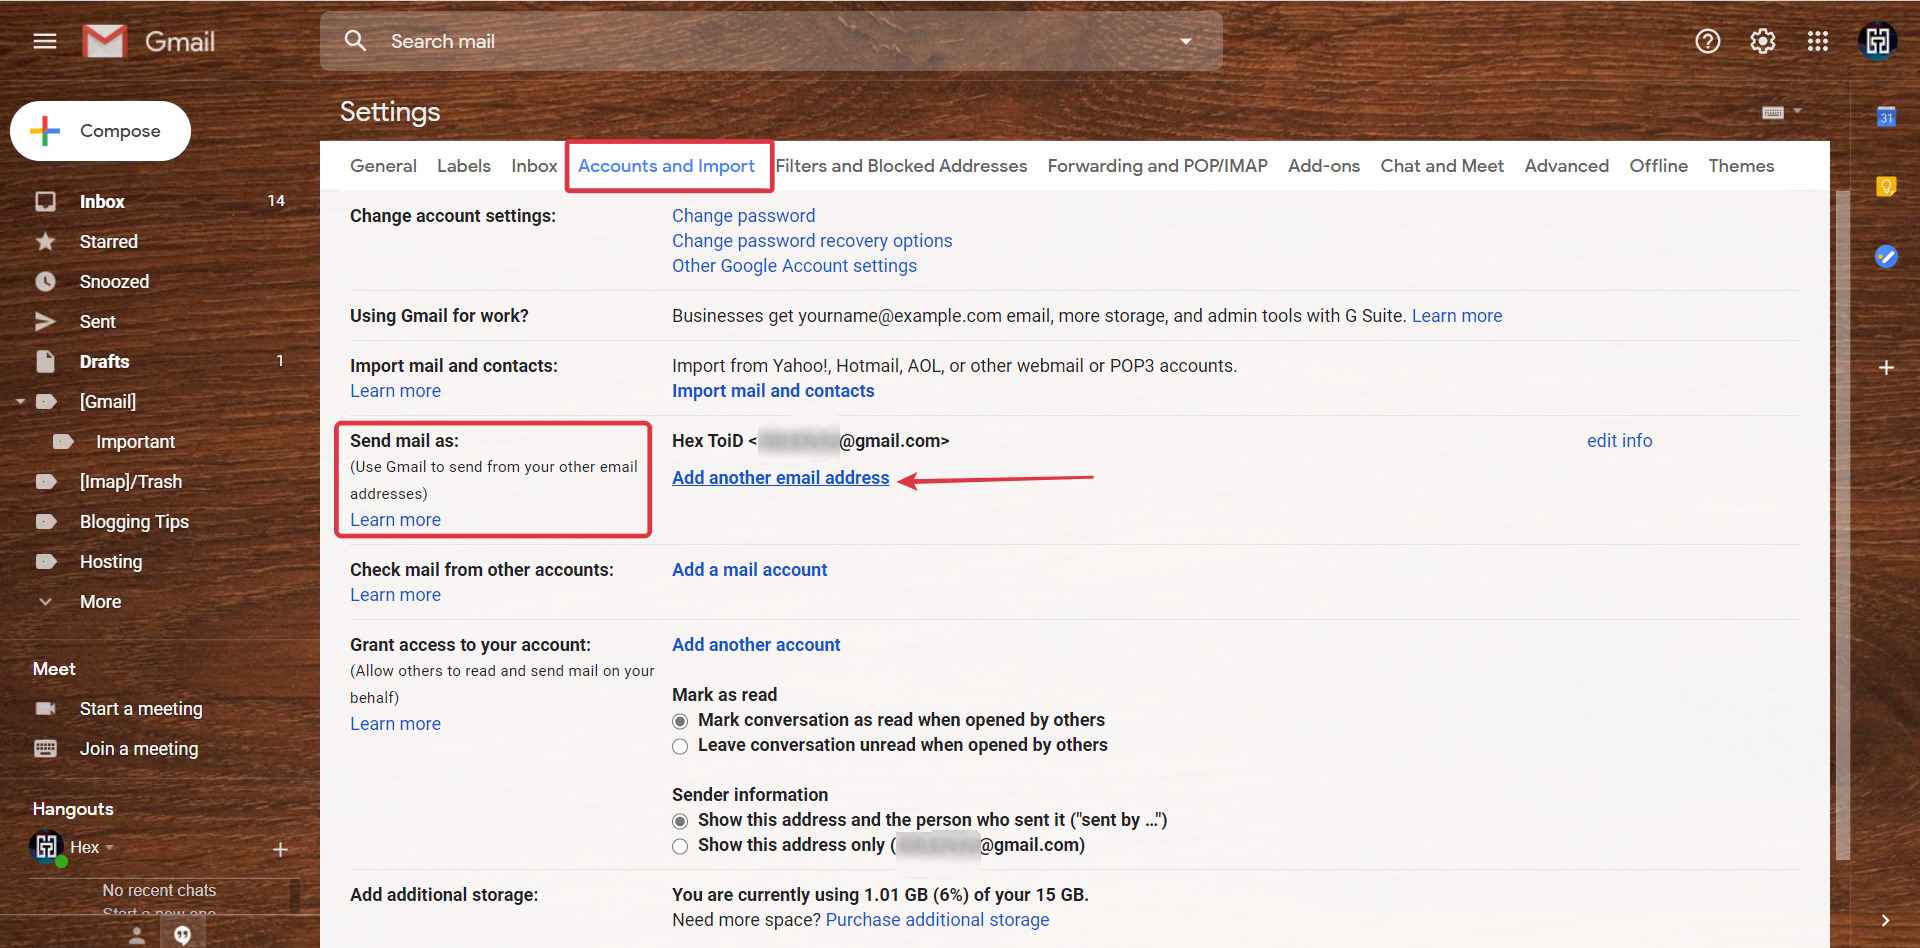
- Go To Gmail > Settings Icon > Click On See all settings
- Navigate to “Accounts and Import” > Click “Add another email address” (Near Send mail as: Section)
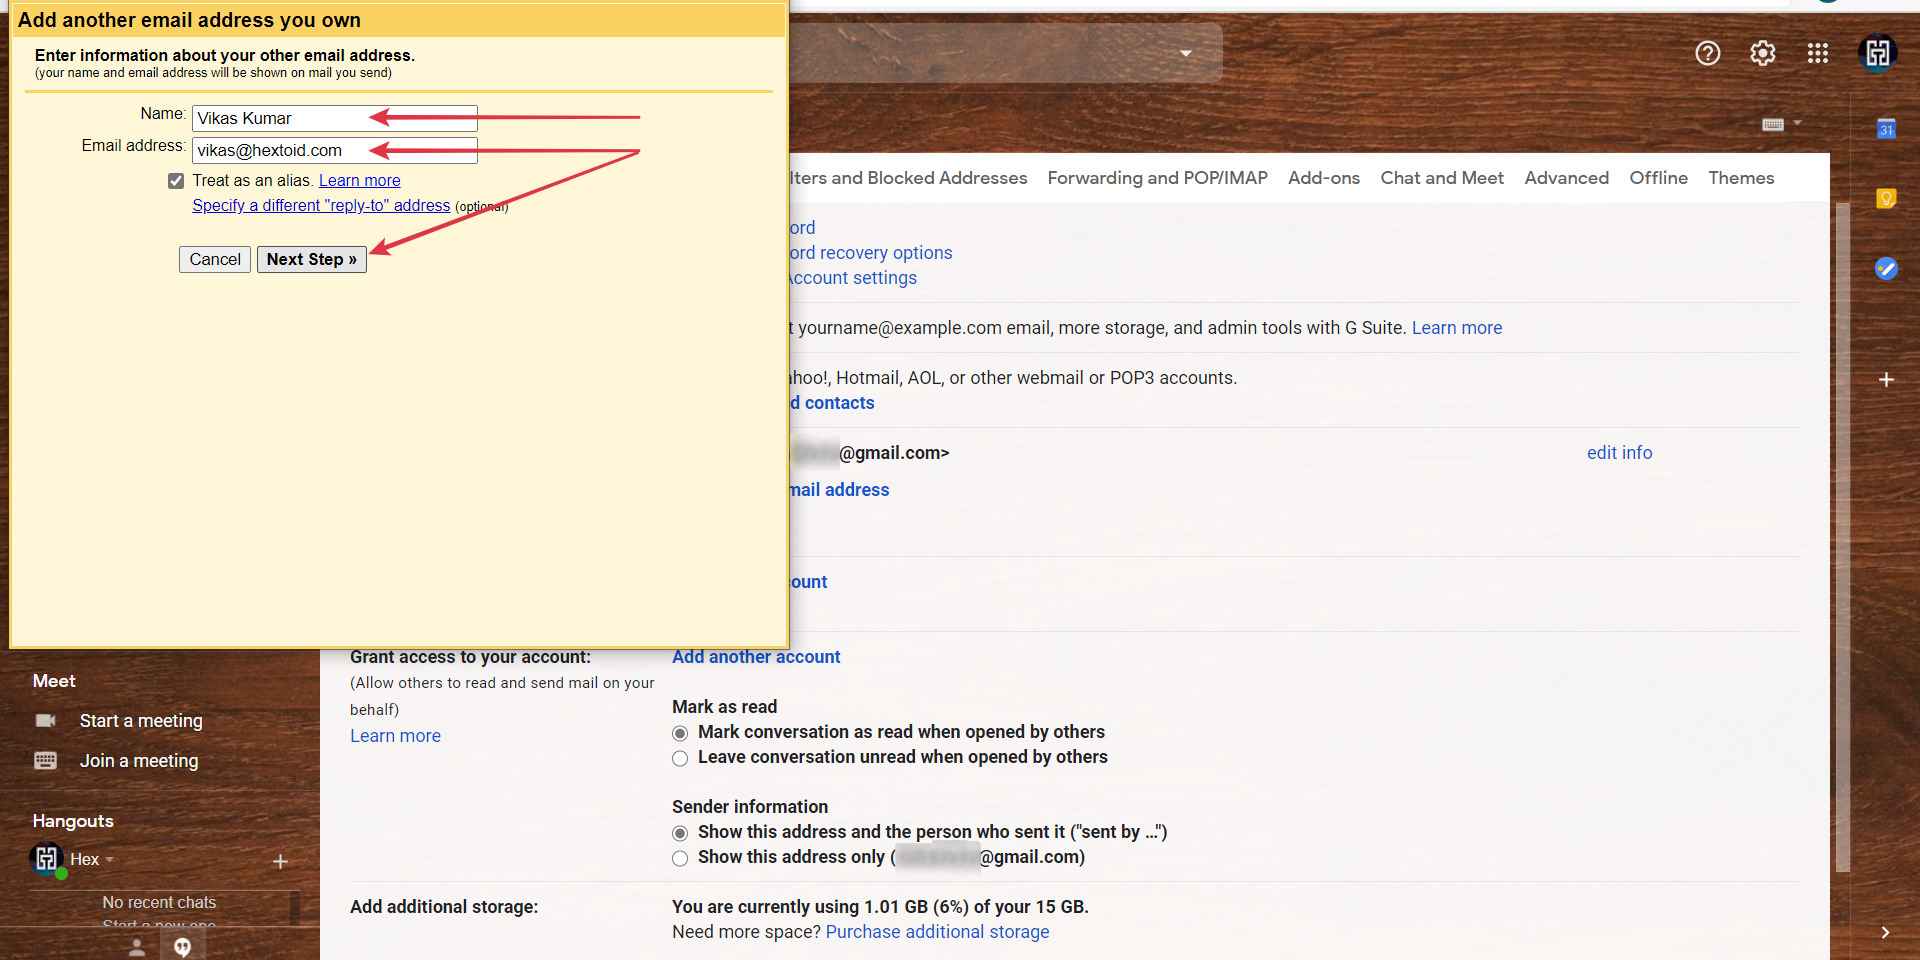
- Enter Name that you want to display in the receiver device
- Type your newly created custom email
- Check the box
- Click Next Step
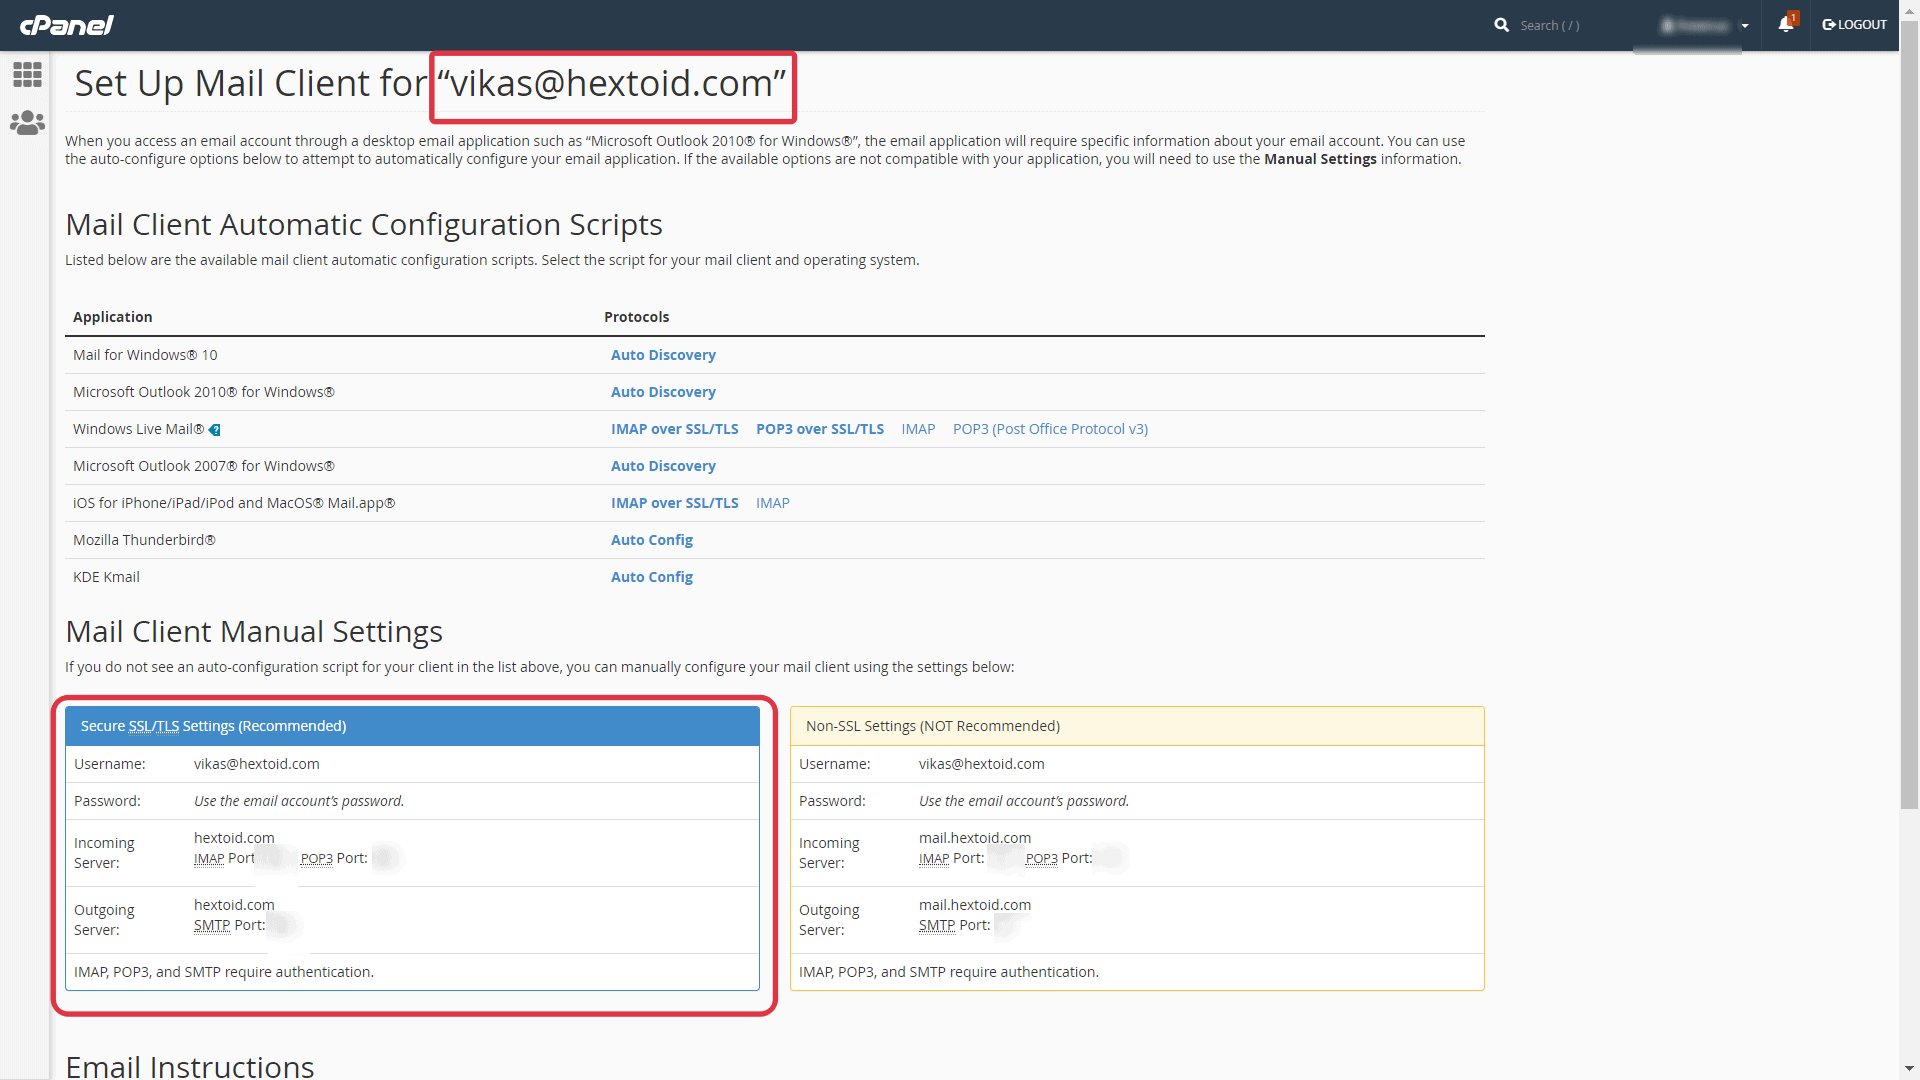
- While setting up email forwarder we need the Mail Client details to compete the setup
- Here we will be using it
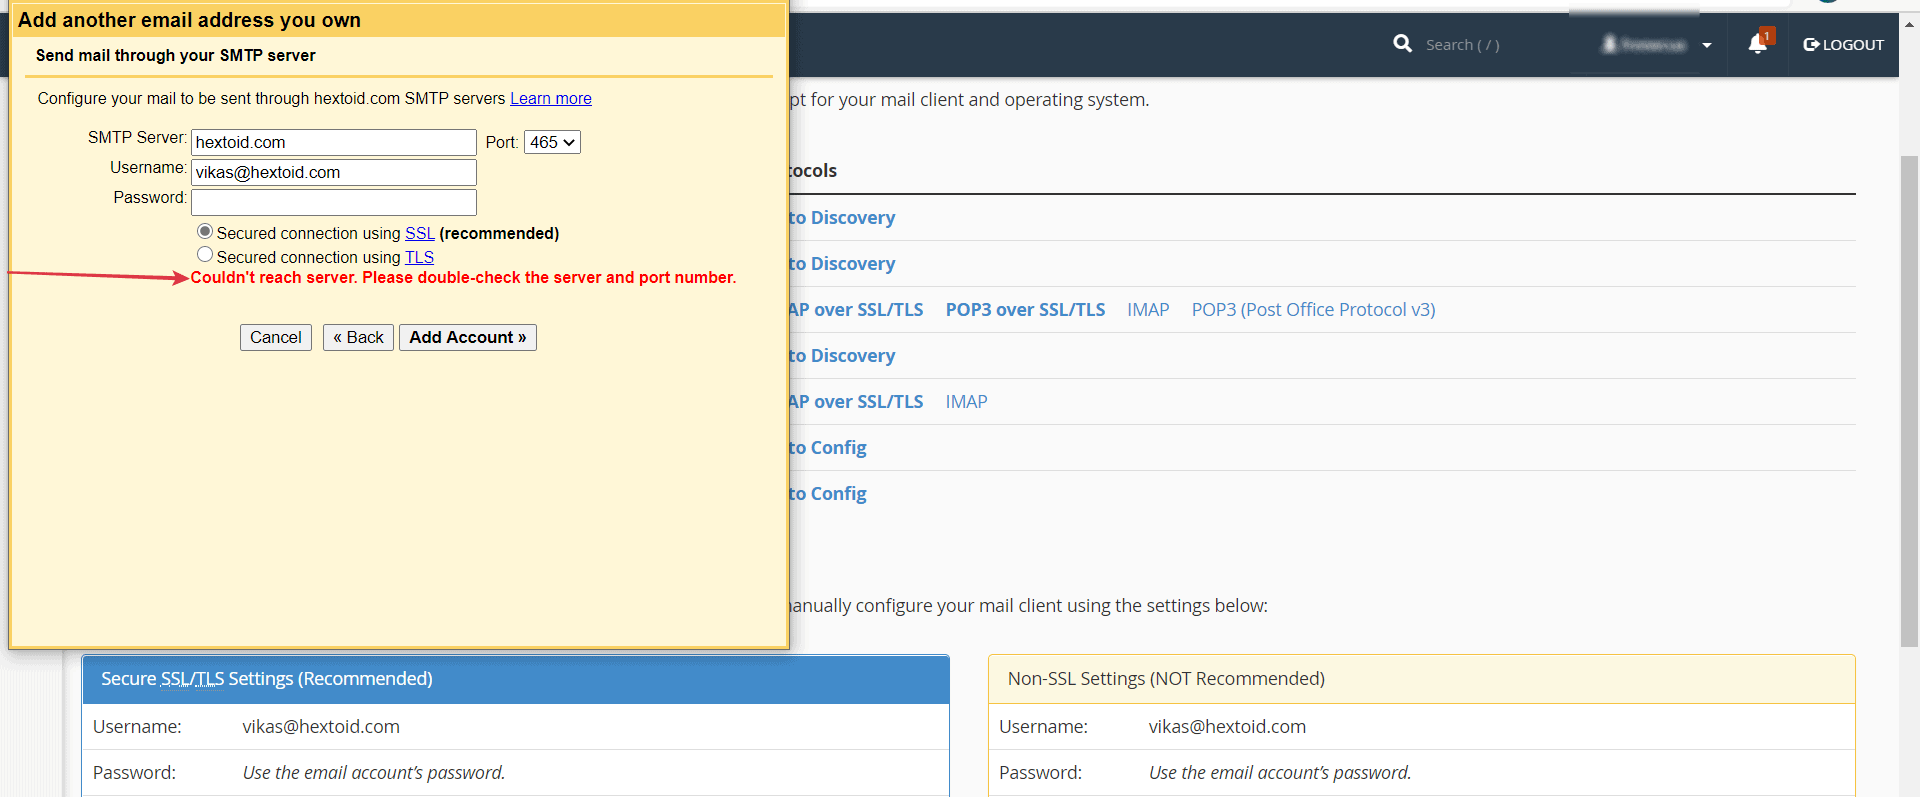
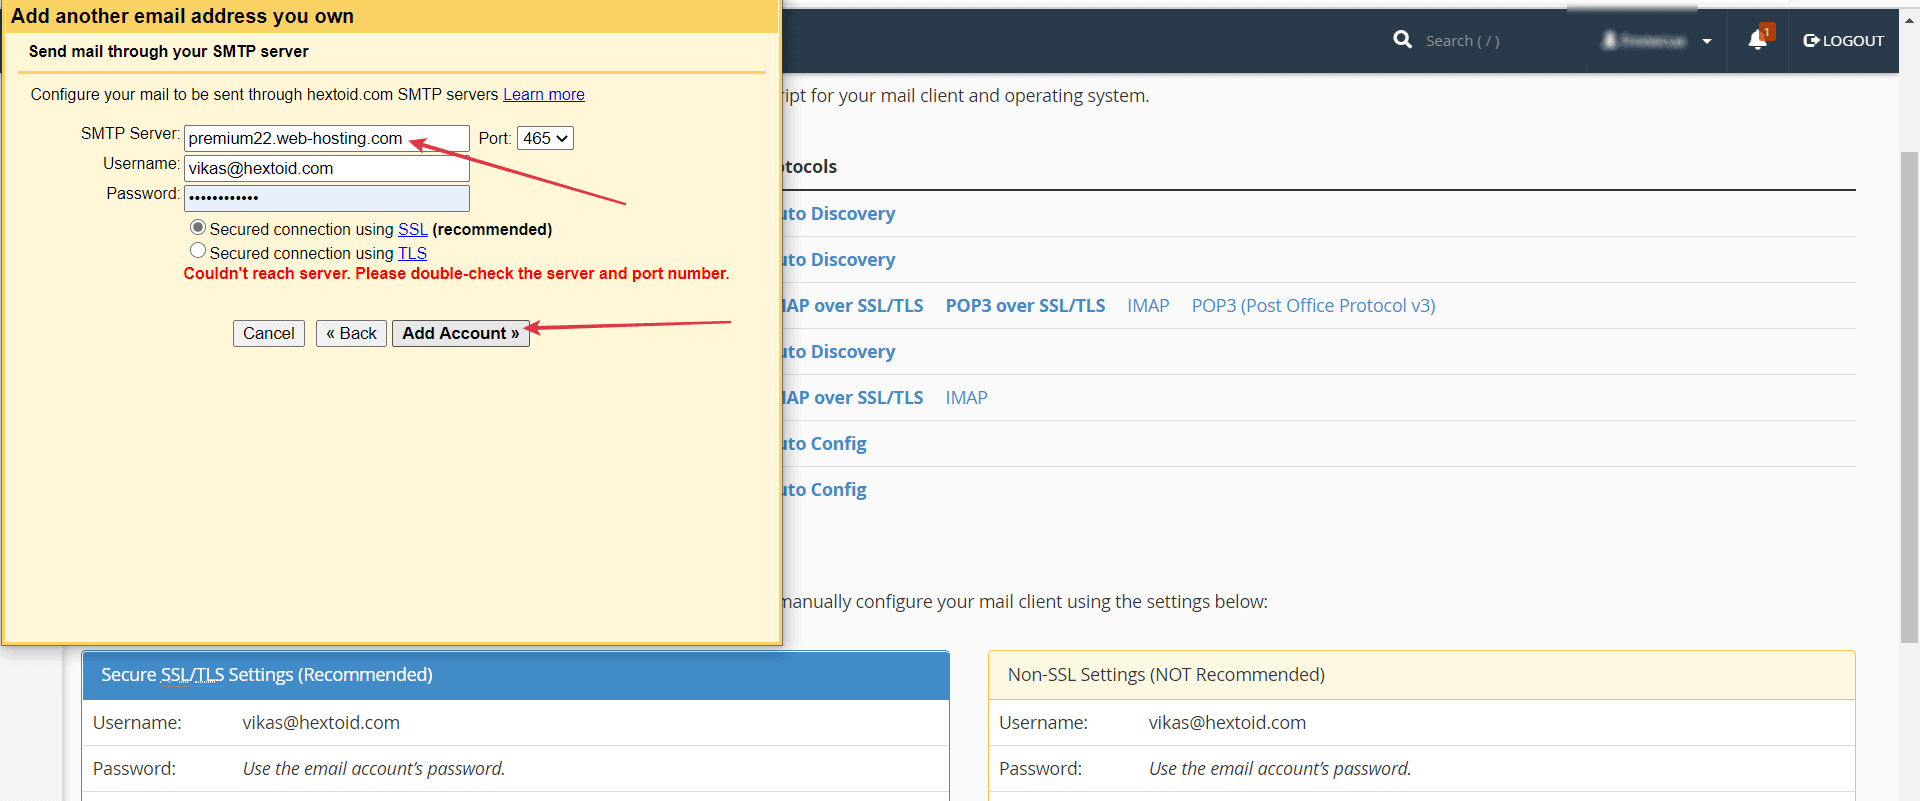
- Enter the SMTP Server > Choose Port > In Username Enter newly created custom email > In password type the password of custom email that you created
- Check the Secured connection using SSL > Click Add Account

- Here we got an error describing “Couldn’t reach server. Please double-check the server and port number.”
- This error is Occurring because I’m using Cloudflare on my site
- And I discovered the solution of this error after a short talk with my hosting support team.
- Here are the screenshots of the chat with Namecheap support team
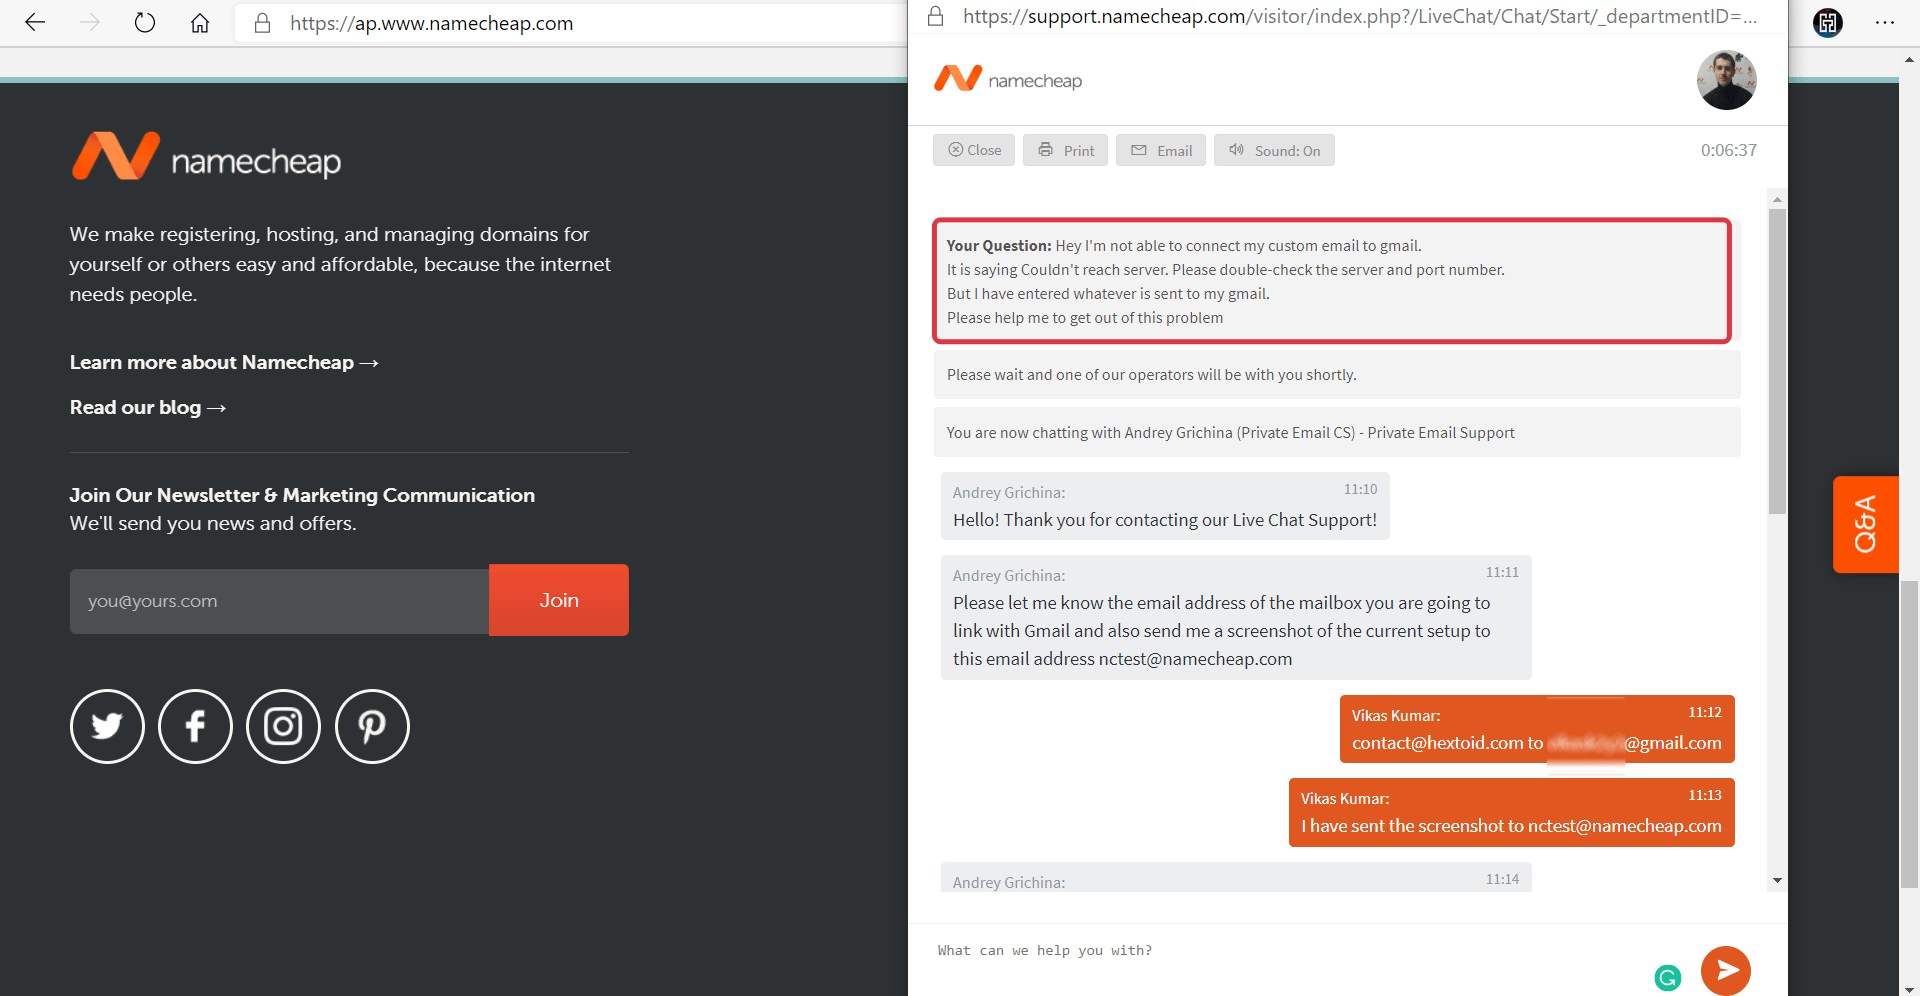
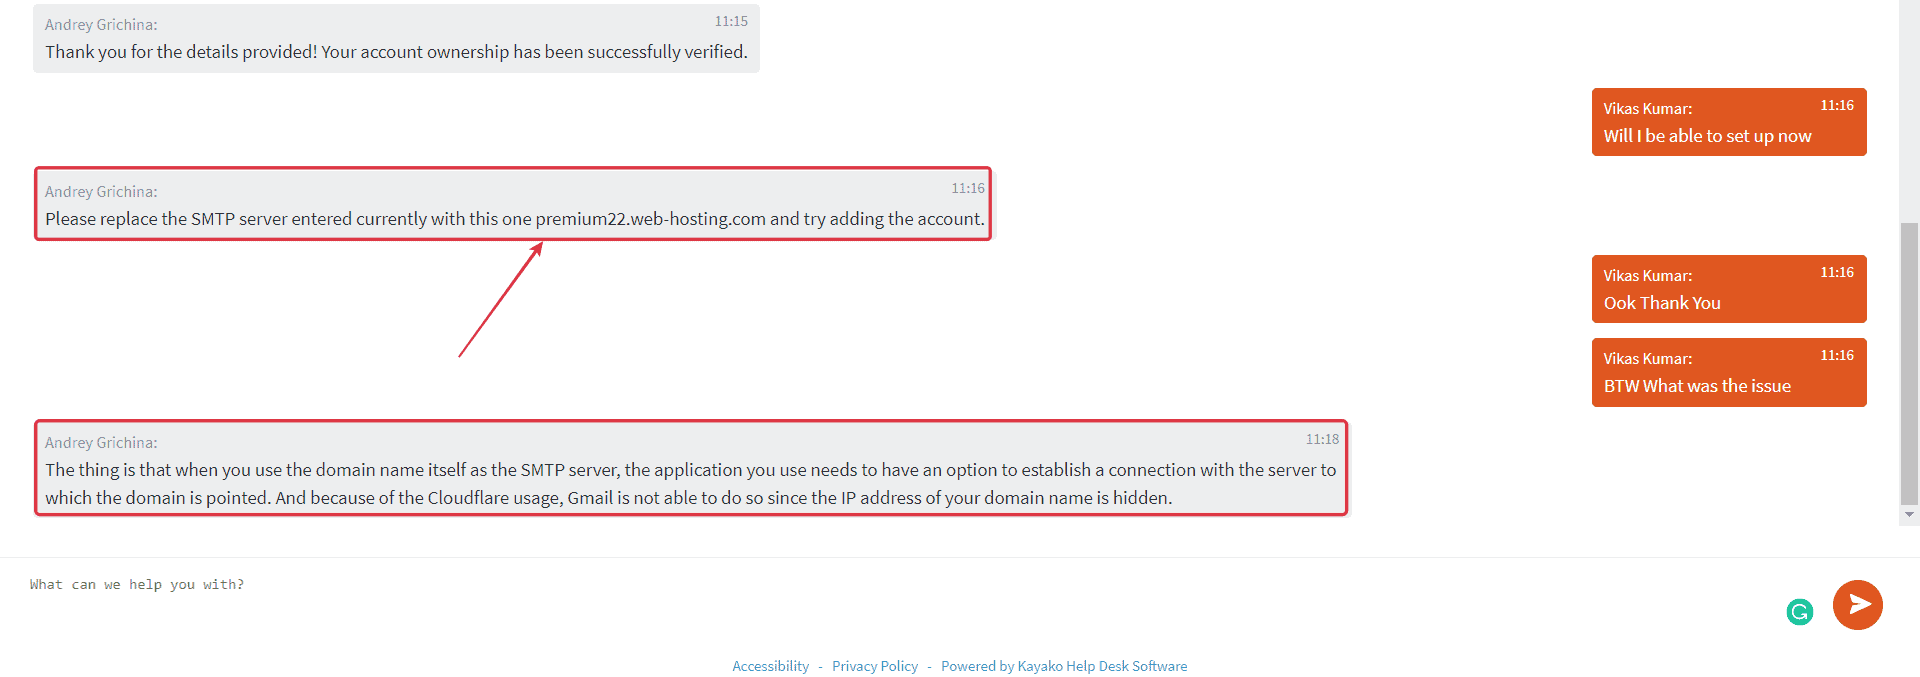
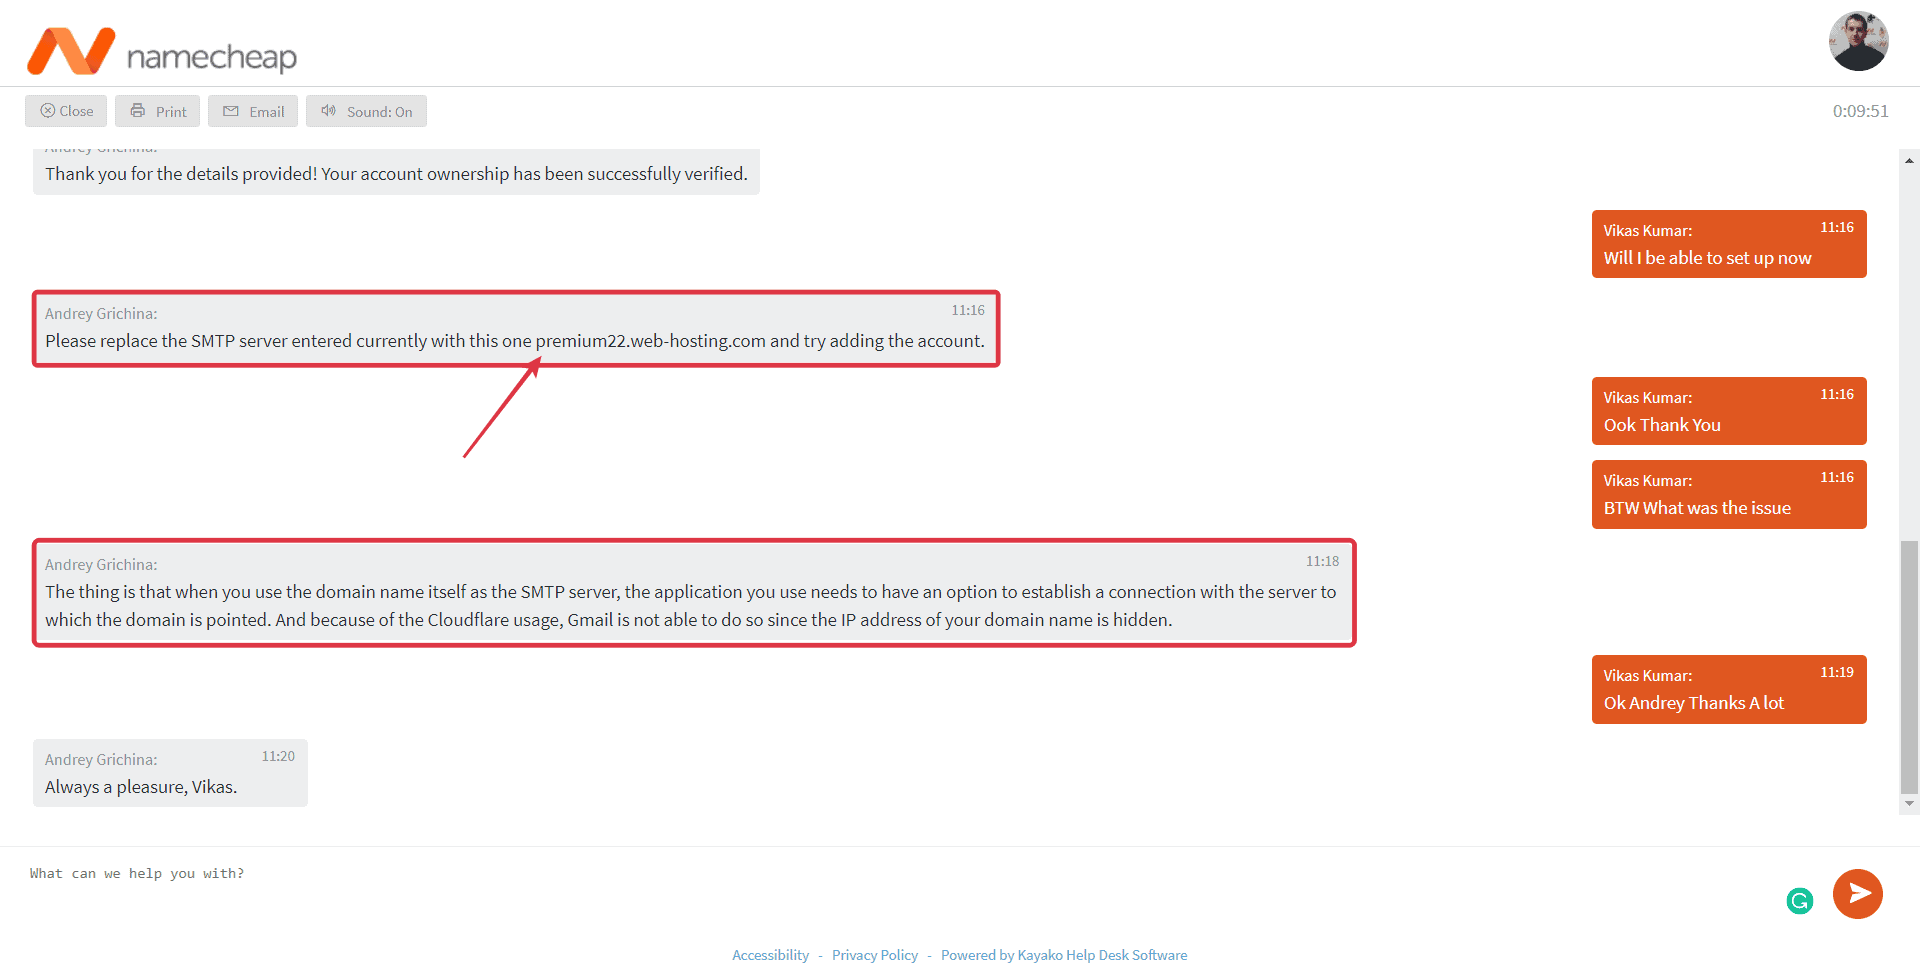
- They asked me to change the SMTP server with the provided SMTP server that is “premium22.web-hosting.com”
- If you are using Cloudflare for your site and your hosting is different then the SMTP server might not be same as mine. So it would be better to get in touch with your service provider.
In the chat support team also elaborated why the error occurred “The thing is that when you use the domain name itself as the SMTP server, the application you use needs to have an option to establish a connection with the server to which the domain is pointed. And because of the Cloudflare usage, Gmail is not able to do so since the IP address of your domain name is hidden.“
- Change the SMTP Server address with your SMTP Server provided by your hosting provider
- Click Add Account
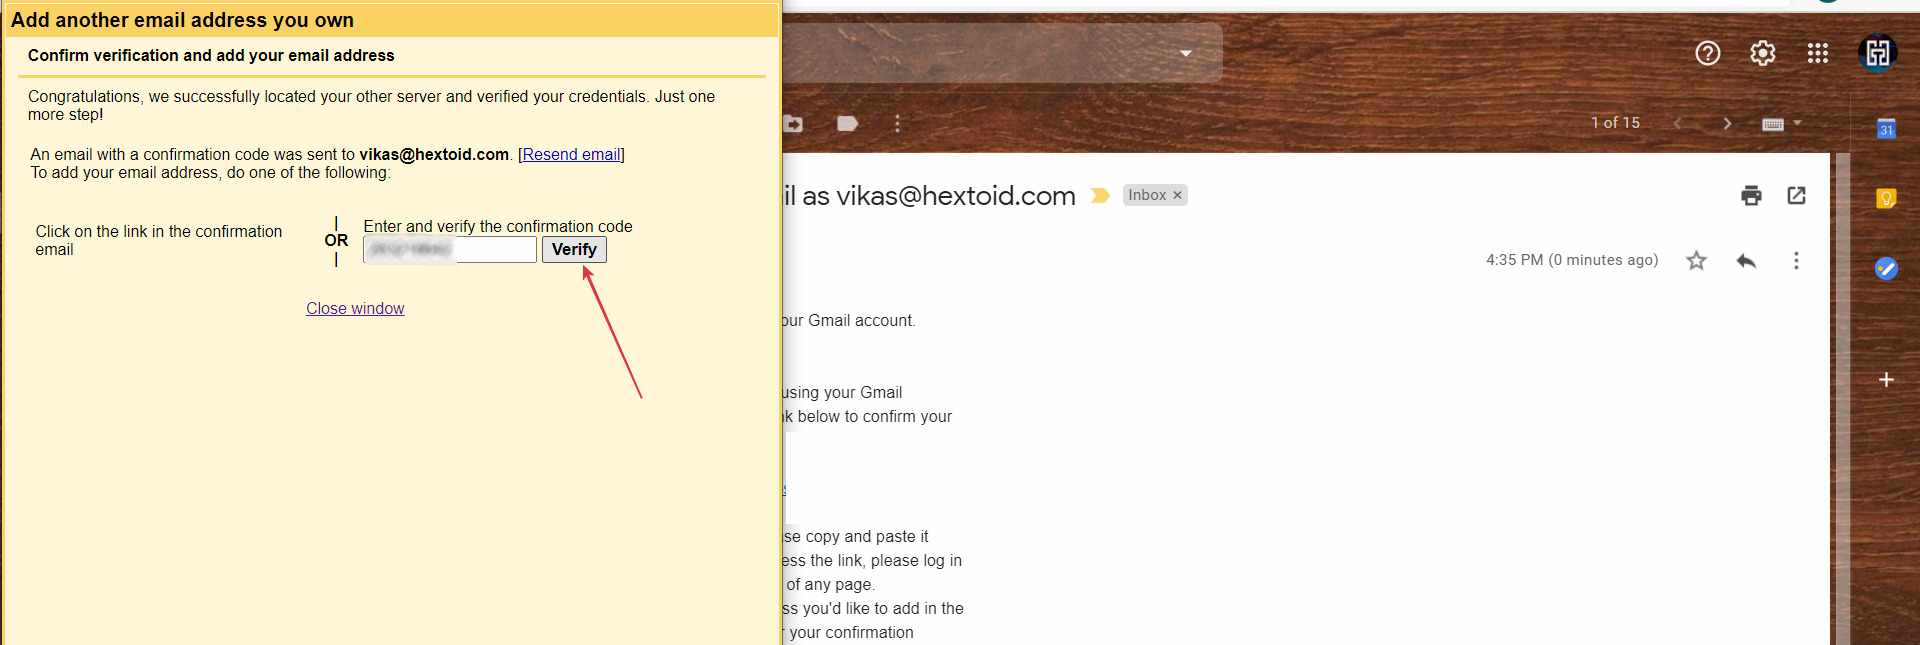
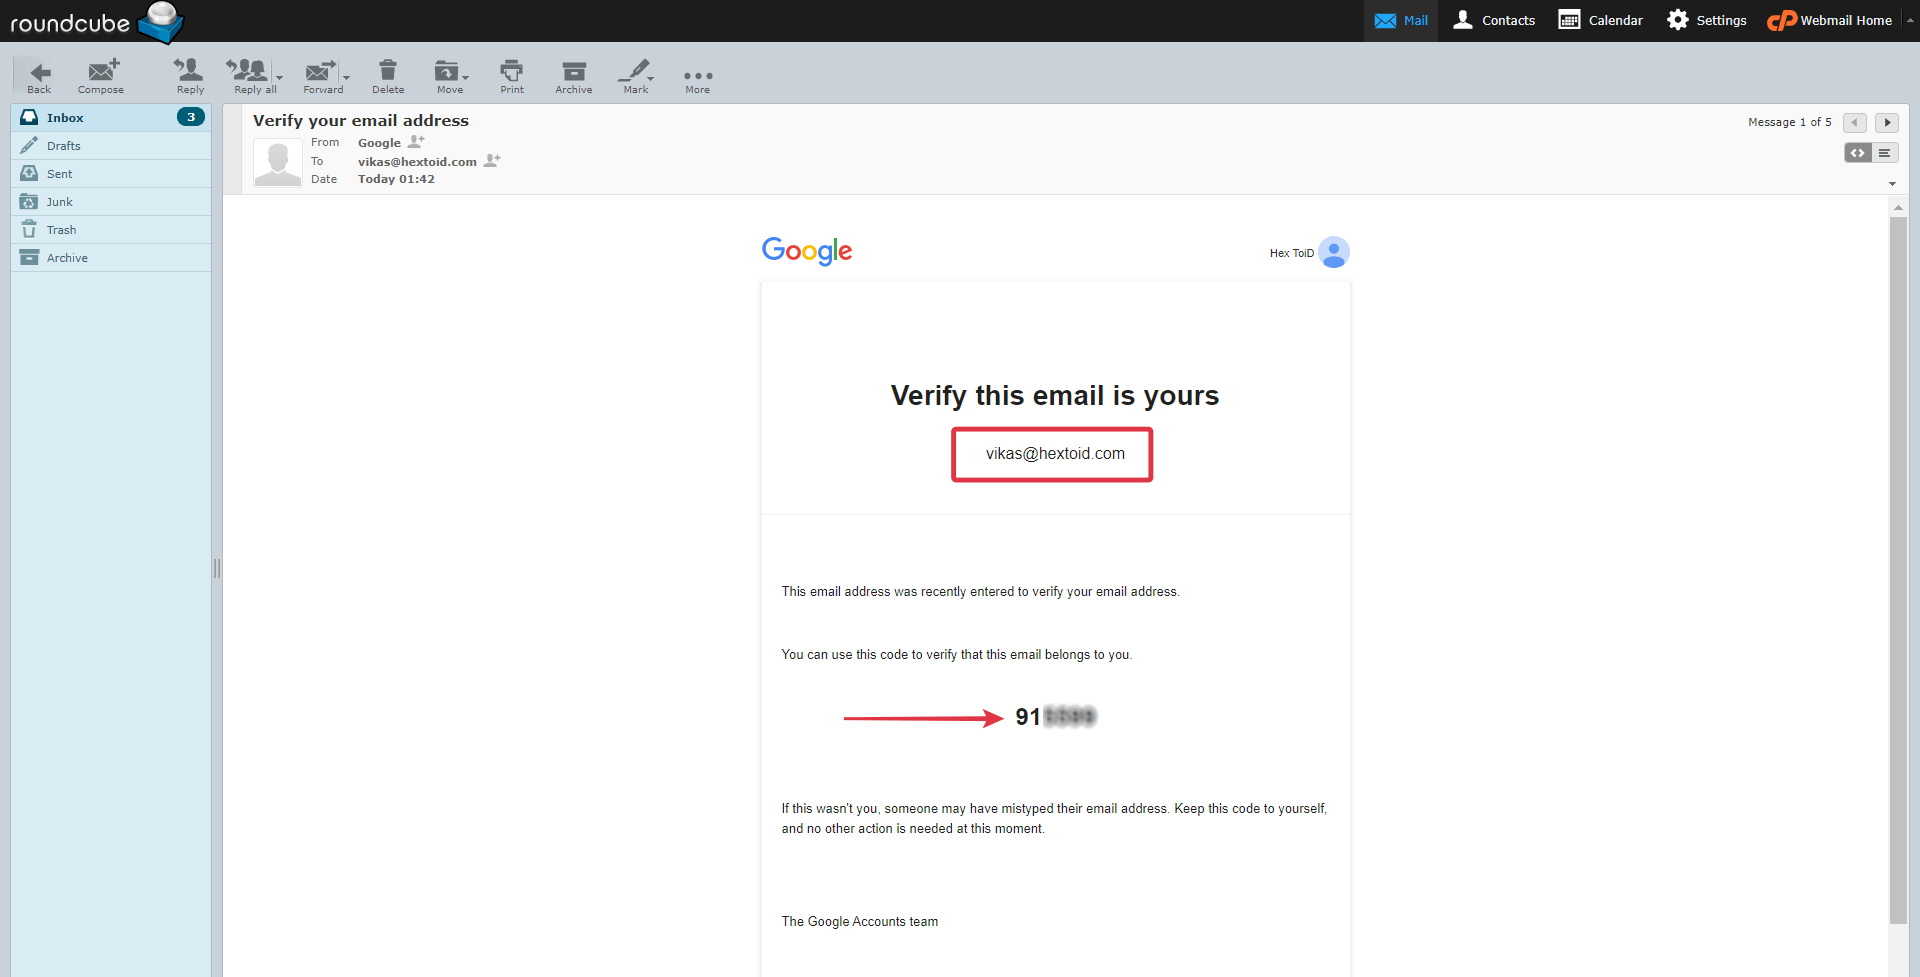
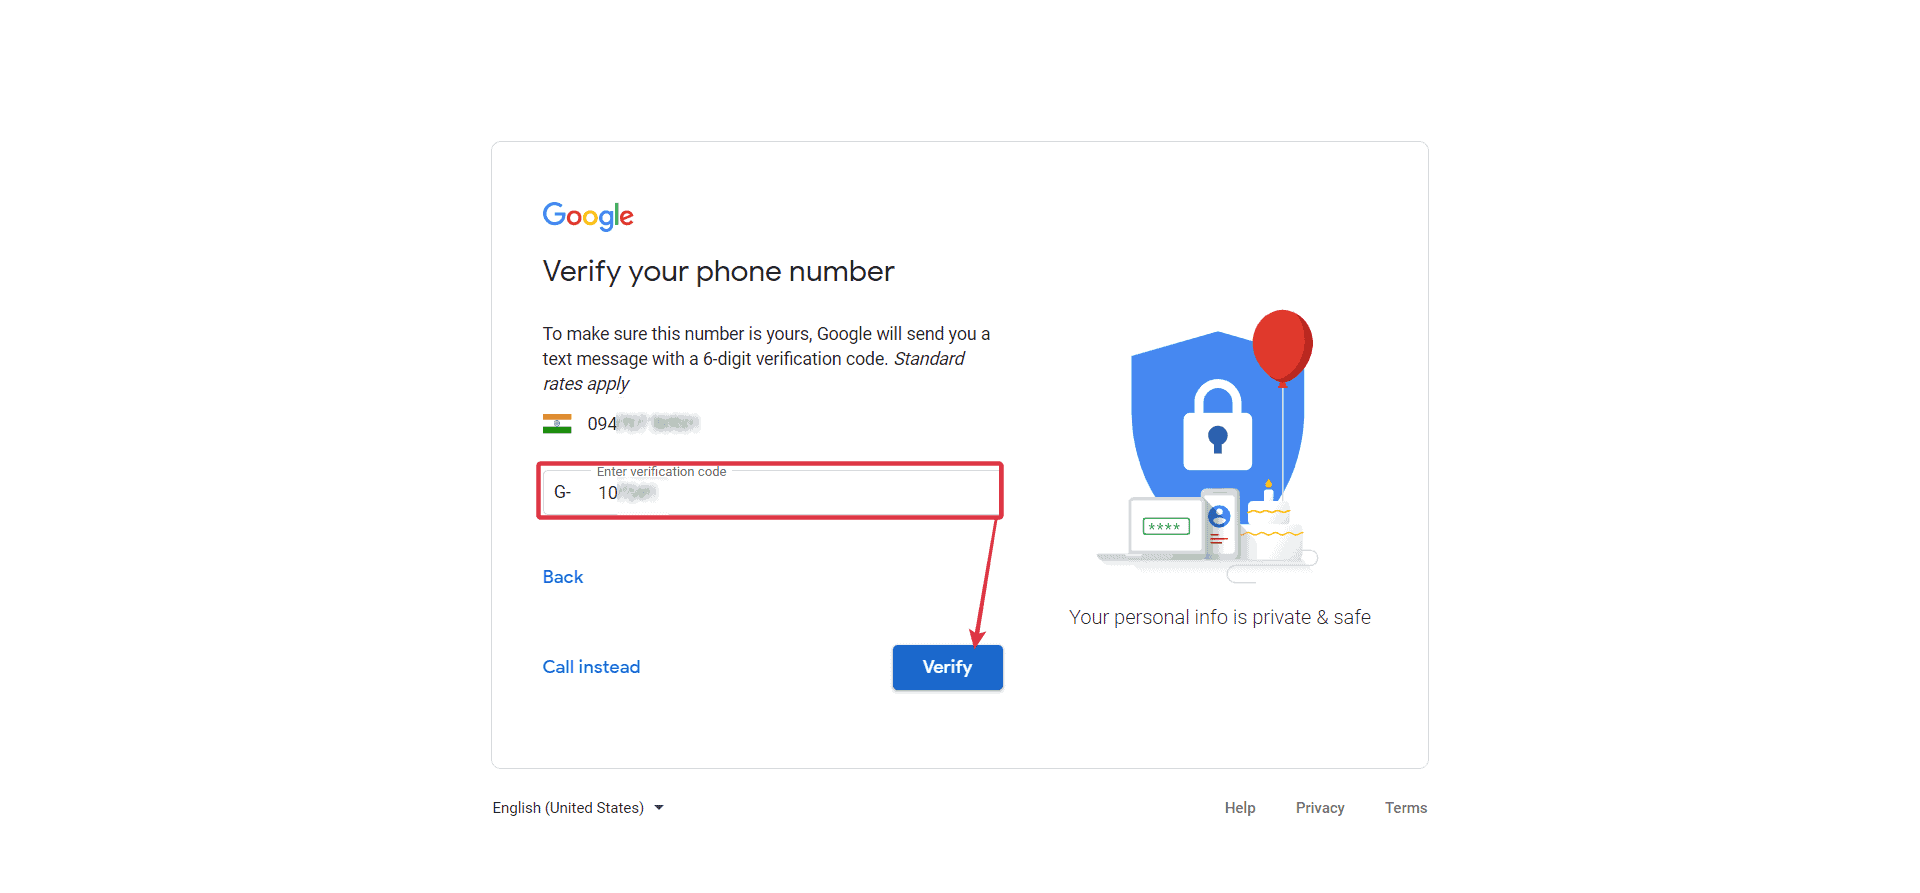
- A verification code has been sent to your custom email address as we have already done the email forwarder setup so we can get the confirmation from Gmail
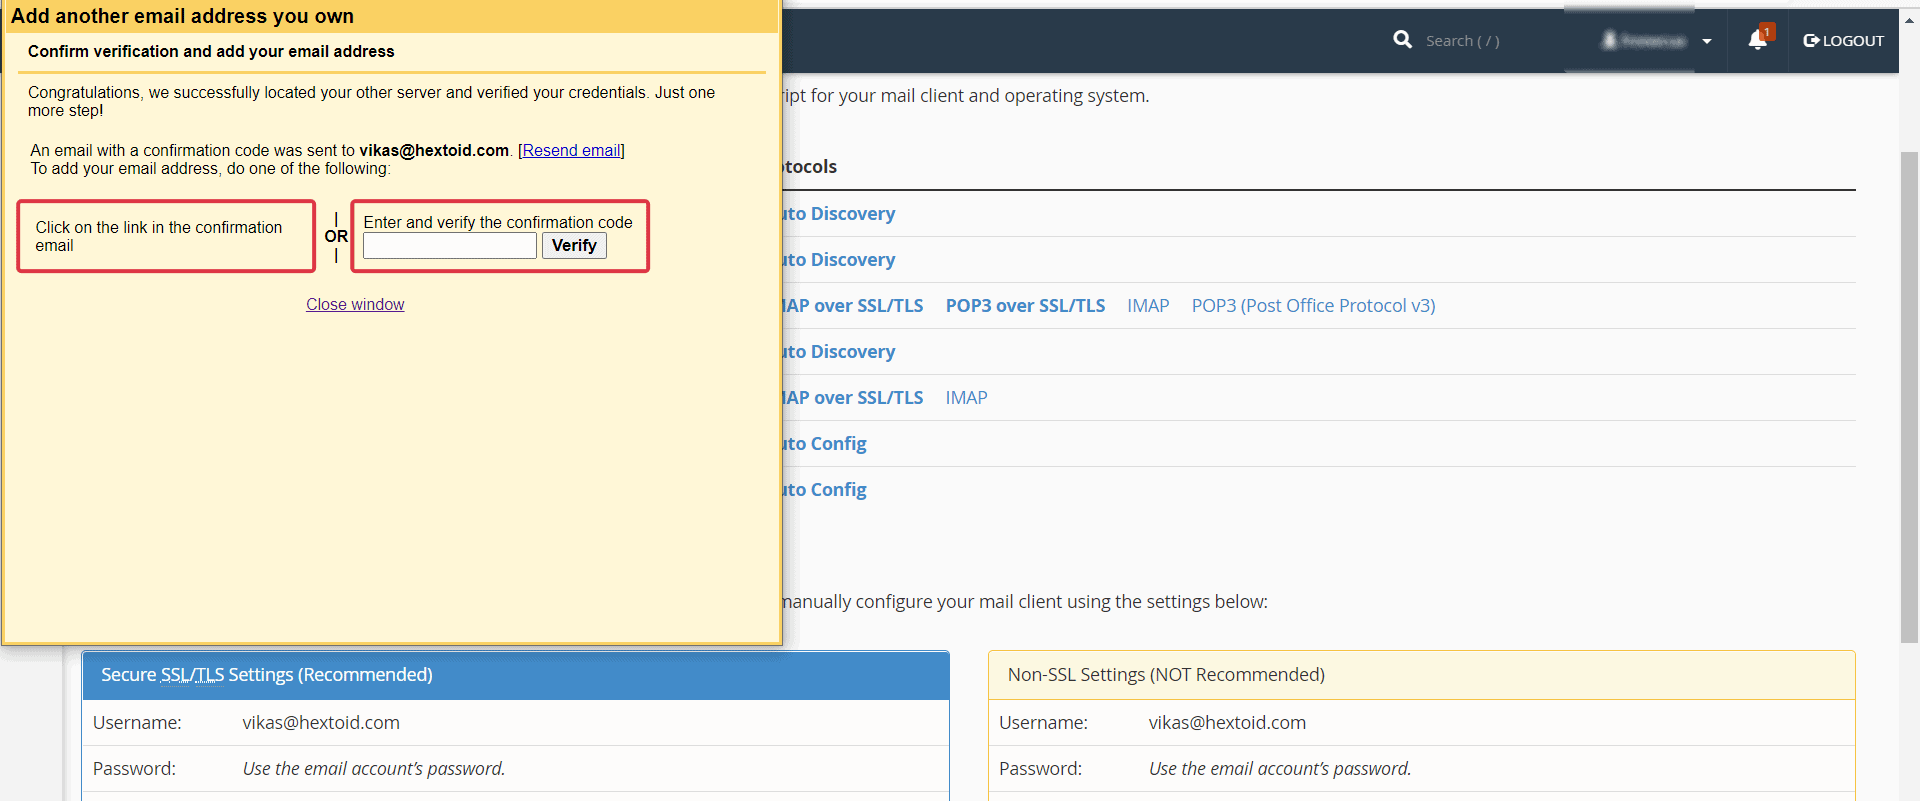
- In the first para arrow denoting the confirmation code that you have to enter in that box.
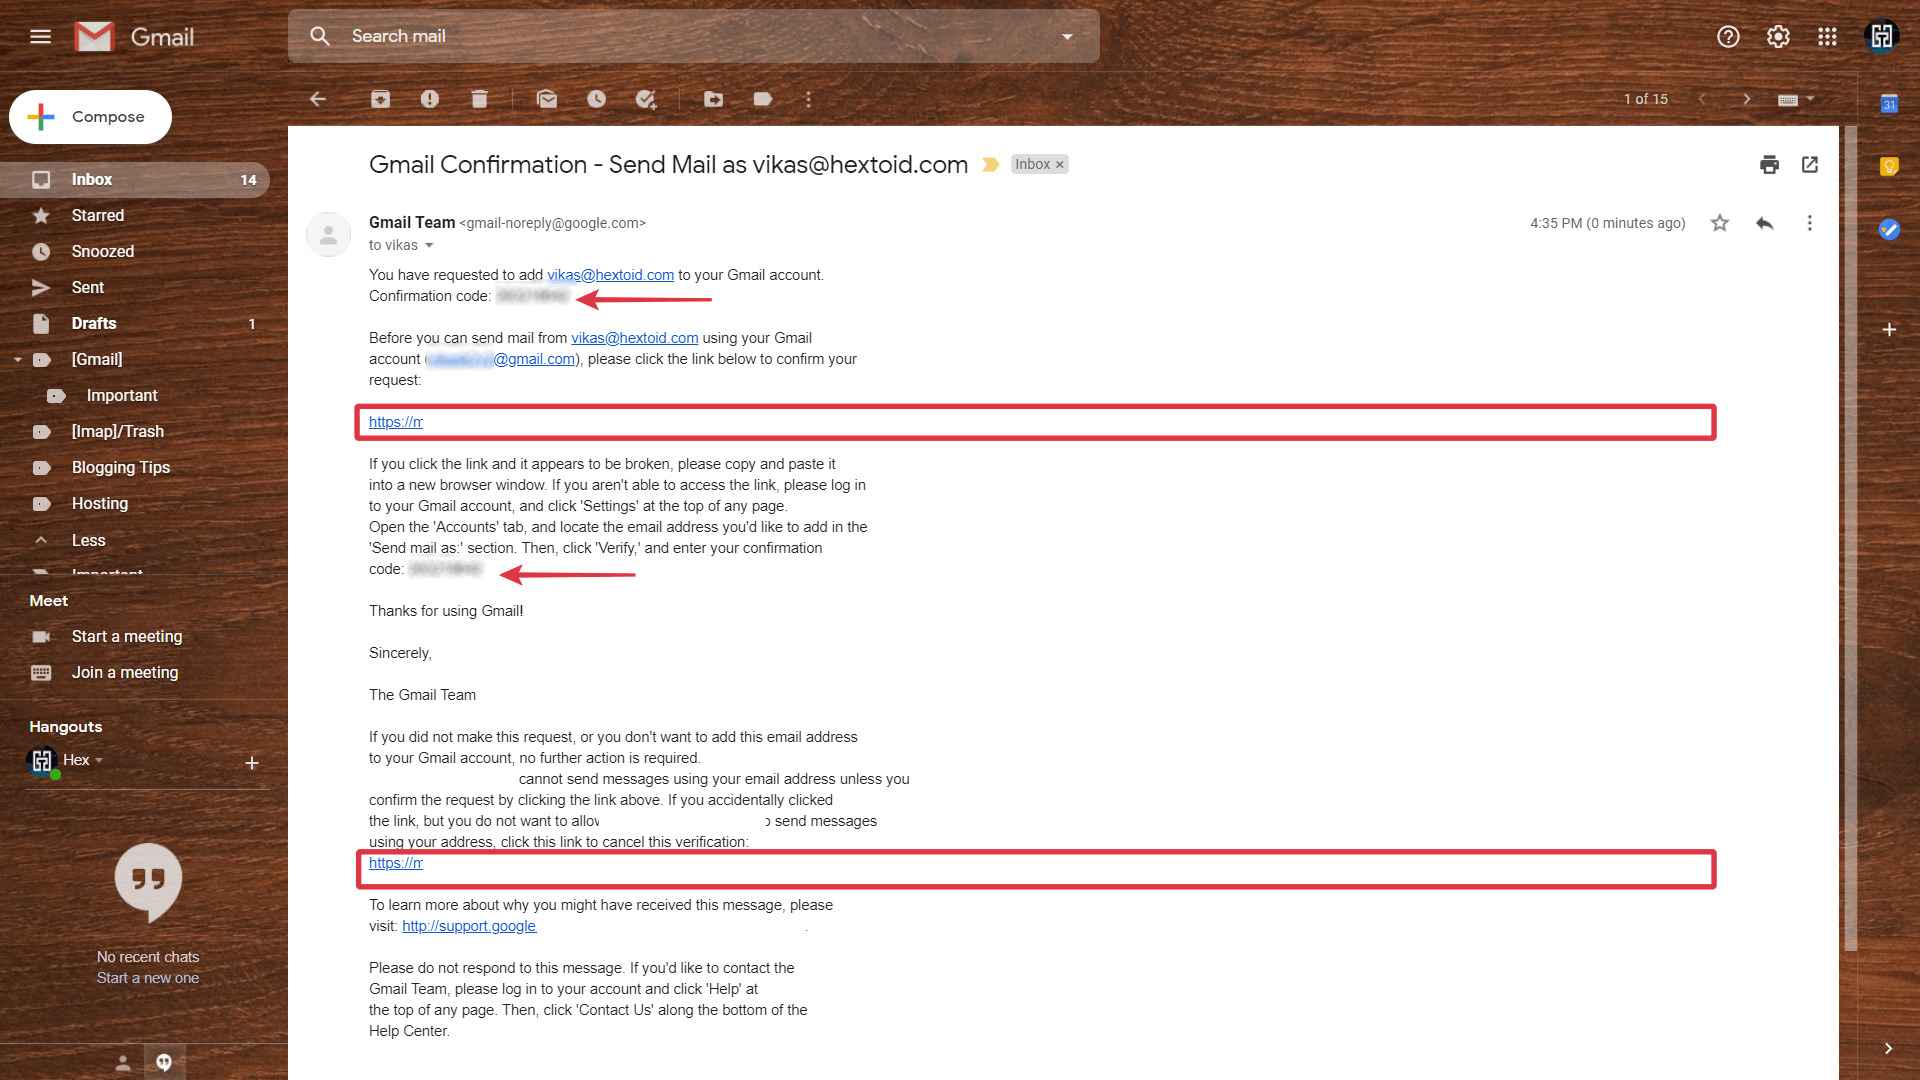
- Enter the Verification Code and click Verify to finish the Setup procedure
Congrats! You have successfully completed the email setup with Gmail to send and receive all the emails at Gmail.
Now, let’s test how it is working.
Sending Email Using Gmail With Custom Email
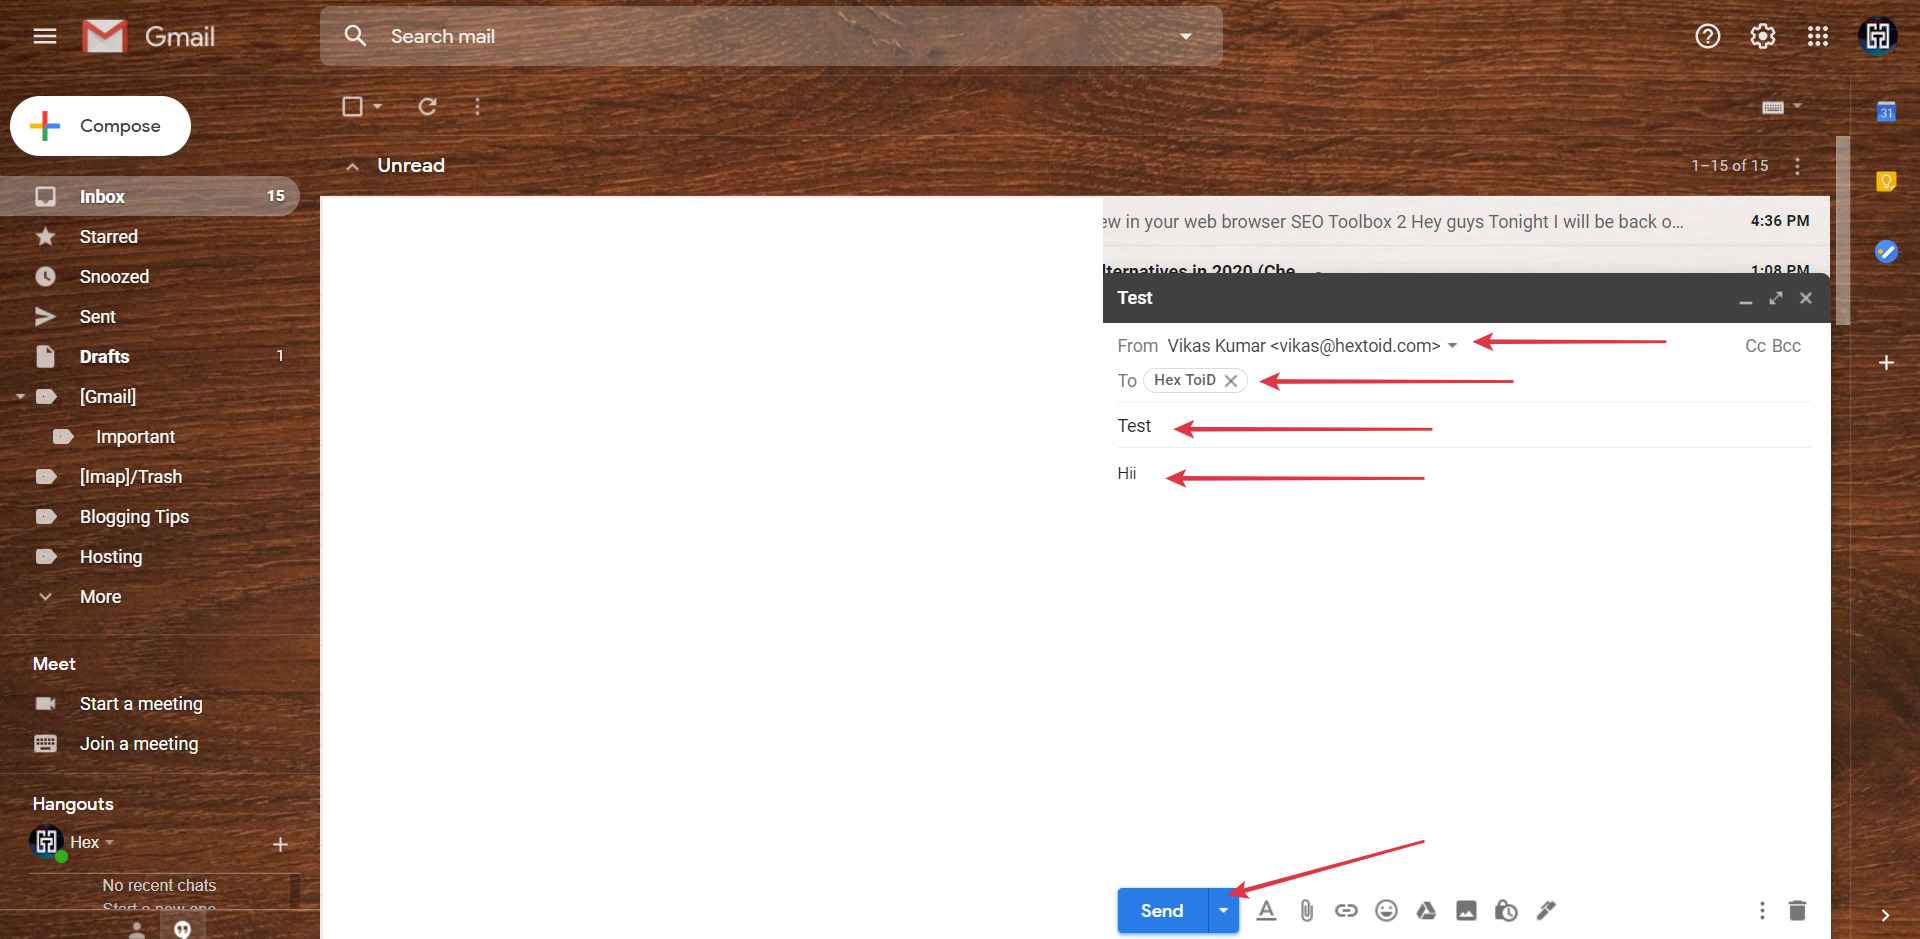
- Gmail > Click Compose
- In the from section on the drop down arrow and choose the custom email
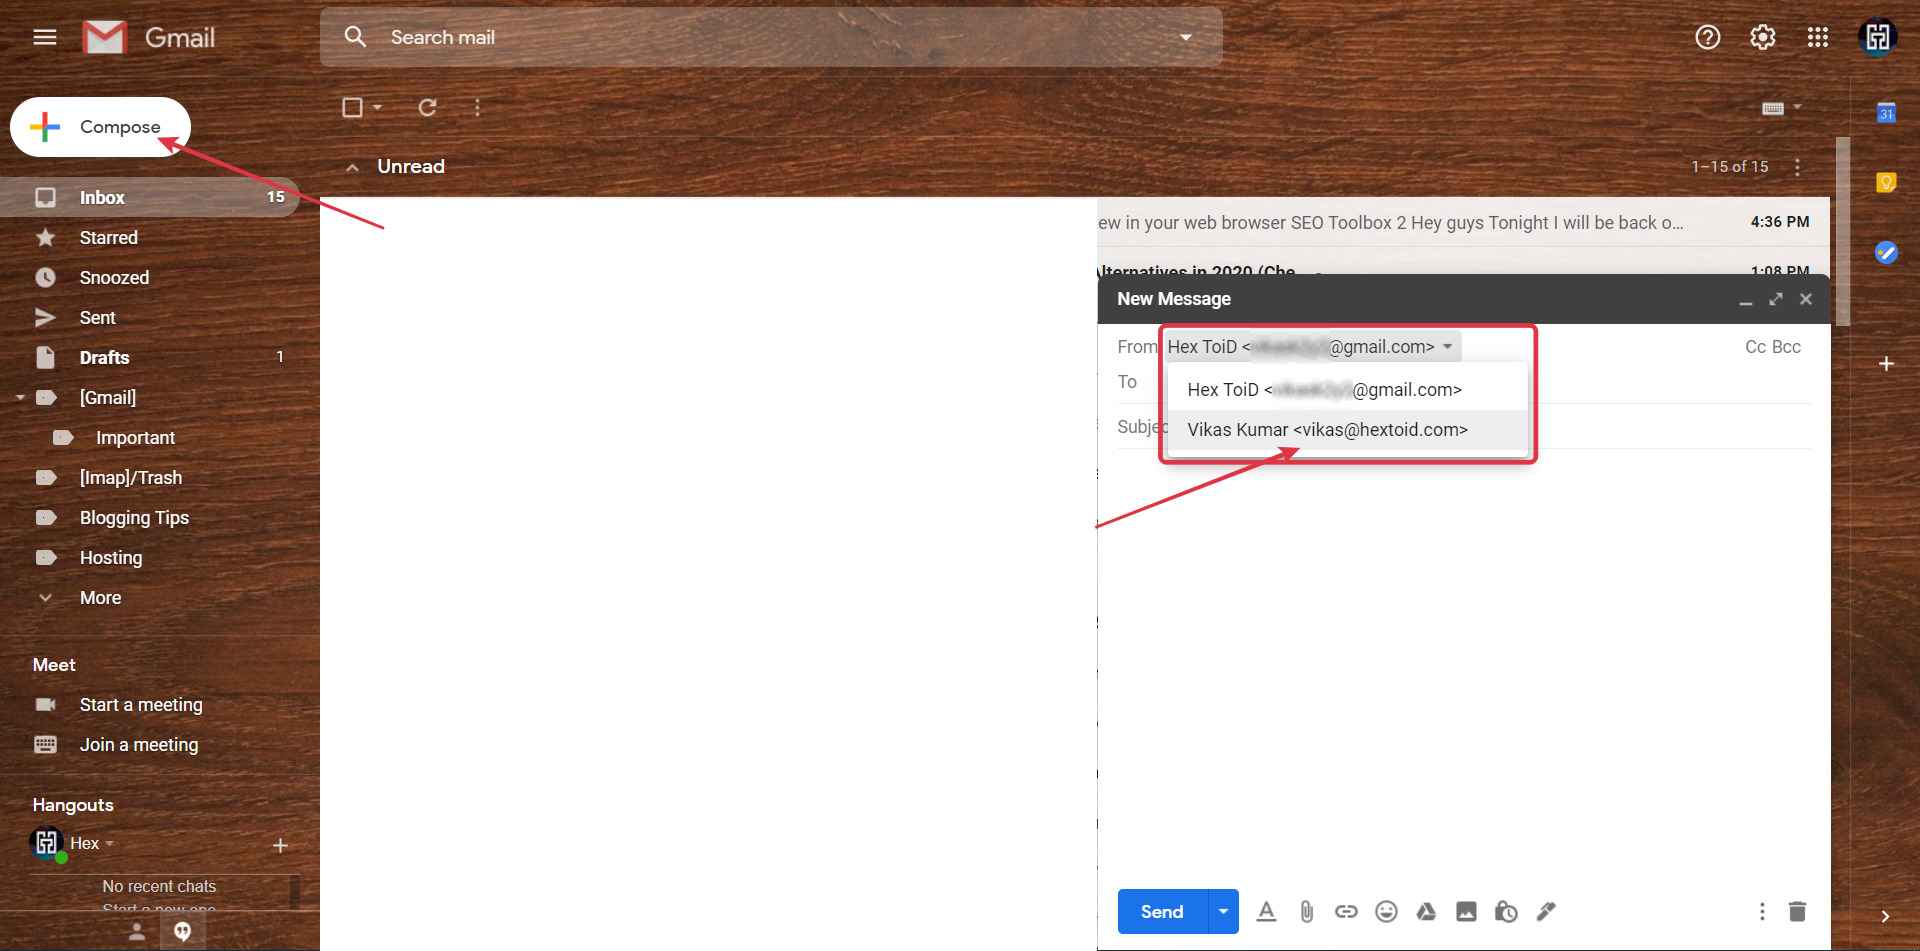
- Enter Receiver address > Subject > Message > Hit Send
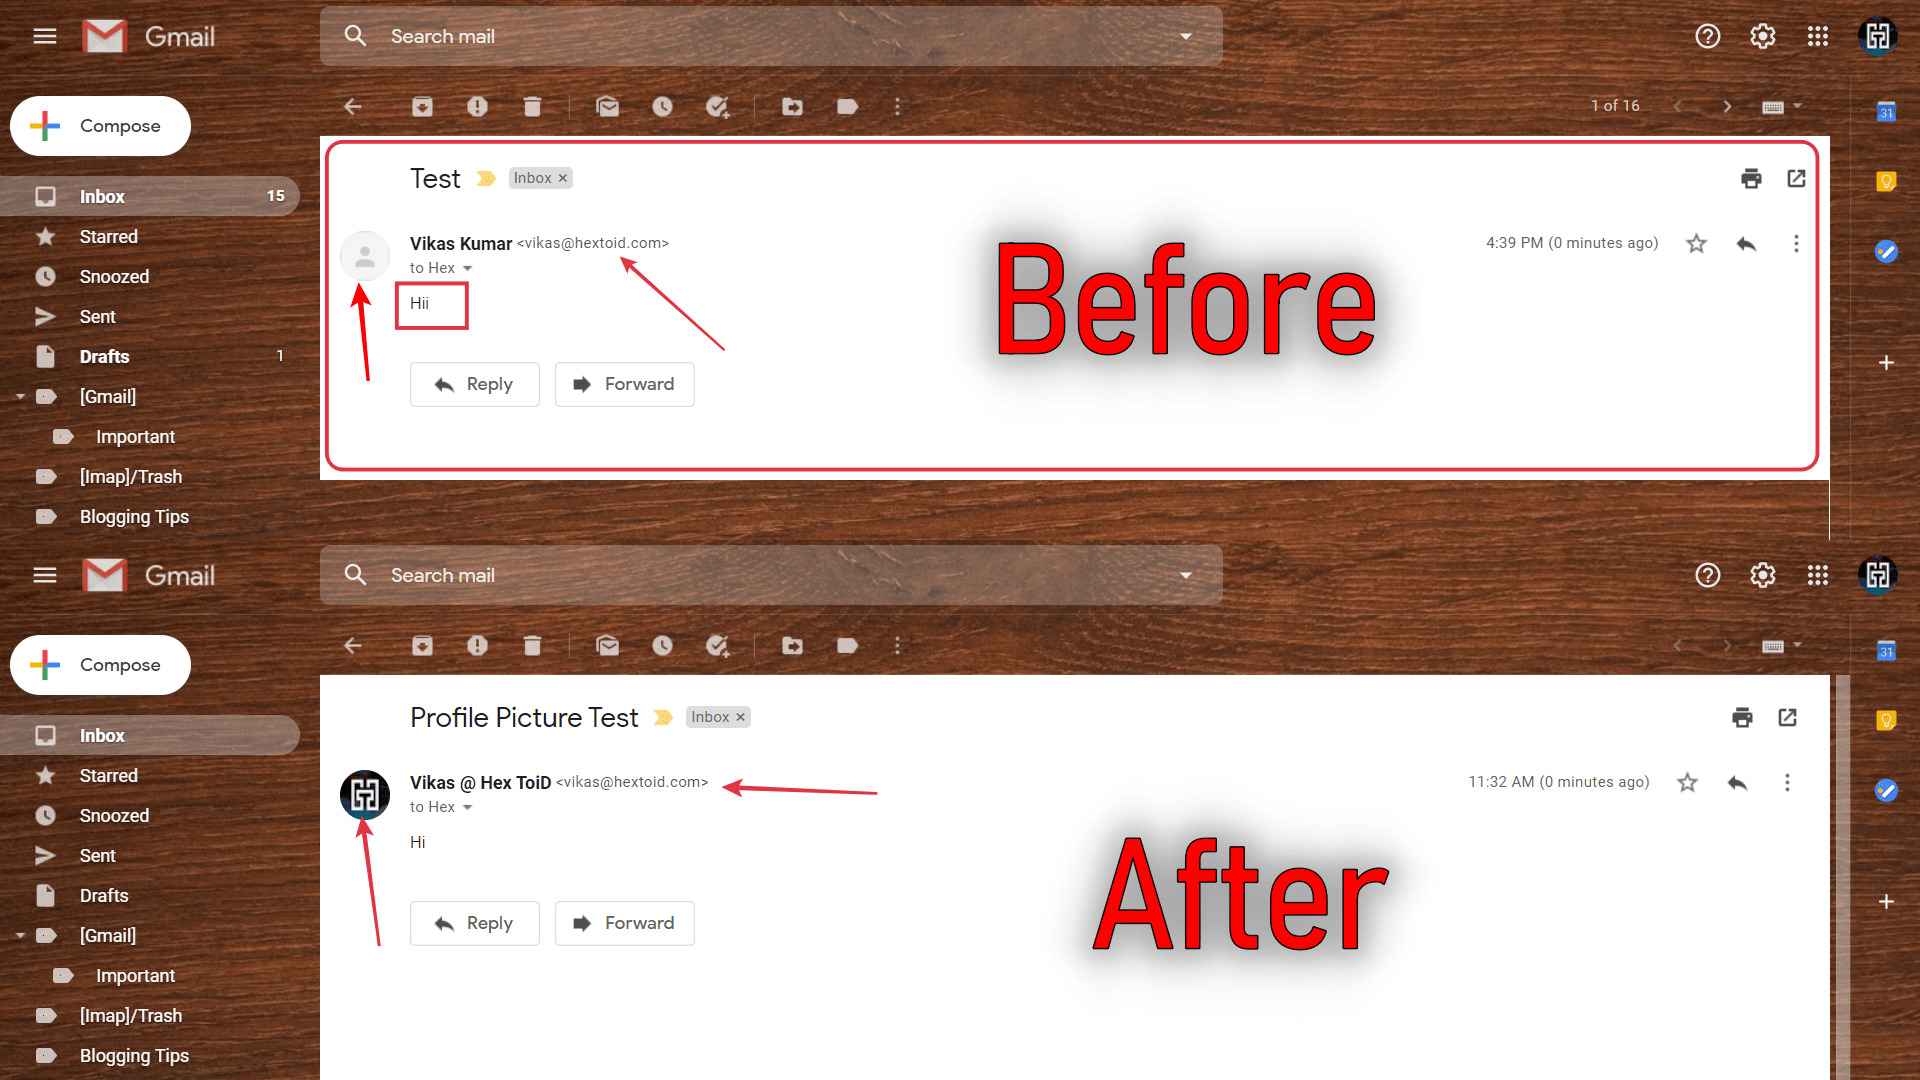
- As you can see we have got the email in Gmail from the custom email

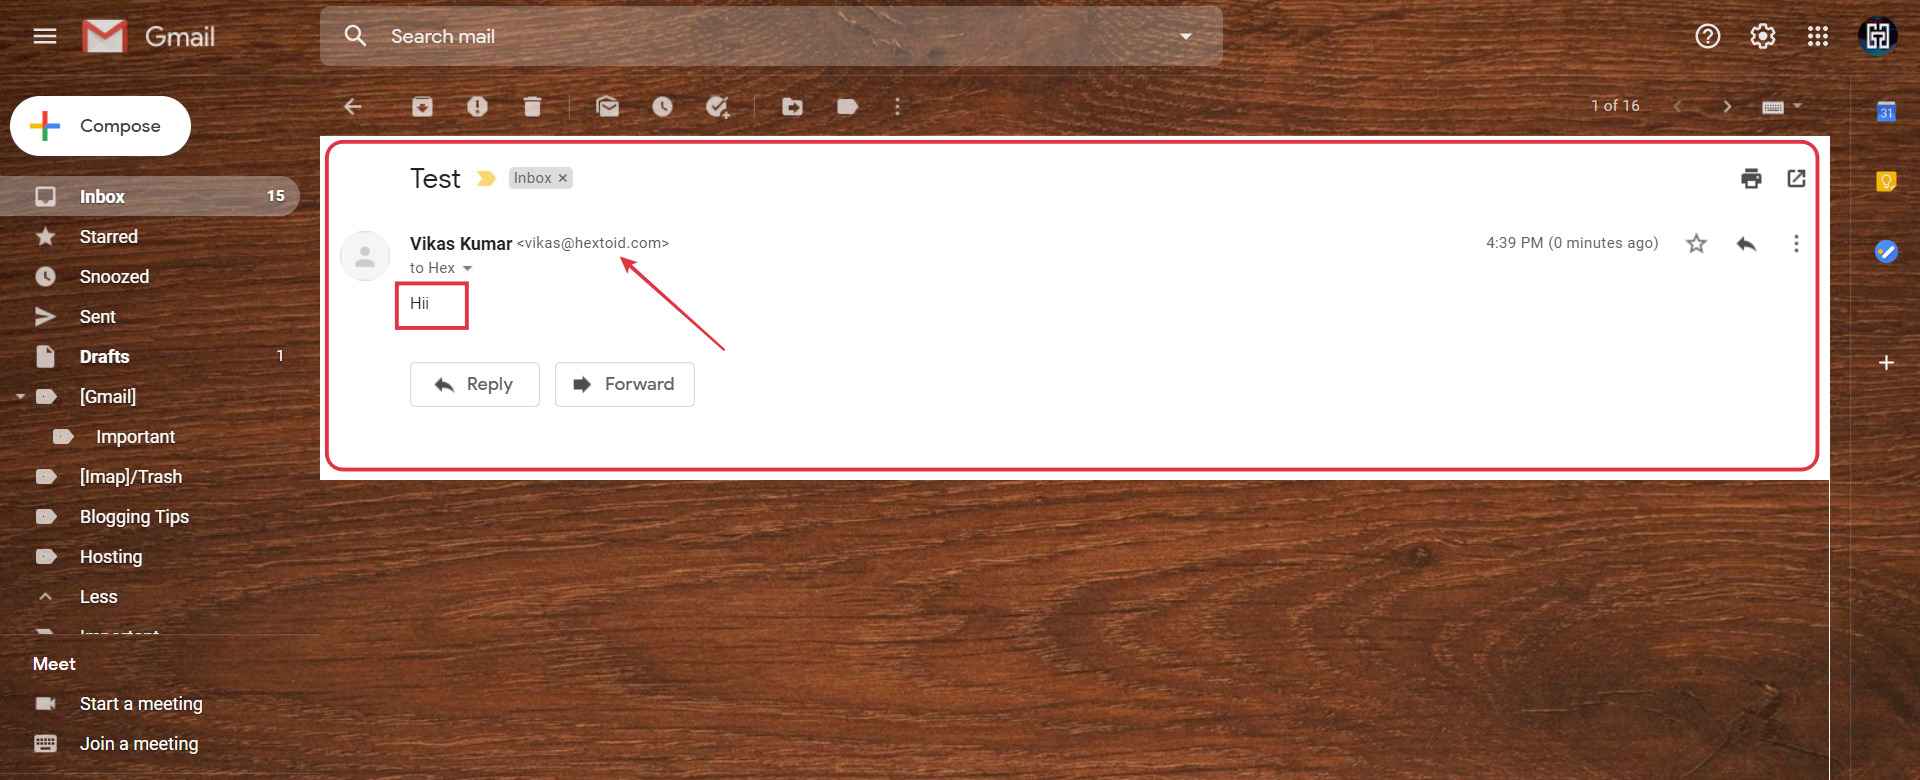
In almost every business email their brand logo or profile photo is available and as we can see in the above email there is no any logo or profile photo.
Let’s setup the profile photo in the custom email
How To Set Profile Picture In Custom Email?
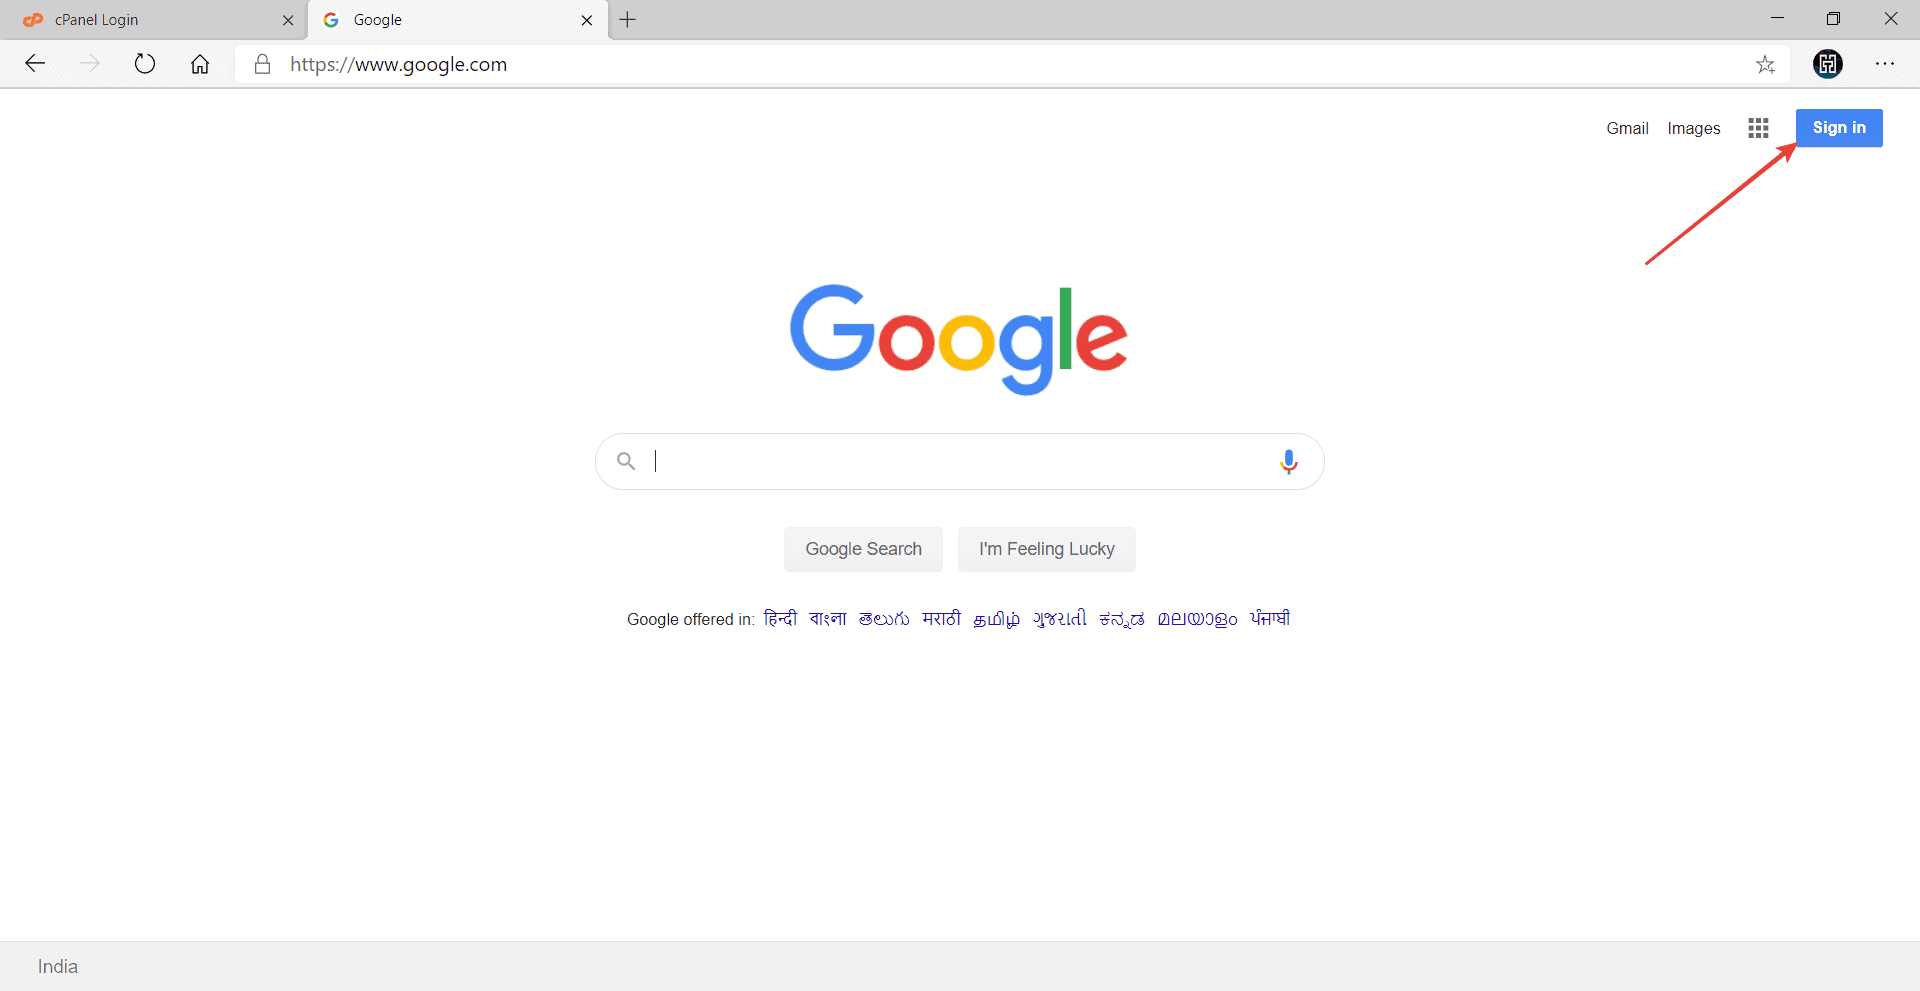
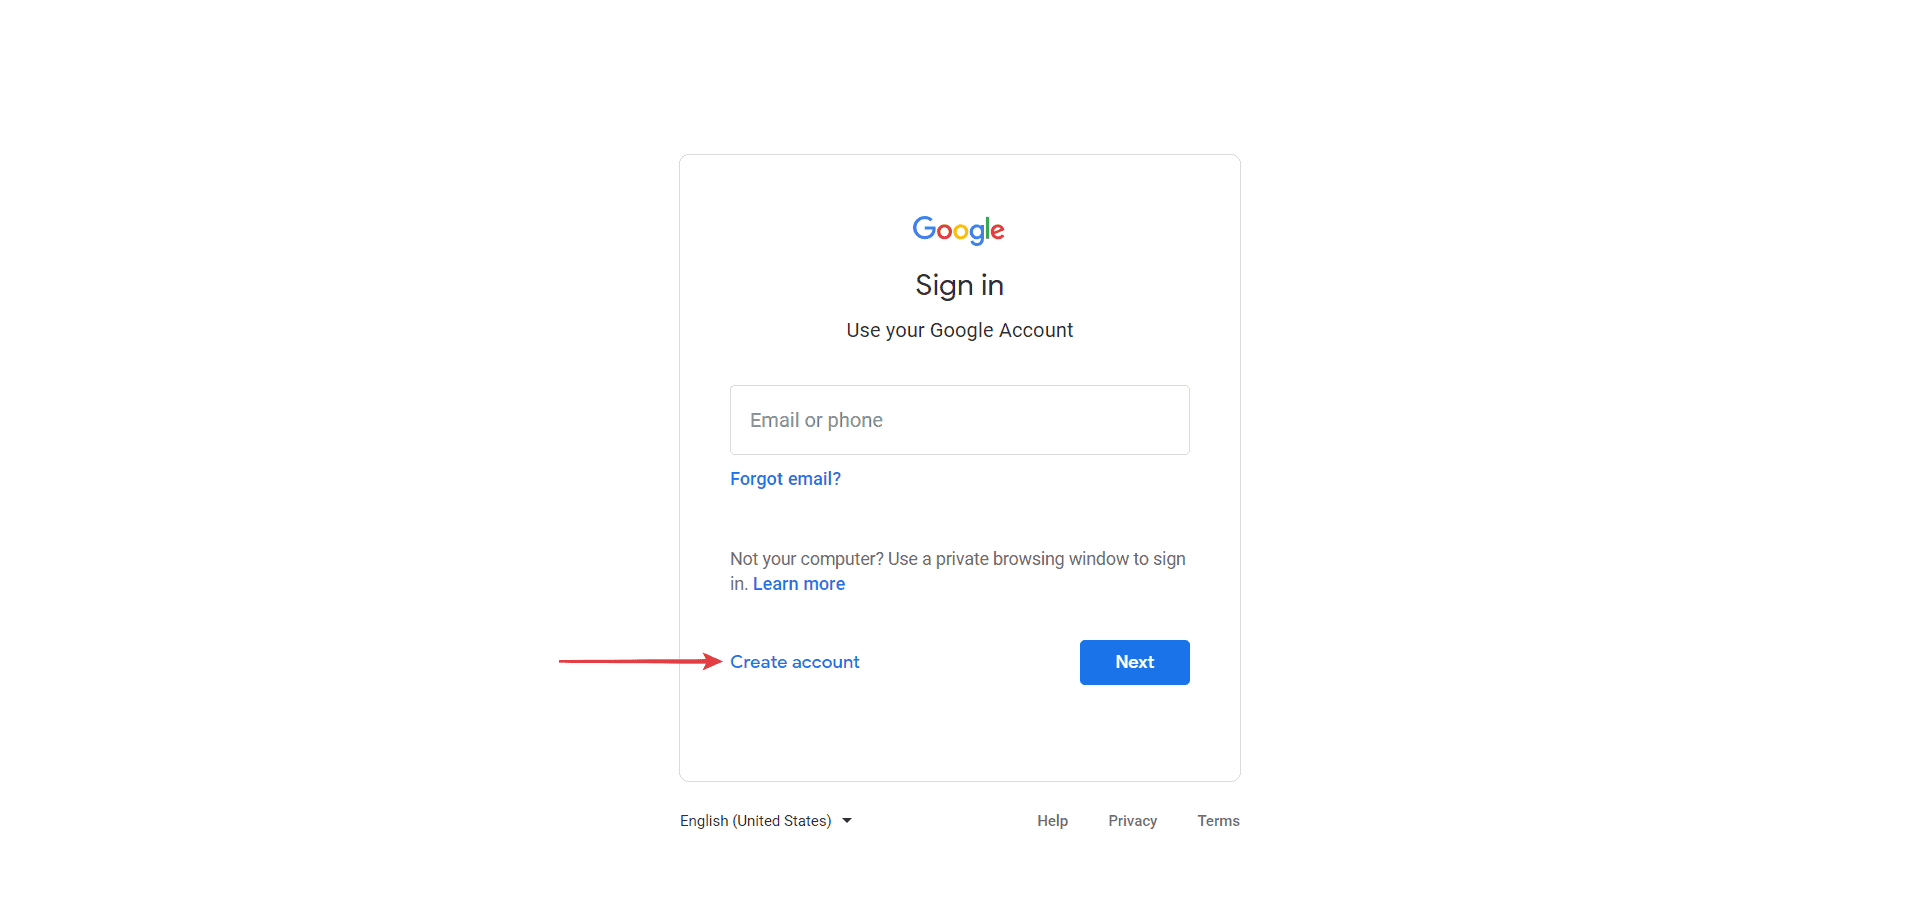
- Log out all your Gmail account if you are already signed in with a existing Gmail
- Go to https://www.google.com > Click Sign in
- Click Use another account

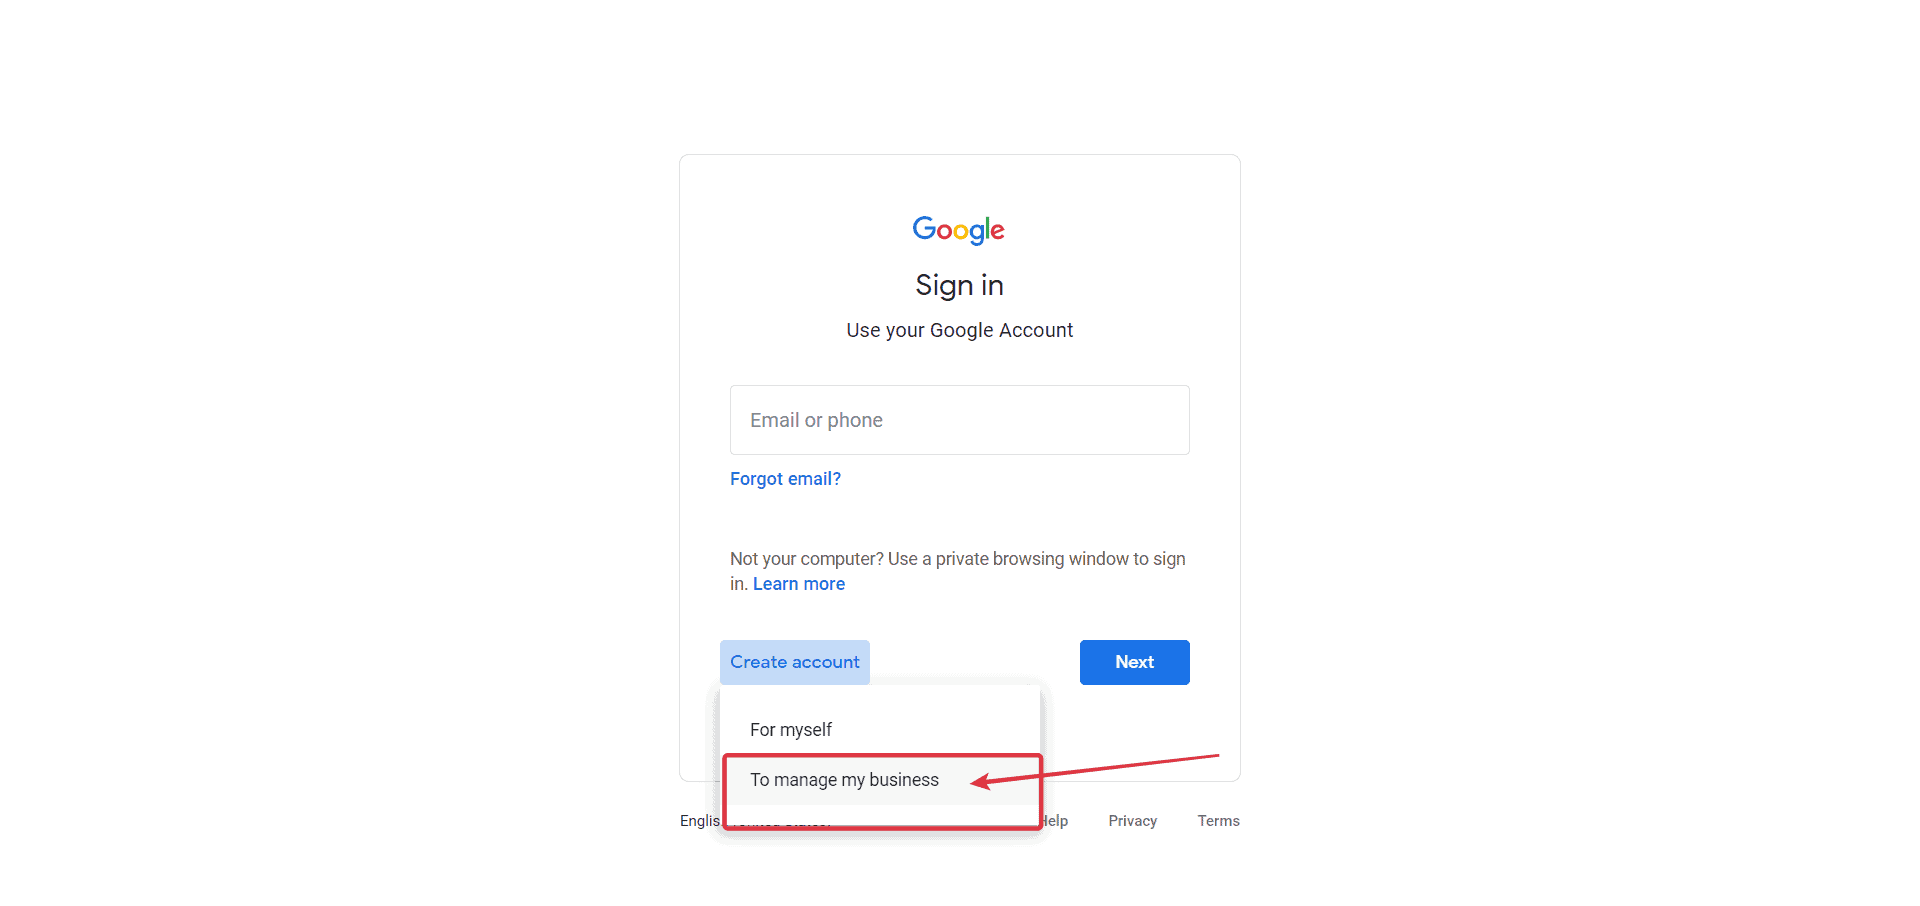
- Hover/Click Create account
- Click on To manage my business
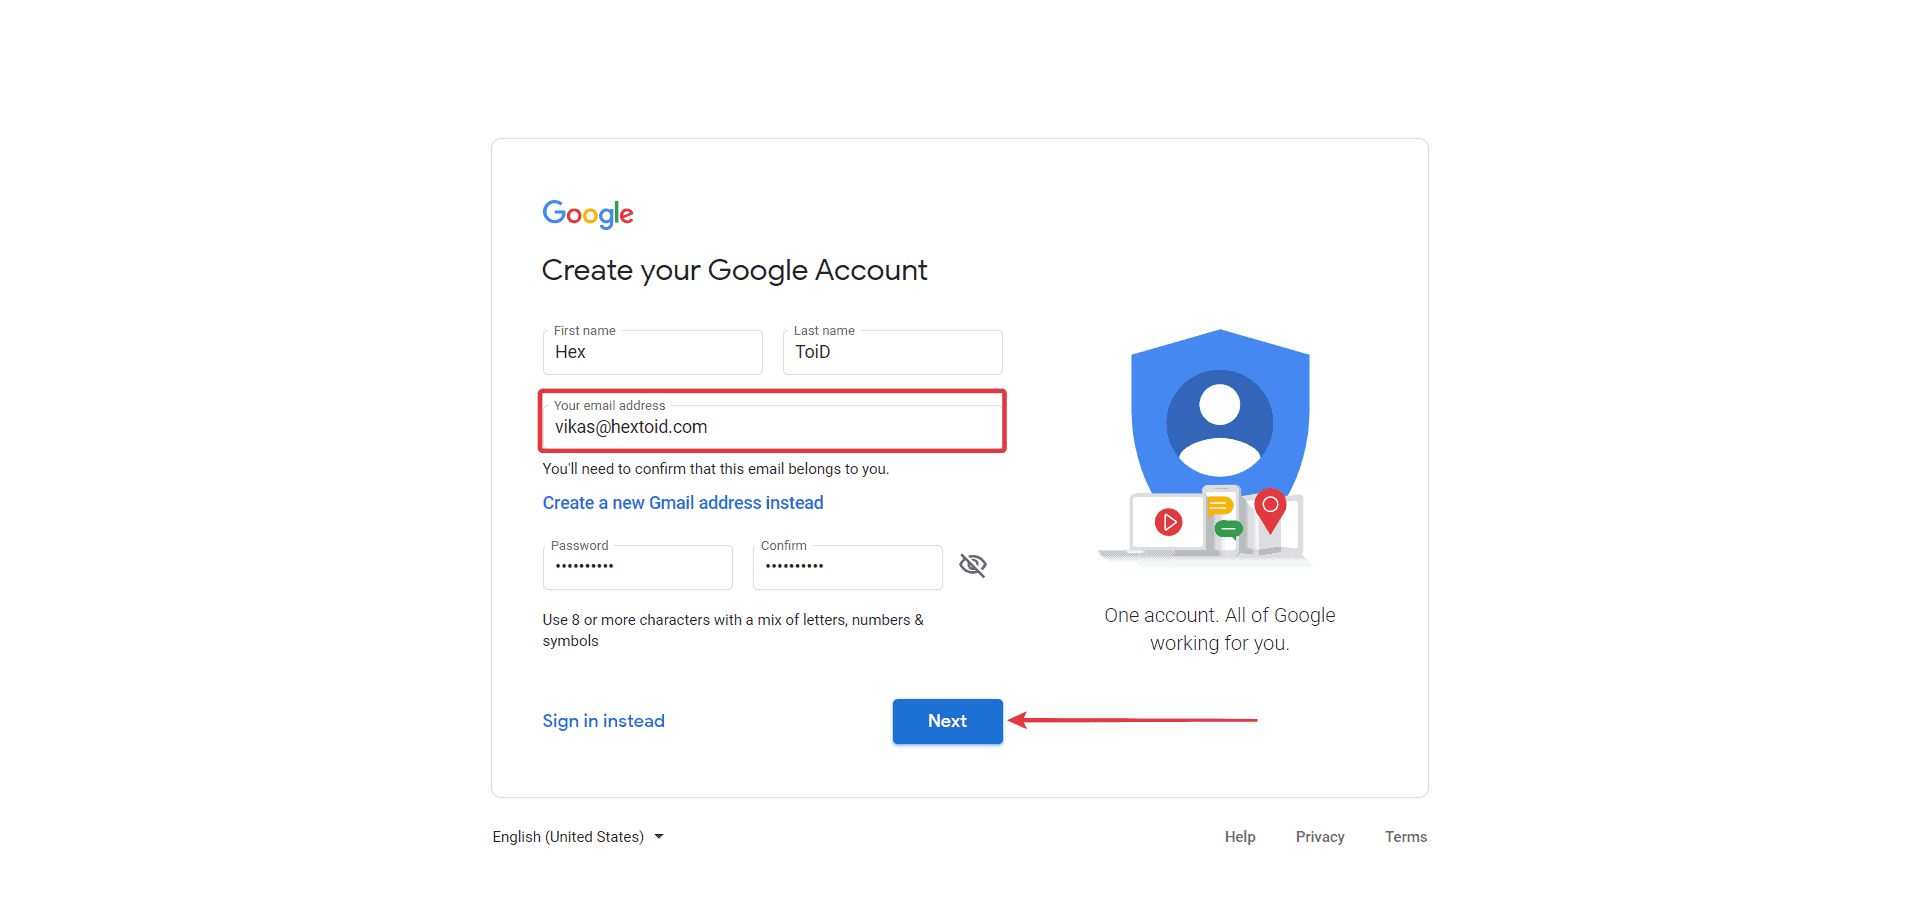
- Click on Use my current email address instead

- Fill the details and your custom newly created email
- Here you can enter any new password (This is to login in Google)
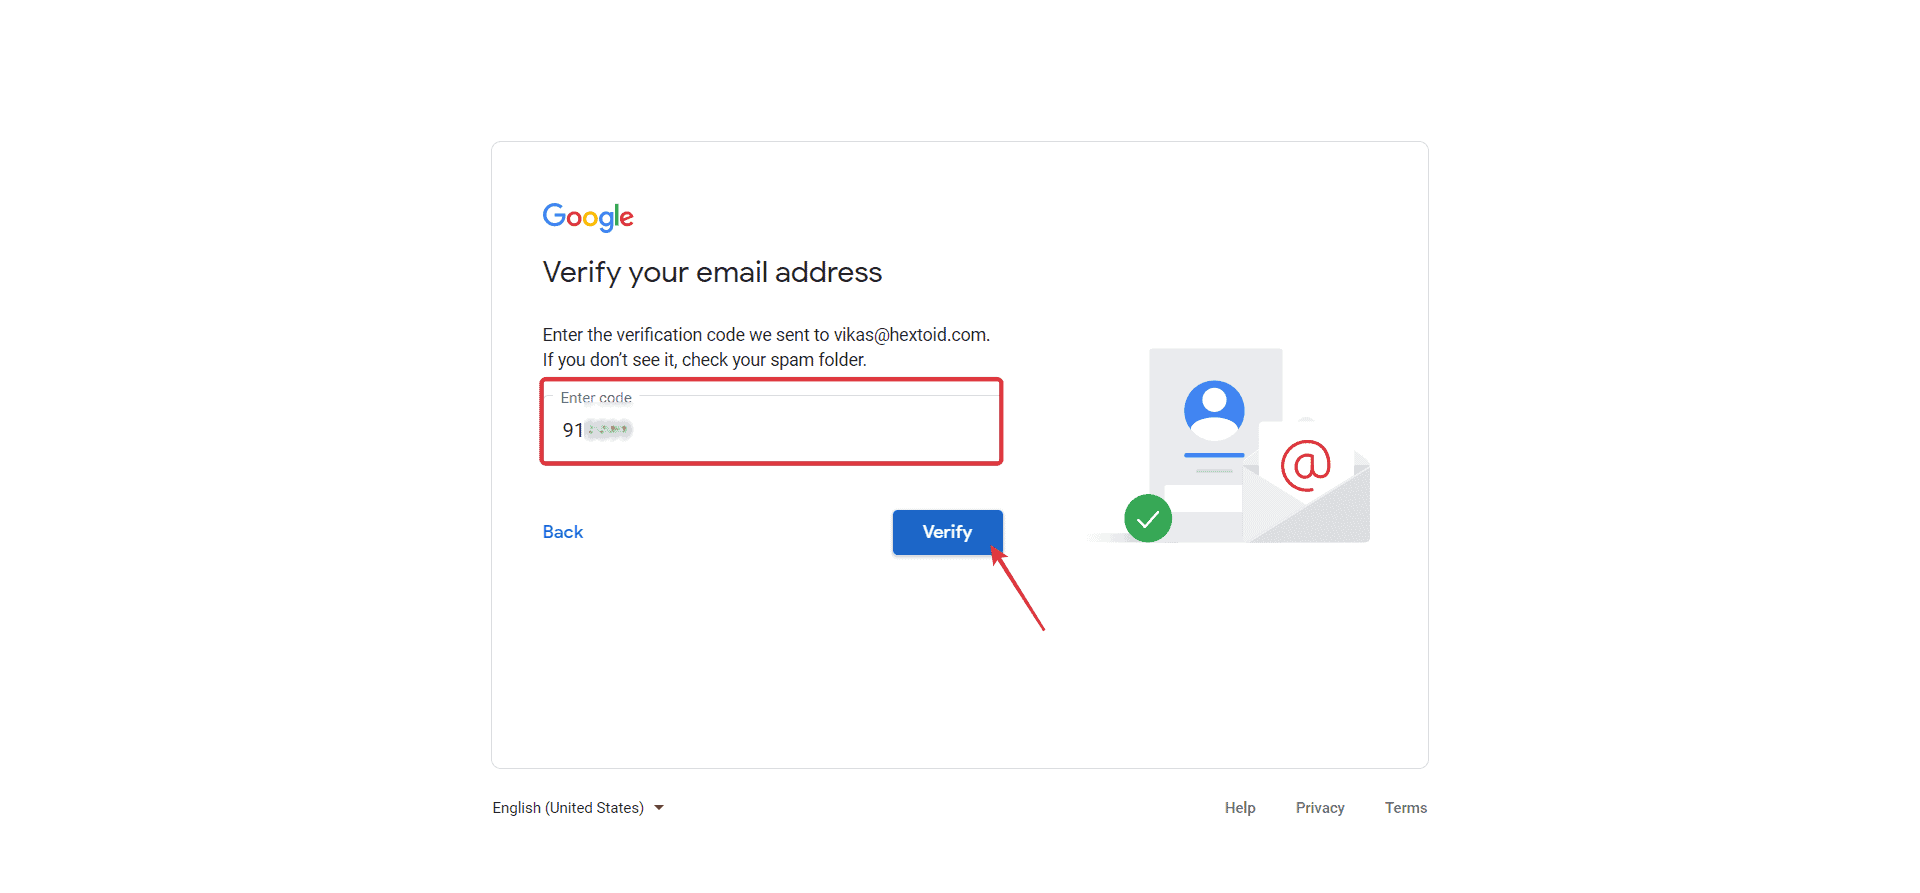
- Enter Confirmation Code sent at your Custom email as well as Gmail
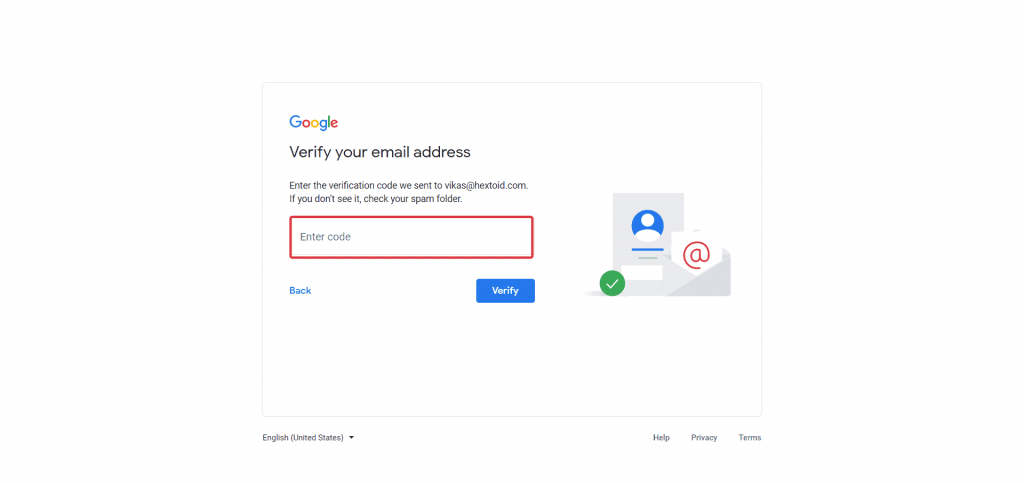
- Check custom email inbox or Gmail Inbox for Confirmation Code
- Enter confirmation code > Click Verify
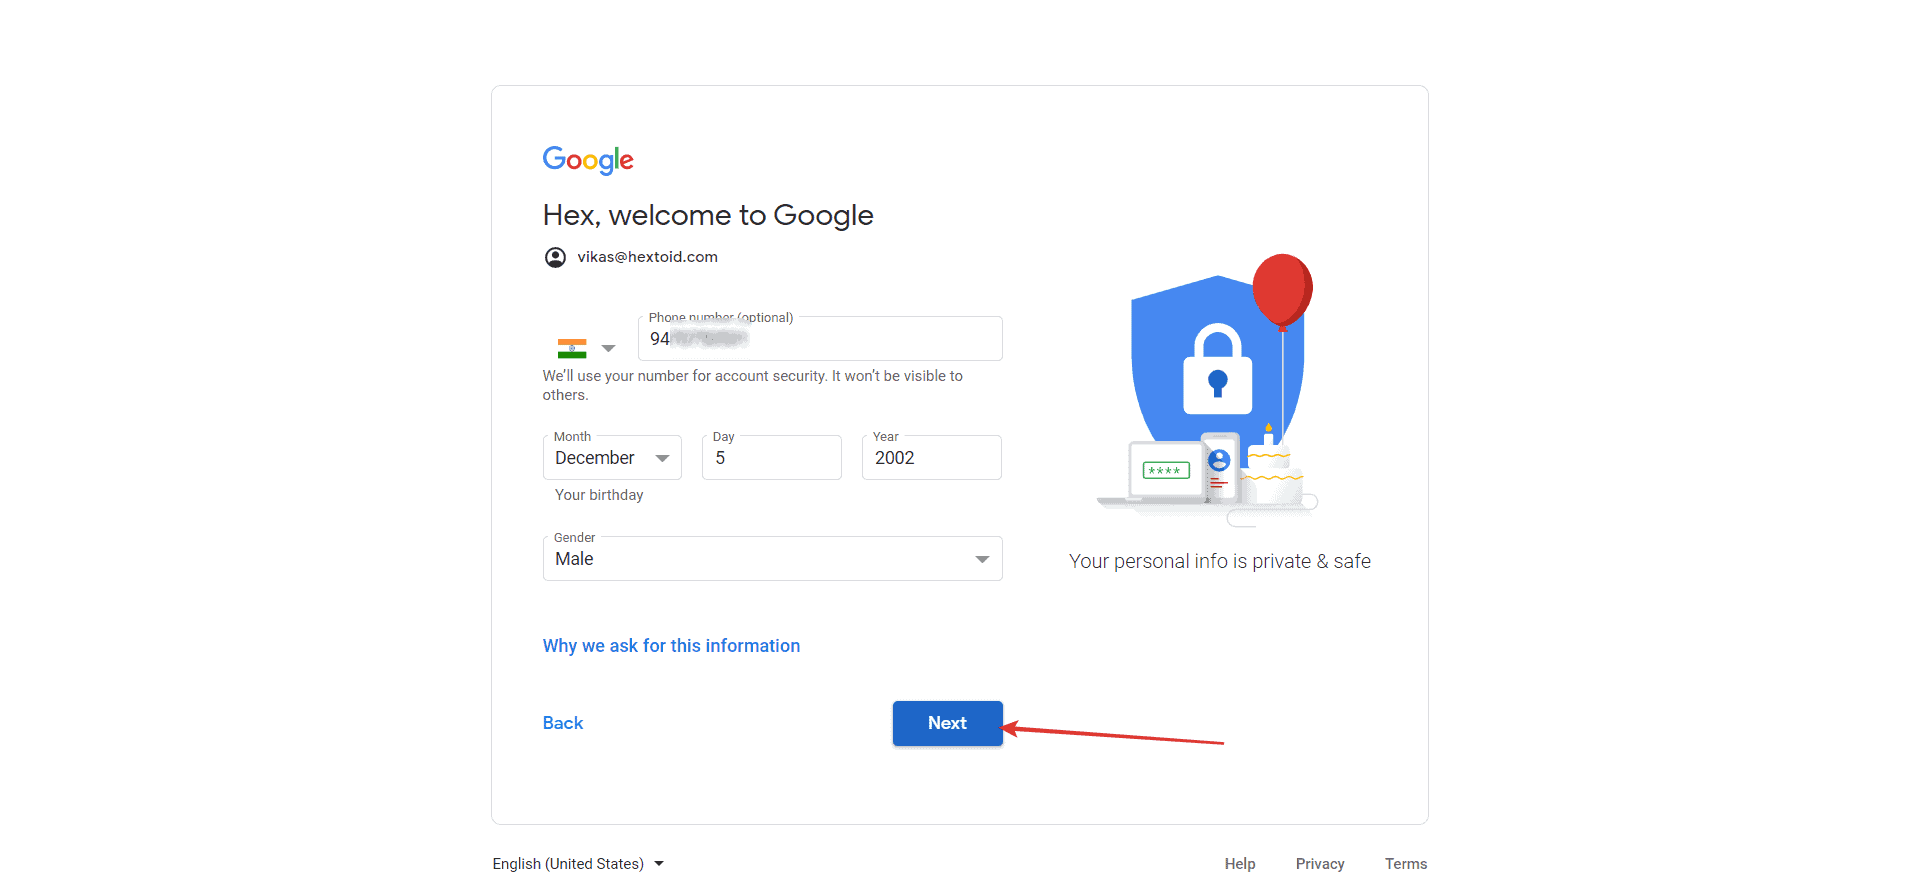
- Enter Phone Number > D.O.B. > Gender > Click Next
- Recheck the phone number and click next
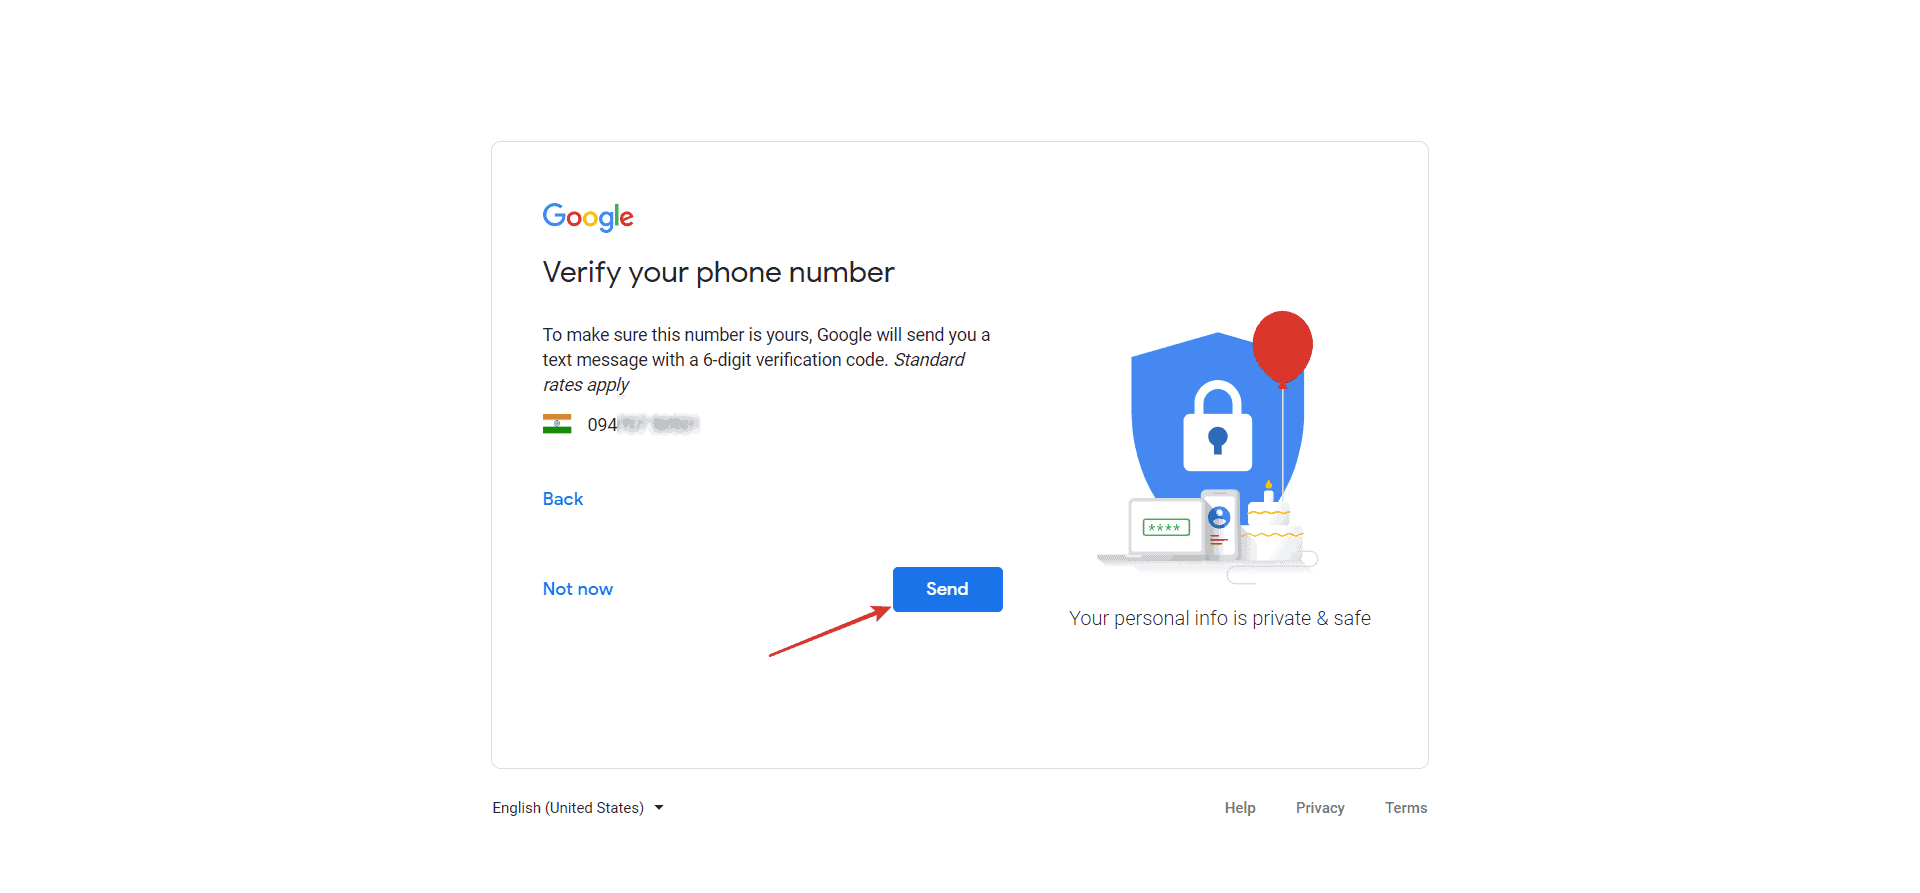
- Enter verification code > Click Verify
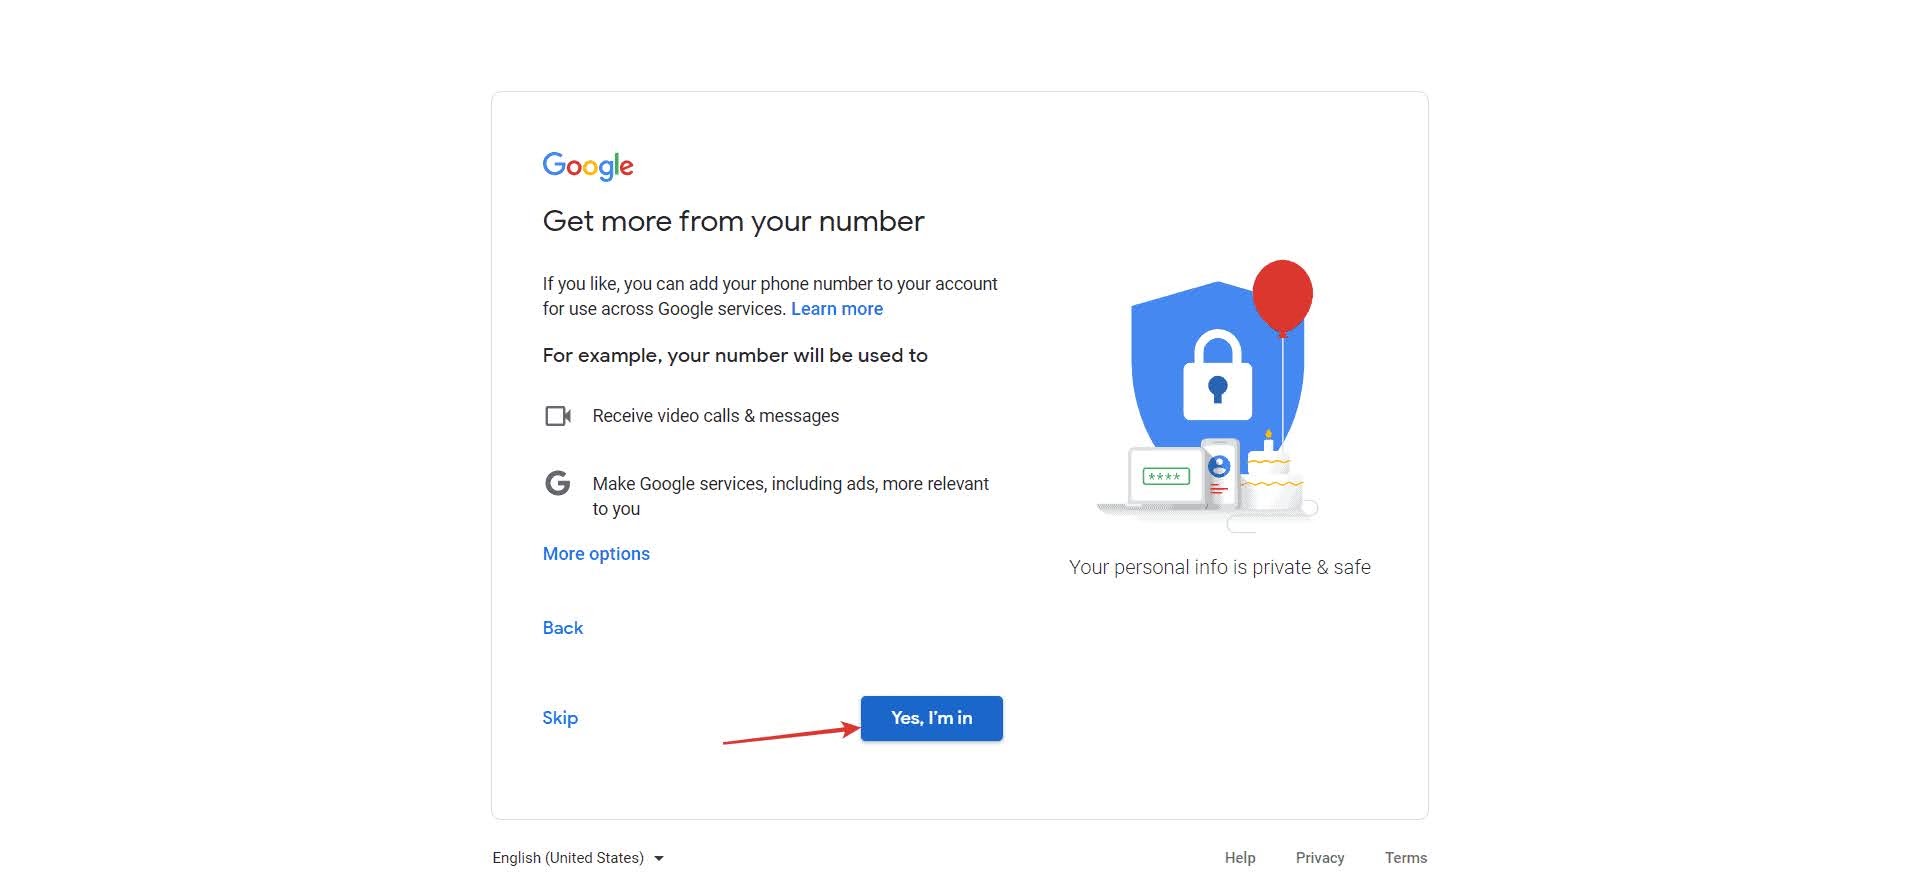
- Click Yes I’m In
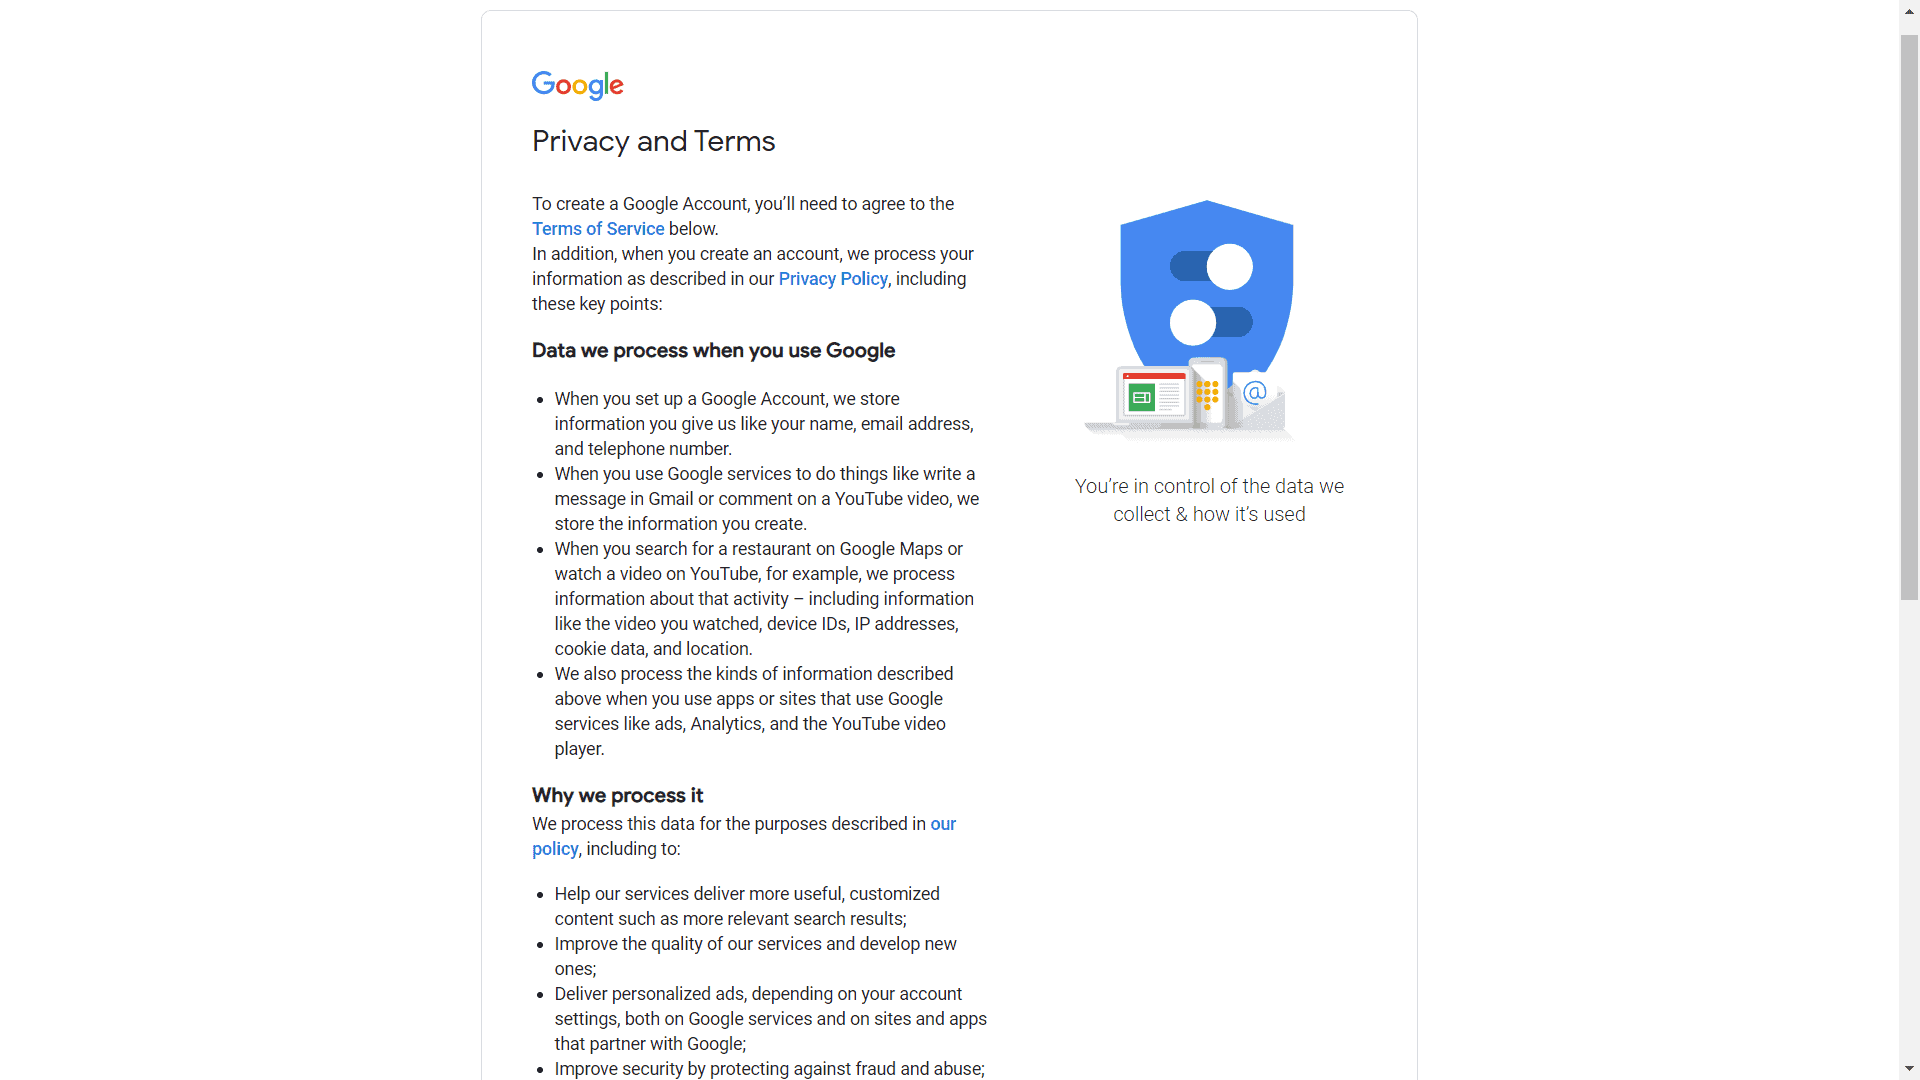
- Read and Agree
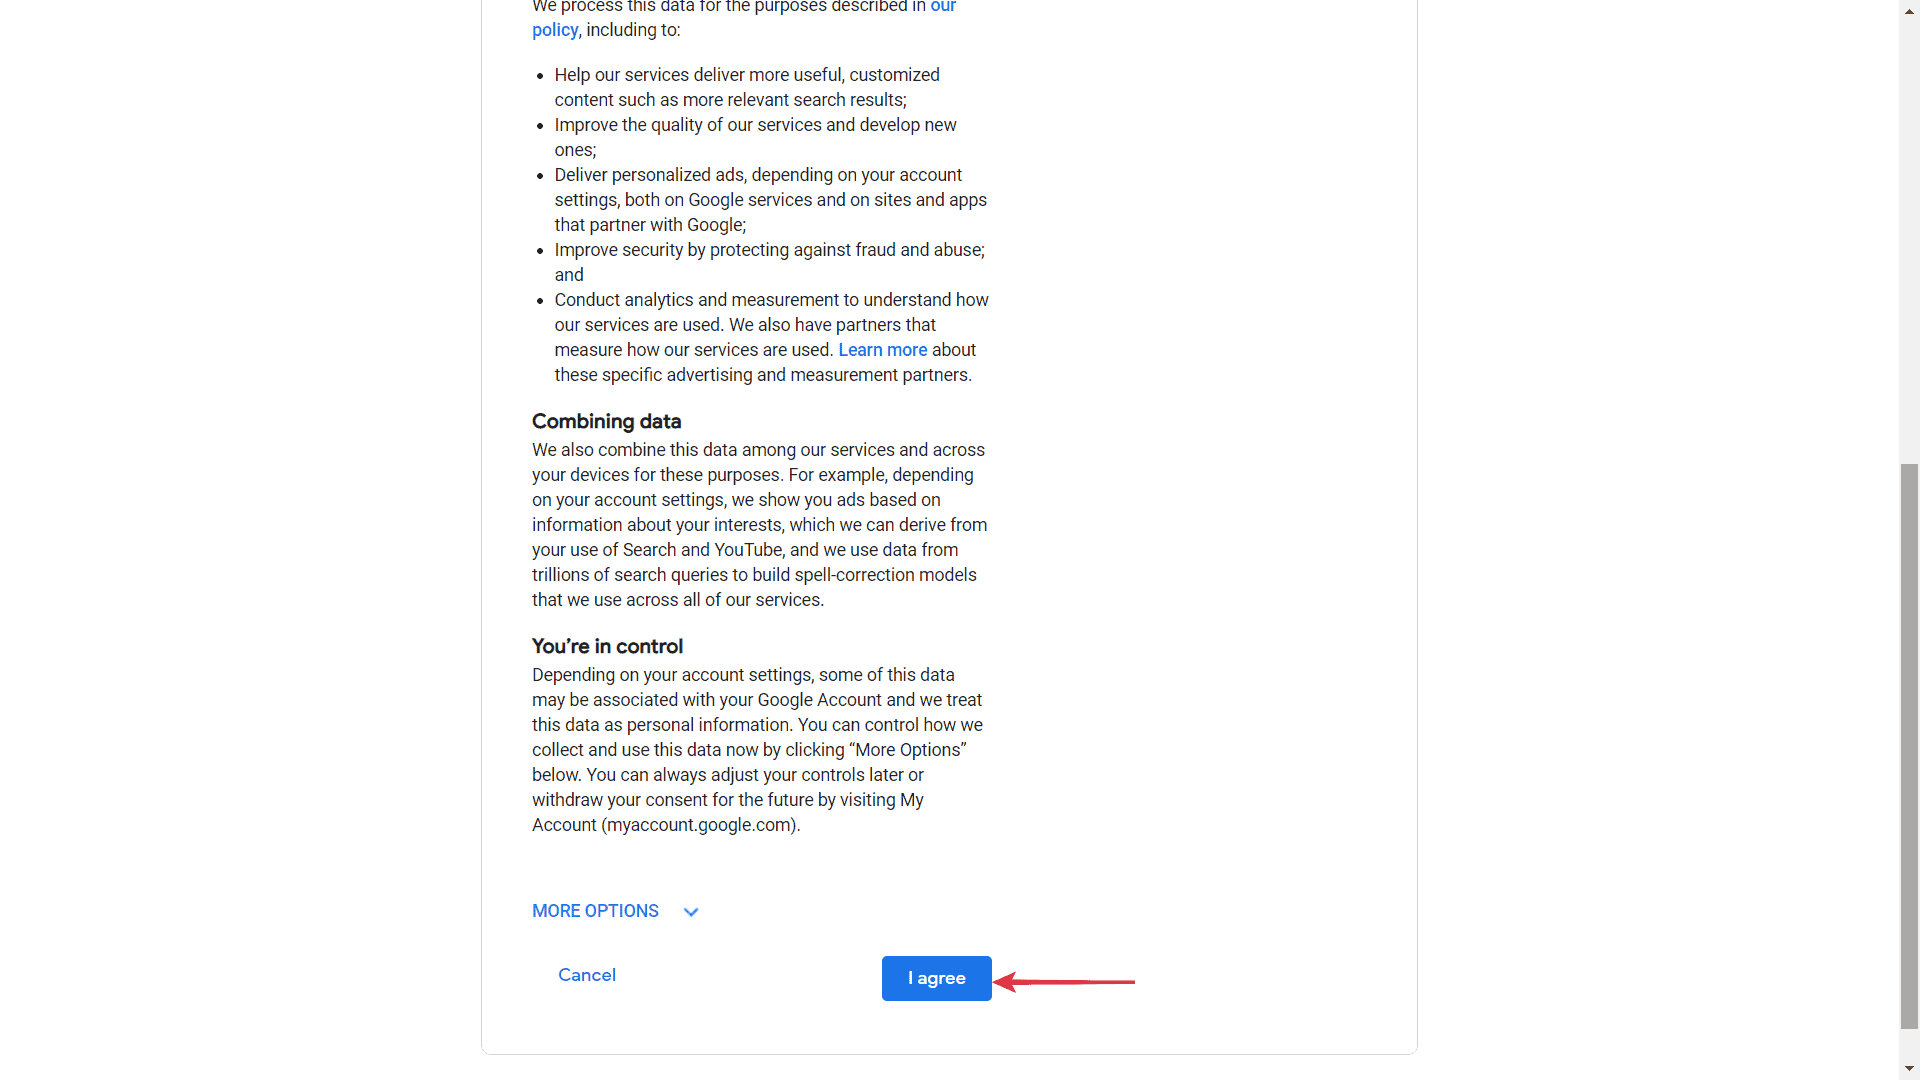
- Click Continue
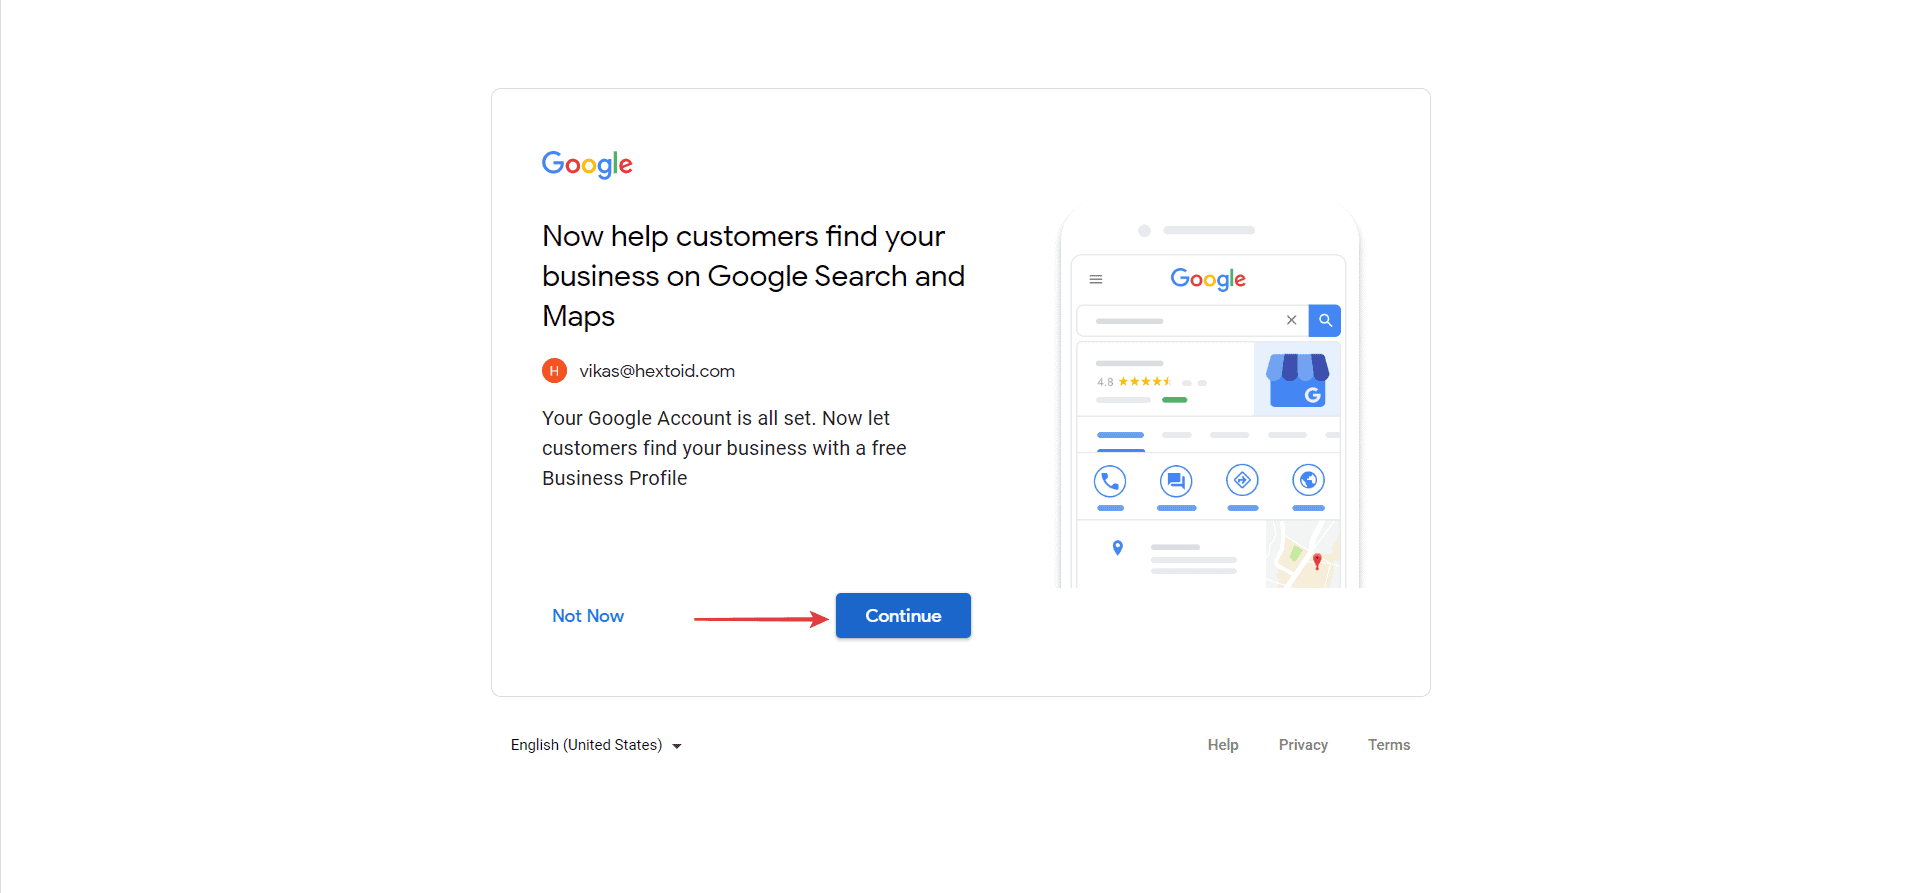
- Go back to Google > Click on Camera Icon next to profile picture / manage your Google account
- Go to Personal info tab > Click camera Icon
- Upload photo from your system
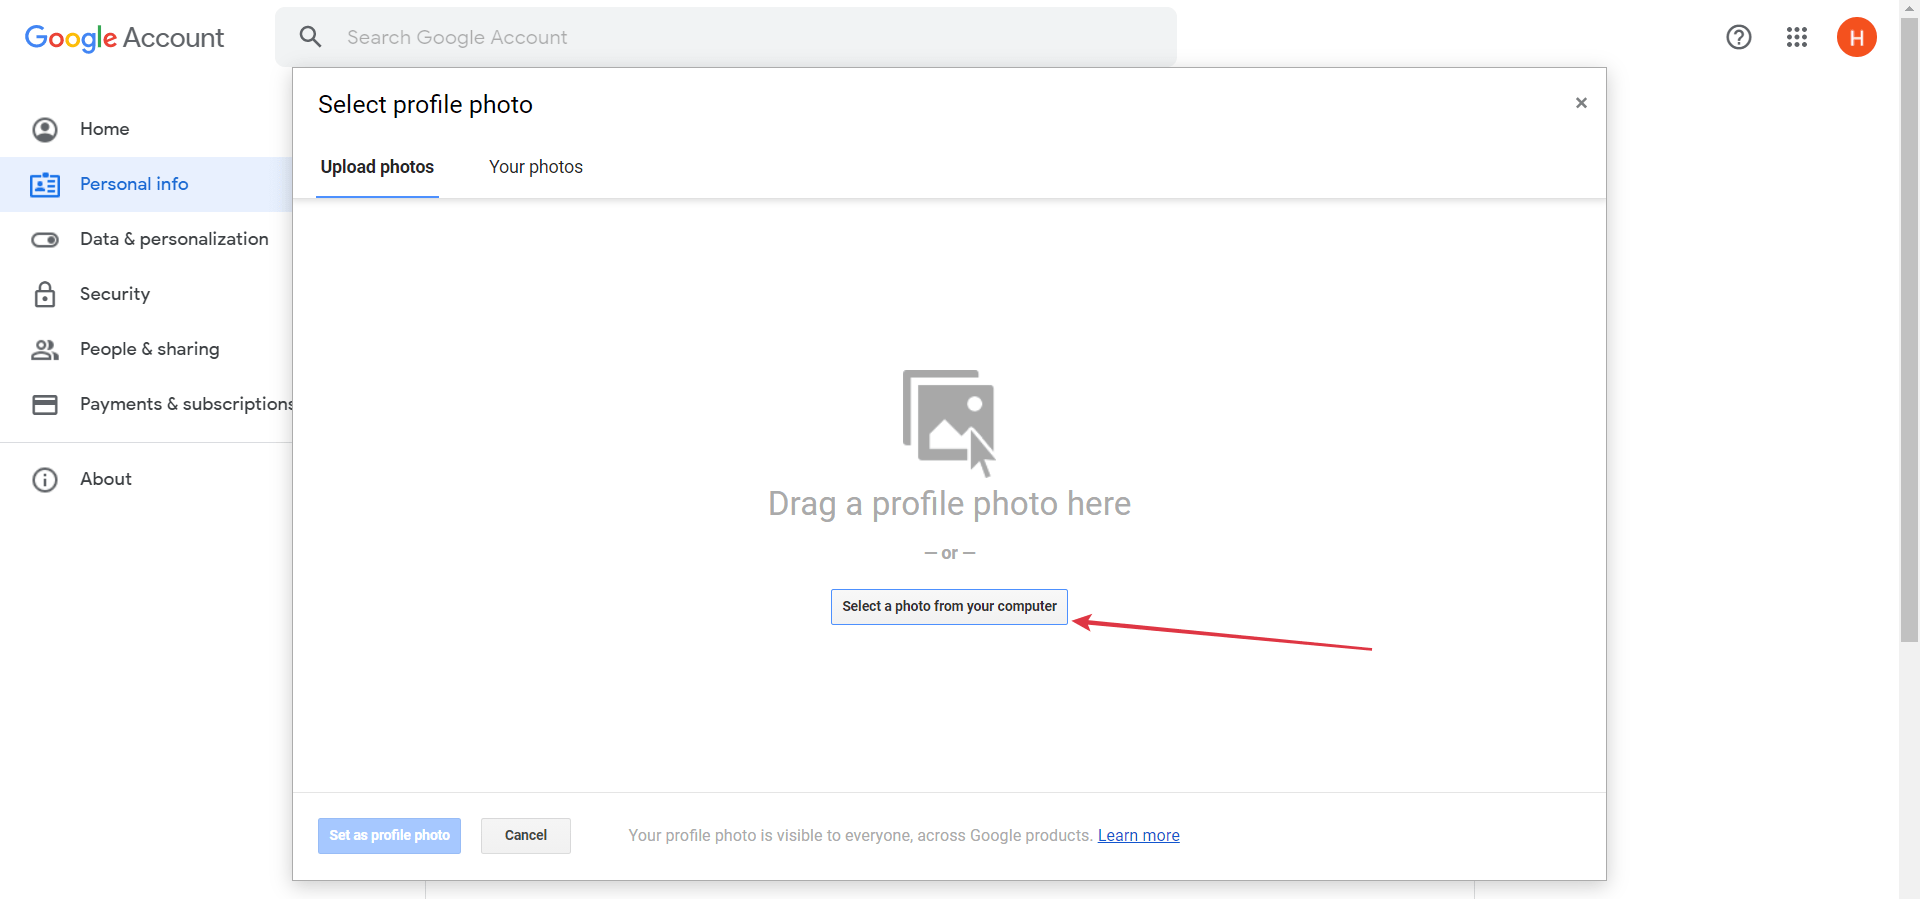
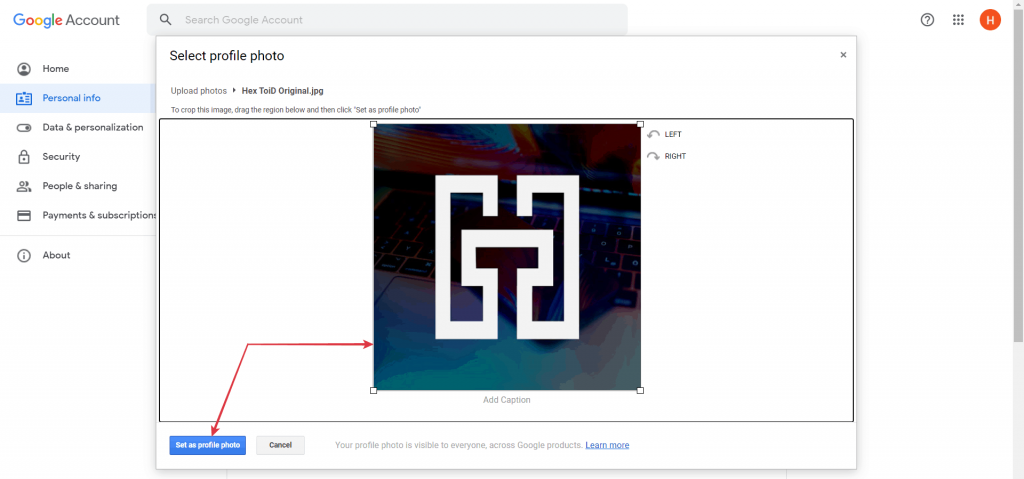
- Crop / Rotate the image in which you feel suitable > Click set as Profile Photo
- As you can see Profiles Picture is available


- I’m sending one more email to test the Profile Picture availability
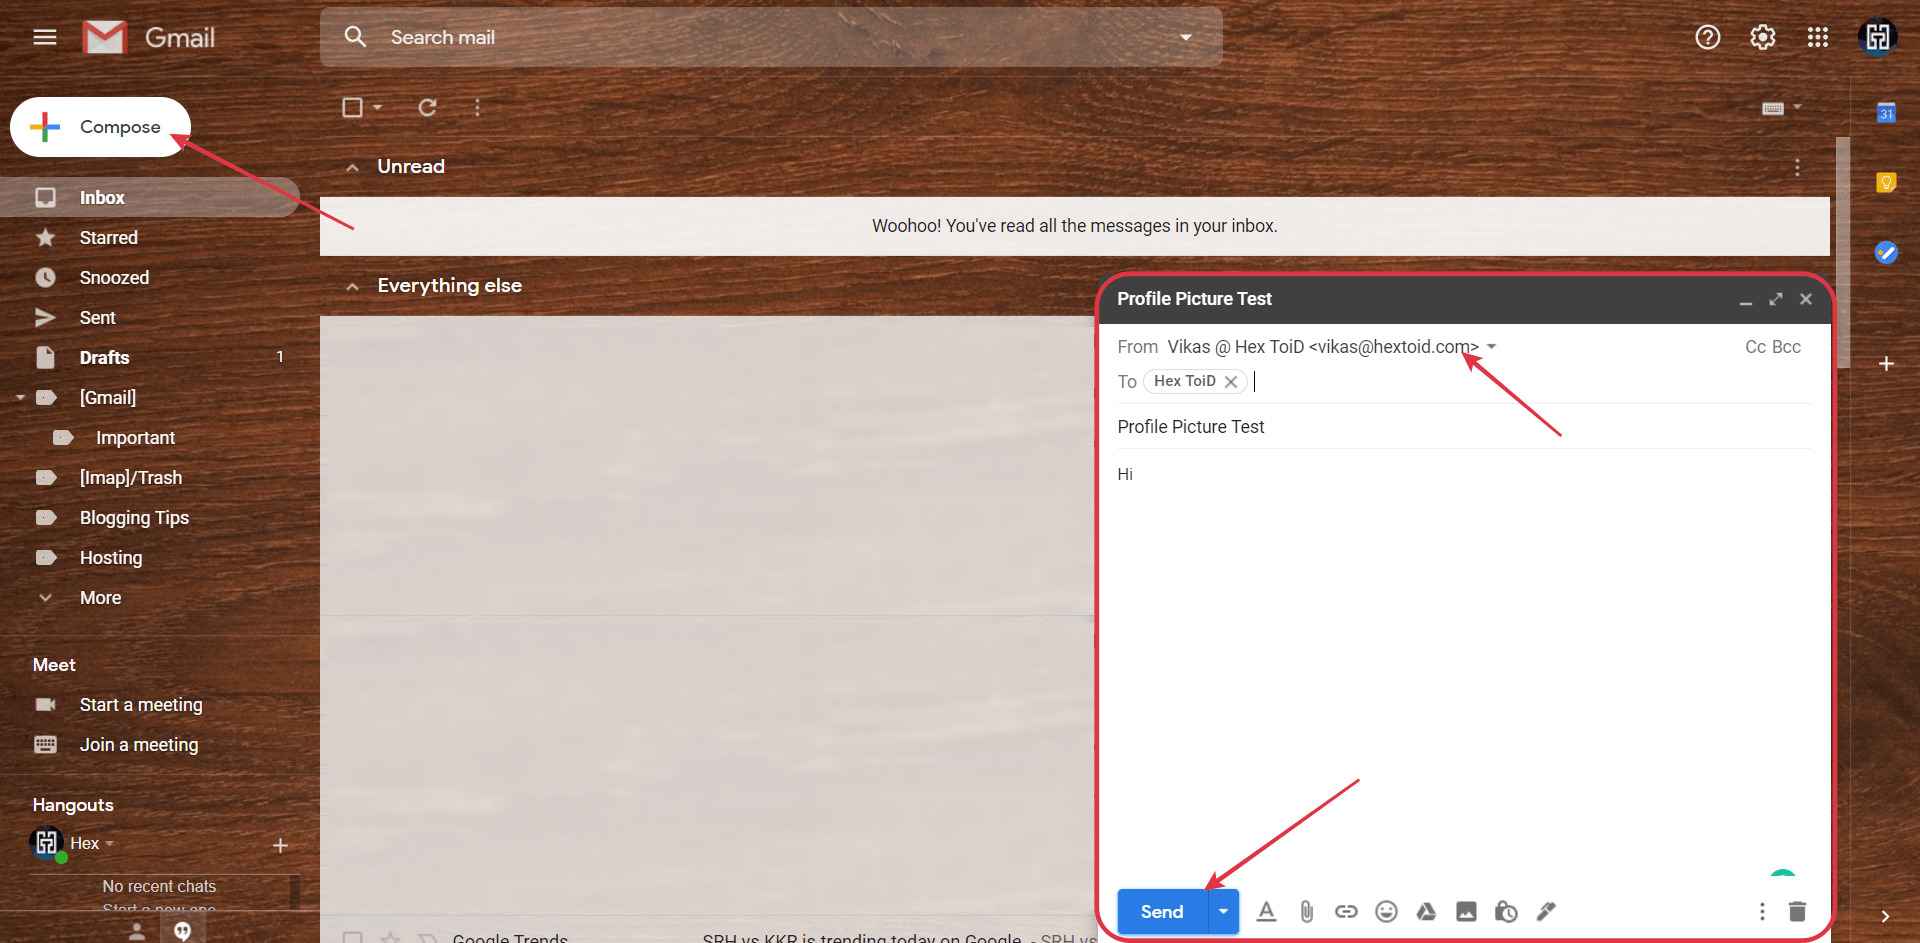
- Yeah! As you can see this email appears with the profile we added just now
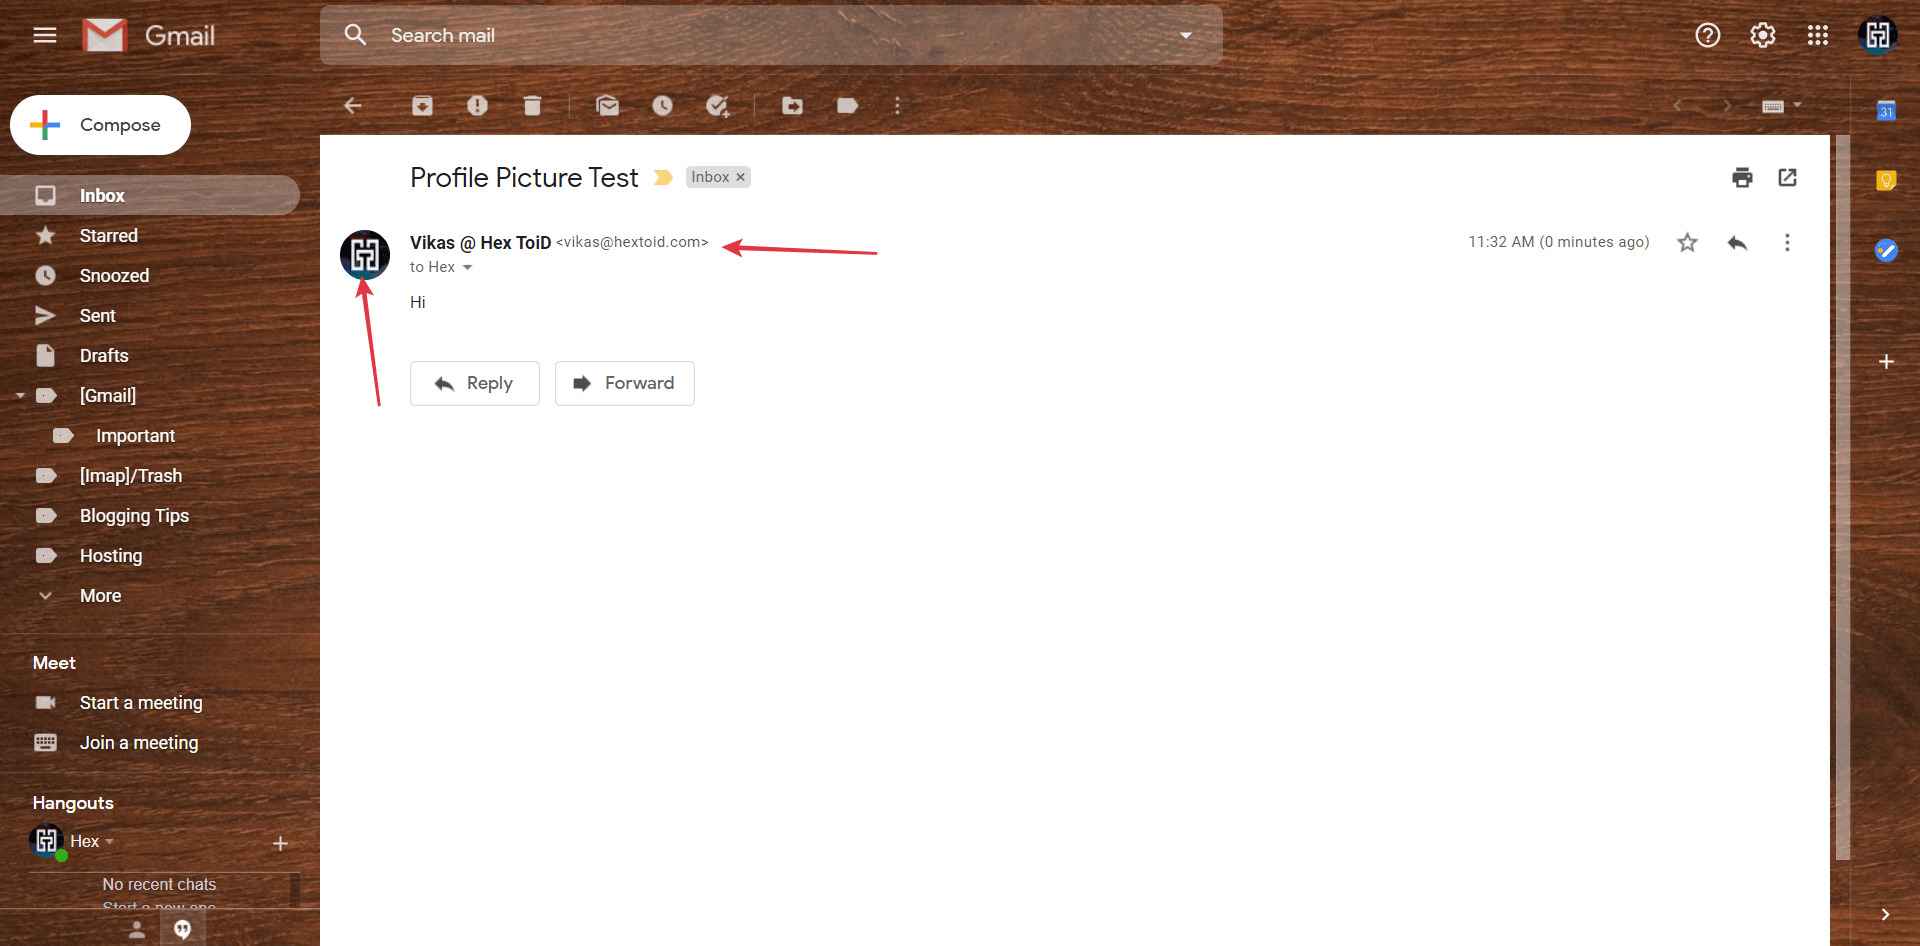
- This is how you can create and set profile picture in the custom email
That’s all about creating a business email using the domain name for free.
People Also Ask
Yes, if you have the access to your cPanel and email accounts you can create as much email accounts you want without paying cost.
No, you can’t create a free business email without domain. But you can create the generic emails of Gmail, Hotmail, etc.
Website is not mandatory to create a business email address all you need is a domain and a hosting with cPanel.
It is all up to you how you want but you can try some of these addresses
1. [email protected]
2. [email protected]
3. [email protected]
4. [email protected]
5. [email protected]
6. [email protected]
7. [email protected]
8. [email protected]
9. [email protected]
10. [email protected]
To set up profile photo in custom email all you need to is to sign up for business email using the newly created custom email, and for more information follow the above procedures
Wrap Up
I hope this article would be beneficial for you to solve all your issues related to creating a business email. If you have any queries please drop it down in the comments.


![10 Google Adsense Approval Trick 2023 [WordPress & Blogger]](https://www.hextoid.com/wp-content/uploads/2021/04/google-adsense-approval-trick-for-blogger-and-wordpress-768x432.jpg)